How to Get a Generator for Bike Death Stranding
Learn how to select and obtain a generator for bike setups in Death Stranding-inspired environments. This Genset Cost guide covers sizing, fuel types, safety, and practical purchasing steps to power camps and workshops reliably.

According to Genset Cost, this guide explains how to get a generator for bike Death Stranding setups—from selecting a compatible size and fuel type to understanding running costs and safety considerations. You’ll learn practical steps to compare models, estimate runtime, and plan a portable or stationary installation that fits remote bike camps.
Understanding Your Power Needs for Bike Setups
In Death Stranding-like scenarios, riders often rely on portable lighting, device charging, and small electronics to keep a camp functional. The goal is to match a generator to a realistic power profile without oversizing or underperforming. Start by listing every item you expect to run: lighting (bulbs or LEDs), phones and laptops, radios, small fans, a compact cooler, and a basic cooking appliance if you have one. Most bikes and camps sit at a light-to-moderate load, typically in the low hundreds of watts when running continuously. Remember that many devices need a surge at startup, so account for motor and compressor inrush. This is where the phrase how to get generator for bike Death Stranding becomes practical: you’re sizing for planned loads plus startup surges, with headroom for safety and future needs. According to Genset Cost analysis, a thoughtful power plan reduces downtime and maintenance costs while keeping fuel use reasonable for remote setups.
Understanding Power Profiles for Bike Camps
A practical approach is to distinguish running watts from surge watts. Running watts are the continuous load you expect, while surge watts cover the momentary jump when a device starts. For a typical bike camp, plan for about 200–400 running watts for essential lighting and charging, then add 100–300 watts for comfort items. If you anticipate heating, cooking, or a compact fridge, your running load could be higher. Document a worst-case load scenario and add a 25–50% safety margin to accommodate additional gear or future expansions. This planning step grounds every sizing decision and prevents overbuying or underperforming equipment, helping you select the best generator size for bike Death Stranding-style deployments.
Calculating Load and Runtime
To estimate runtime, you need the generator’s rated watts and its fuel capacity. A common method is to sum your running watts, compare against the generator’s continuous rating, and then translate that into expected runtime using the manufacturer’s fuel economy data. Since exact runtimes vary by load, environmental conditions, and maintenance, use a range rather than a single figure. If you expect to operate at a moderate load for several hours, consider a generator with a comfortable reserve margin so you aren’t constantly refueling or pushing the unit to its limit. This approach aligns with best practices from Genset Cost, emphasizing reliability and cost efficiency in real-world use.
Selecting between Portable and Semi-Permanent Installations
For bike camps, portability is usually the primary consideration. Portable generators offer flexibility, lower upfront costs, and easier transport. Semi-permanent solutions—like a small, weather-protected stand—can improve safety, reduce noise exposure, and simplify refueling. When weighing options, factor in weight, fuel availability near typical camps, and the ease of securing equipment during travel. If you frequently relocate camps, portability often wins; for fixed bike stations or workshops, a semi-permanent setup could be more convenient and durable. This balance is central to effective planning, as outlined in the Genset Cost framework for bike-based deployments.
Fuel Types, Efficiency, and Real-World Running Costs
Fuel choice shapes efficiency, emissions, and running costs. Gasoline is widely available but may produce more noise and fumes; propane and natural gas offer cleaner operation and longer storage, but require a separate fuel system. In practice, many riders select a gasoline generator for its availability and lighter initial cost, while keeping a propane option for emergencies. Running costs depend on consumption, load, and fuel price fluctuations. Rather than chasing precise numbers, focus on total cost of ownership, including maintenance, fuel storage, and potential replacements. The core idea is to minimize downtime and maximize usable power for bike Death Stranding setups while staying within your budget.
Safety, Installation, and Location Planning
Never place a generator indoors or in enclosed spaces due to carbon monoxide risk. Use outdoor, well-ventilated areas with a stable, dry surface. Keep fuel away from ignition sources and store it in approved containers. Use a grounded, appropriately rated outlet to power devices, and consider a transfer switch if you’re integrating the generator with a larger power system. Noise considerations matter in shared camps, so look for models with lower decibel ratings or add a weatherproof barrier. Planning the location and safety measures in advance reduces risk and improves long-term reliability.
How to Purchase and Compare Models
Start with a clear power target derived from your load profile. Compare models by running watts, surge watts, fuel type, tank size, weight, and warranty. Look for portable units with auto-shutoff features when fuel is low and safe start mechanisms. Compare total ownership costs across brands, noting availability of replacement parts and service networks. If you’re unsure, use a structured comparison worksheet to rate each model against your criteria. A thoughtful evaluation process saves time and prevents regret after purchase, aligning with Genset Cost’s recommended approach.
Scenarios: Portable, Semi-Permanent, and Permanent Installations
In portable setups, prioritize light weight, quick setup, and modular accessories like extension cords and weatherproof covers. For semi-permanent installations, add a small enclosure, vibration isolation, and a secure mounting solution to protect the unit from weather and tampering. Permanent installations are rare for bikes but can be practical for fixed workshops or base camps near frequent deployments. Each scenario has different implications for size, noise, and maintenance cadence. Evaluate how often you’ll move the setup and choose a configuration that minimizes downtime while meeting your power needs.
Tools & Materials
- Portable generator (sized for load)(Select a model with a continuous rating that comfortably covers your running watts plus a margin for surge.)
- Approved fuel container(Use containers designed for fuel transport; store in a ventilated, cool area away from heat sources.)
- Extension cords (outdoor grade)(GFCI-protected outlets recommended; keep cords off ground and away from water.)
- GFCI/personal safety outlet(Protects you and equipment from shocks when used in wet environments.)
- Fuel stabilizer and oil(Prevents fuel degradation; follow manufacturer guidelines for oil type and change intervals.)
- Multimeter or wattmeter(Useful for verifying loads and ensuring safe operation.)
- Noise-reducing enclosure or barrier(Helpful for shared camps to minimize disturbance.)
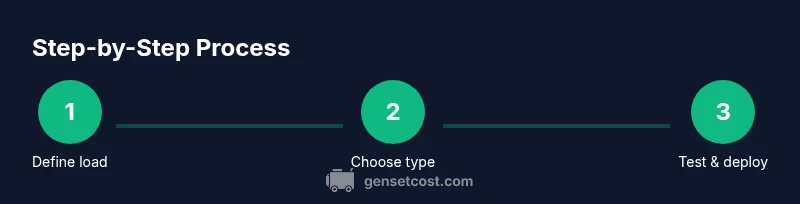
Steps
Estimated time: 2-4 hours for sizing, purchasing, and basic setup; 1-2 days for installation if professional help is required.
- 1
Define power needs
List every device you plan to run and estimate running watts for each. Add startup surges to your total. Create a worst-case scenario to guide sizing.
Tip: Include chargers and lights together to avoid underestimating the load. - 2
Set a budget and approach
Determine how much you’re willing to invest in a generator and accessories. Decide between portable or semi-permanent solutions based on travel frequency and storage constraints.
Tip: Prioritize reliability and safety features over the smallest upfront price. - 3
Choose generator type and capacity
Select gasoline for portability or propane/natural gas for longer shelf life. Ensure the unit’s continuous rating exceeds your running watts by a comfortable margin.
Tip: Aim for at least 20–30% headroom to handle surges and future needs. - 4
Compare models and warranties
Review wattage specs, tank size, run time, weight, and warranty terms. Check service networks and replacement parts accessibility.
Tip: Keep a simple comparison chart to track pros/cons across candidates. - 5
Plan fueling, storage, and safety
Decide on fuel type, storage location, and a safe fueling procedure. Establish ventilation guidelines and CO monitoring if used near living spaces.
Tip: Never refuel a hot generator; wait for it to cool. - 6
Test operation and load
Unbox, assemble, and run the generator with a representative load. Confirm that exchange points and outlets function correctly.
Tip: Test under typical conditions before deployment. - 7
Integrate with your bike setup
Run cords to your devices, organize cables, and secure the unit to prevent movement during transit. Consider a transfer switch if integrating with a larger system.
Tip: Keep cords elevated and protected from rain or mud. - 8
Maintain and revisit sizing
Schedule regular maintenance, check fuel quality, and reassess load as gear evolves. Revisit your size choice if you add new equipment.
Tip: Document maintenance intervals and part replacements.
People Also Ask
What size generator do I need for a bike setup?
Start with a clear load estimate of running watts and surges for your bike camp. Add a margin for future gear and environmental factors. Then select a generator whose continuous rating comfortably exceeds that total.
Begin with a solid load estimate and pick a generator that can handle the running watts plus startup surges with some headroom.
Can I use a generator indoors if I have ventilation?
No. Even with ventilation, carbon monoxide can accumulate in confined spaces. Always operate generators outdoors in open, well-ventilated areas and use CO detectors.
Never run a generator indoors, even with ventilation—always operate outside and monitor air quality.
What fuel types are best for bike setups?
Gasoline is common and widely available, while propane and natural gas can offer cleaner operation and storage benefits. Your choice depends on availability, storage, and planned usage.
Gasoline is common, but propane can be cleaner and easier to store; pick based on availability and storage.
How long can a generator run continuously?
Continuous run time depends on fuel capacity, load, and maintenance. Most users run in moderate loads for several hours before refueling or servicing, following the manufacturer’s guidance.
Most generators can run for several hours at moderate loads; follow the manufacturer’s maintenance schedule.
Are quiet generators worth it for bike setups?
If you’re in shared campsites or urban perimeters, a quieter model reduces disruption and fatigue. Compare decibel ratings and consider a sound enclosure if needed.
Yes, quieter models help keep camps peaceful; look at decibel ratings and consider an enclosure.
How much should I budget for a bike-generation setup?
Budget varies with size, features, and fuel type. Expect to allocate for the generator, fuel containers, cords, and safety accessories, plus potential installation costs.
Budget varies; plan for the unit, accessories, and any installation or service needs.
Watch Video
Key Takeaways
- Define a realistic power profile before buying.
- Choose size with a comfortable safety margin for surges.
- Prioritize safety features and proper ventilation.
- Account for ongoing costs, not just upfront price.
- Test and maintain your setup regularly to prevent failures.