What Causes Generator Under Voltage: Troubleshooting Guide
Learn the common causes of generator under voltage and follow a practical, step-by-step approach to restore stable output. From overloads to AVR faults, get safety tips and professional guidance from Genset Cost.

To answer what causes generator under voltage, the most likely culprits are overloads, loose connections, or a faulty automatic voltage regulator (AVR). A quick fix is shedding nonessential loads and verifying wiring, but a thorough check is needed. Follow the flowchart below to isolate whether the issue is electrical or mechanical.
What undervoltage means for your generator
According to Genset Cost, what causes generator under voltage is most often overload, loose connections, or a faulty AVR. This introductory explanation defines undervoltage in practical terms for home backup systems and explains why staying within voltage specs matters for essential loads during outages. When voltage drops, appliances may dim, lights flicker, and critical equipment can trip breakers. Prolonged undervoltage can heat windings and stress the generator’s electrical system. This guide outlines common causes, safe testing steps, and when to call a professional. You’ll learn a clear approach to diagnose electrical vs mechanical contributors, so you can restore stable output and protect equipment during outages.
In many homes, the first clue is observed at outlets, where voltage may appear slightly low or fluctuate under load. Understanding the distinction between a temporary dip and a sustained undervoltage is key to preventing equipment damage and unnecessary repairs. Throughout this article, we reference generalized industry guidance and Genset Cost insights to help homeowners and property managers decide when to test further or escalate maintenance.
Common electrical symptoms and their implications
Symptoms of undervoltage include dimming lights, appliance motors failing to start, fuses or breakers tripping under normal load, and a subtle hum or heat buildup in the generator when under load. If you notice any combination of these signs, it’s important to approach diagnosis methodically. Frequent flickering or lights that don’t reach full brightness may indicate a voltage sag that warrants further testing. In the long term, repeated undervoltage can shorten the life of electrical components and shorten the life of sensitive devices connected to the system.
Major causes at the electrical system level
Electrical causes are the most common culprits behind voltage sag. Key factors to inspect include: overload or excessive load relative to the unit’s rating; loose, corroded, or damaged connections at the output or inside the panel; a faulty or out-of-calibration Automatic Voltage Regulator (AVR); and wiring or grounding issues that create impedance in the system. A small mismatch between generator capacity and the connected loads can push the system into undervoltage during peak demand. Regular maintenance can mitigate these issues and prevent surprises during outages.
Mechanical and fuel-related factors that mimic electrical issues
Voltage drops can also be caused by mechanical issues that affect engine speed and excitation. A drop in engine RPM due to dirty air filters, fuel supply restrictions, or throttle misadjustment reduces excitation and the generator’s voltage output. Fuel quality, clogged filters, or a stuck governor can cause the engine to lag behind its rated speed, producing undervoltage even when electrical connections are sound. Differentiating mechanical delay from electrical fault requires checking RPM, fuel flow, and governing response in parallel with electrical measurements. All of these factors should be considered when diagnosing what causes generator under voltage in a real-world setting.
Diagnostic approach: safe checks you can perform
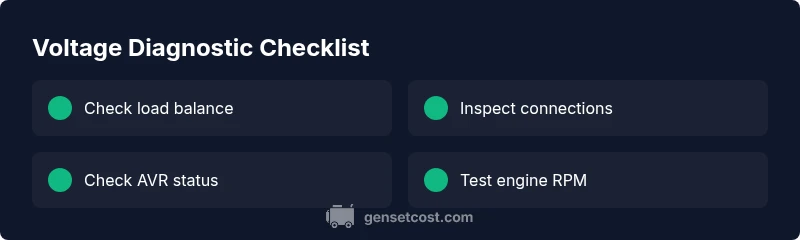
Begin with simple, non-invasive checks before opening panels or touching wiring. Verify that the total connected load stays within the generator’s continuous rating and that no single device is drawing more than the unit can handle. Inspect visible connections at the output panel for looseness or corrosion and tighten or replace as needed with the power off. If the generator has a built-in diagnostic or fault indicator, note any error codes and consult the manual. For safety, always disconnect the load and wear appropriate PPE when inspecting electrical components. If you’re unsure about any step, stop and contact a licensed technician.
Step-by-step fixes for the most common causes
- Reduce load and re-test voltage: Shed nonessential loads and measure voltage again at the same outlet under a reduced, steady load. 2) Tighten and inspect connections: Inspect all output terminals, grounding points, and panel connections for tightness and corrosion; replace damaged wires. 3) Check engine RPM and fuel delivery: Confirm the engine is running at or near its rated RPM; clean or replace fuel filters if needed and ensure fuel supply is steady. 4) Test/adjust AVR: If voltage remains low under normal load, inspect the AVR fuse and calibration; replace or recalibrate as specified by the manufacturer. 5) Inspect grounding: Ensure proper grounding and bonding to avoid impedance that can reduce voltage at certain outlets.
Prevention tips to avoid future voltage issues
Implement a regular maintenance plan that includes periodic AVR checks, wiring inspections, and fuel system service. Maintain a current load profile to avoid consistently running near the generator’s maximum rating. Use a power quality meter when feasible to track voltage fluctuations and identify patterns across different loads. Document maintenance actions and test results so you can spot deterioration over time.
When to seek professional help and how Genset Cost can guide you
If you still observe undervoltage after completing basic checks and fixes, it’s time to engage a licensed electrician or generator technician. AVR-related faults, complex grounding problems, and internal wiring concerns are best diagnosed with professional tools and expertise. At Genset Cost, we guide homeowners and property managers through qualified service options, helping you compare service plans and estimate installation or repair costs for a safe, long-term solution. Remember, safety first when working around electrical equipment, and never bypass protective devices.
Steps
Estimated time: 60-120 minutes
- 1
Verify safety and plan the check
Power down nonessential loads, switch off nonessential circuits, and prepare PPE. Document symptoms and current load so you can replicate safely later. Establish a safe workspace and ensure you can measure voltage at the generator output without exposing yourself to live components.
Tip: Always start with the lowest-risk checks before touching wiring. - 2
Assess load and reduce demand
Record the total load and remove noncritical devices. Run the generator with a known, modest load to see if voltage stabilizes. If voltage rises with reduced load, overload is the likely cause.
Tip: Create a simple load profile that you can reuse during maintenance. - 3
Inspect connections and the panel
Visually inspect all visible connections for looseness, corrosion, or damaged insulation. Tighten terminals as per manufacturer guidelines, replace damaged cables, and ensure clean, dry contacts.
Tip: Do not force connections; use the proper torque specifications. - 4
Check engine RPM and fuel flow
Observe engine RPM under load to confirm it aligns with the generator’s rated speed. Inspect fuel filters and air intake; clear restrictions and ensure steady fuel flow to prevent RPM drop.
Tip: A small RPM difference can cause noticeable voltage sag. - 5
Evaluate the AVR and calibration
If voltage still drops, inspect the AVR fuse, wiring, and settings. Recalibrate if you have the manual guidance; replace the AVR if necessary, preferably with a technician’s help.
Tip: AVRs are sensitive; incorrect calibration can worsen sag. - 6
Confirm grounding and test voltage
Verify proper grounding and bonding. Use a calibrated multimeter to measure output voltage; compare with the manufacturer’s spec, and document readings.
Tip: Measure at the load side of the breaker to capture real-world performance. - 7
Decide on next steps
If voltage remains low after the above checks, escalate to a licensed professional. Consider a capacity upgrade or a targeted repair plan based on the technician’s assessment.
Tip: Keep a written plan and cost estimate handy for the technician.
Diagnosis: Voltage sag or undervoltage at the output under load
Possible Causes
- highOverload or excessive load relative to generator rating
- highLoose, corroded, or damaged connections at the output or inside the panel
- mediumFaulty or out-of-calibration Automatic Voltage Regulator (AVR)
- mediumLow fuel flow or engine RPM drop affecting excitation
- lowWiring issues or improper grounding causing impedance
Fixes
- easyReduce nonessential loads to bring total demand within rating; upgrade capacity if needed
- easyTighten/clean all connections at outlets, terminals, and grounding points; replace damaged cables
- mediumTest and recalibrate or replace the AVR; consult a technician if calibration fails
- mediumCheck fuel supply and engine RPM; clean or replace filters, ensure correct throttle setting
- mediumInspect wiring and grounding; repair or replace damaged harnesses; confirm proper grounding
People Also Ask
What does undervoltage mean in a generator system?
Undervoltage means the generator is producing a voltage lower than its rated output under load. This can cause dimmed lights and underperforming appliances. It indicates an imbalance between load and the generator’s capacity or a fault in the electrical system.
Undervoltage means the voltage is too low under load, which can affect performance. It usually points to load issues or faults in the system.
Can an overload cause a voltage drop?
Yes. Exceeding the unit’s rating can cause voltage to sag as the system struggles to supply the demand. Reducing load or upgrading capacity typically resolves this.
Yes, overload can cause voltage drop; reduce load or upgrade.
Are loose connections a common culprit?
Loose or corroded connections at the panel or outlets are a frequent cause of undervoltage. Tighten or replace wiring as needed and ensure clean contacts.
Yes, loose connections are a common cause. Check and tighten them safely.
How do I test generator voltage safely?
Use a proper multimeter at the generator output with PPE. Compare readings to the manual’s rated voltage and record results.
Test with a multimeter and compare to the rated voltage.
What maintenance helps prevent voltage issues?
Regular AVR checks, clean fuel, ventilated intake, and tight wiring reduce voltage problems and extend component life.
Regular AVR checks and clean fuel help prevent issues.
When should I call a professional?
If voltage remains low after basic checks, or you suspect AVR or internal wiring faults, hire a licensed technician for a definitive diagnosis.
If it stays low after checks, call a professional.
Watch Video
Key Takeaways
- Identify overload early to prevent voltage sag
- Check connections and AVR first when voltage drops
- Maintain engine RPM and clean fuel delivery
- Call a professional for complex AVR or wiring issues