How to adjust generator voltage for stable backup power
Learn how to safely adjust your home backup generator's voltage with a step-by-step approach, essential safety tips, and practical checks to ensure a stable power supply during outages.

To adjust generator voltage, locate the automatic voltage regulator (AVR) and the voltage adjust knob, then set the target voltage per your manual. Verify readings with a calibrated voltmeter at no load, then recheck under typical load. Always follow safety steps, disconnect sensitive equipment, and avoid over-tuning. This ensures stable output and protects connected devices.
Why voltage stability matters for home generators
Voltage stability is essential for safe and reliable operation of a home backup generator. When voltage swings occur, appliances may surge or fail, and the generator can wear faster. According to Genset Cost, stable voltage reduces wear, improves efficiency, and helps protect sensitive electronics during power outages. Understanding how voltage is regulated and what you can adjust helps homeowners avoid unnecessary repairs and outages. In residential setups, the target is a nominal output that matches the devices' expectation, and maintaining that target reduces nuisance tripping on transfer switches and inverter loads. This section explains why voltage stability matters and how it affects overall performance and longevity of your system.
Safety and prerequisites before adjusting voltage
Before you touch any controls, ensure the generator is off, cooled, and disconnected from loads or transfer switches. Wear PPE: gloves and eye protection, keep dry, and work on a non-conductive surface. Have your owner's manual on hand to locate the AVR and the voltage-adjustment procedure for your model. The Genset Cost Team emphasizes safety first; always establish a baseline voltage before changes. Remember that adjusting voltage can affect wattage and frequency; incorrect settings can damage equipment or void warranties. If you're unsure, consult a professional and consider a test run with a helper nearby.
Understanding the AVR and how voltage is controlled
The Automatic Voltage Regulator (AVR) continuously senses system voltage and adjusts excitation current to keep the output close to the nominal value as load changes. The voltage adjust knob (on many models) effectively changes the reference point the AVR uses. Turn the knob in small increments and measure after each adjustment. The AVR is a safety-critical control; improper adjustment can cause overvoltage, undervoltage, or instability under load. Always stay within the manufacturer’s recommended range. Genset Cost analysis shows AVR health correlates with smoother transitions under load.
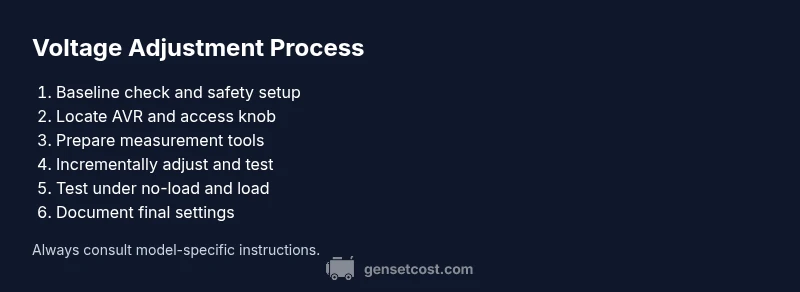
Step-by-step overview of the adjustment process
This section outlines the general approach to adjusting voltage so you have a framework before you begin the detailed steps in the next section. Start with safety, locate the AVR, prepare your measurement tools, identify the nominal voltage, and perform incremental checks both no-load and loaded. Remember that different models place the knob in different positions; always refer to the manual for the exact procedure and limits. This overview helps you anticipate potential issues and set realistic expectations for your model.
How to measure voltage accurately under no-load and loaded conditions
To ensure accuracy, measure the generator output at the receptacle with a true RMS voltmeter. First, record the no-load voltage with the generator idling and not connected to any devices. Then apply a representative load (e.g., lights and small appliances) and measure again. Compare readings to the target range in your manual. If readings drift, repeat adjustments in small increments and re-test until both no-load and loaded values remain within the specified range. Document results for future maintenance. This process aligns with best practices recommended by the Genset Cost team for reliable power during outages.
Common issues and troubleshooting after adjustment
If voltage is too high, you may see flickering lights and belt-driven loads running hotter; under-voltage can cause dimming and undervoltage alarms. If the AVR is overly sensitive, recheck the wiring, grounding, and any calibration procedures specific to your model. In some cases, repeat adjustments in small steps and re-test after a cool-down period to avoid thermal drift. If under load the voltage collapses, check for loose connections or defective sensors. Regular follow-ups with the manual and vendor support are advised to maintain consistency.
When to call a pro and how to verify service quality
DIY voltage adjustments are feasible for many homeowners, but some situations warrant a pro: models with complex AVR systems, high-load installations, or irregular readings. If you are uncertain, contact an authorized technician and request a pre-visit checklist. After service, verify the voltage with a no-load and loaded test and compare against the manual’s stated range. The Genset Cost team recommends using a professional for safety-critical work and to maintain warranty.
Tools & Materials
- True RMS AC voltmeter(Calibrated; measures true RMS for accurate readings)
- Digital multimeter(For auxiliary measurements and verification)
- Insulated screwdriver set(To access AVR screws/knobs safely)
- Protective gloves and eye protection(Safety PPE for handling live components)
- Owner's manual for the generator model(Model-specific instructions and limits)
- Non-conductive mat or insulated workspace(Optional but recommended)
Steps
Estimated time: 30-45 minutes
- 1
Power down and disconnect power
Shut off the generator, allow it to cool, and disconnect all loads and transfer switches. This baseline step prevents shock and accidental energization during adjustments.
Tip: Always verify the unit is fully de-energized before touching any controls. - 2
Locate the AVR and access the voltage adjust knob
Open the control panel to find the AVR and its voltage reference knob. Refer to the manual for your exact model location, as placements vary by brand and year.
Tip: Use a flashlight and avoid touching other wiring while locating the knob. - 3
Prepare measurement tools and verify baseline readings
Set up the voltmeter or true RMS meter within reach of the outlet you will test. Record the current voltage baseline before any adjustment.
Tip: Document baseline readings for future troubleshooting. - 4
Set nominal target voltage in small increments
With the generator off-load, gently rotate the adjustment knob in small steps. Pause after each adjustment to allow the AVR to stabilize.
Tip: Make only small changes; large jumps can overshoot the target. - 5
Measure voltage no-load and document
Start the generator and measure output with no heavy connected loads. Note the voltage reading and compare it to the model’s nominal specification.
Tip: If readings are off, revert to a known baseline before continuing. - 6
Apply a representative load and re-check
Add typical household loads (lights, small appliances) and measure voltage again. Ensure readings stay within the manufacturer’s acceptable range under load.
Tip: Load simulates real operating conditions for accuracy. - 7
Fine-tune in small steps if needed
If the loaded voltage drifts outside range, adjust again in tiny increments and re-test under both no-load and loaded scenarios.
Tip: Avoid chasing a single reading; validate across conditions. - 8
Document final settings and perform a final safety check
Record final AVR setting values and voltage readings. Ensure all tools are removed, and re-close the panel securely before returning to service.
Tip: Keep a maintenance log for future reference.
People Also Ask
Can I adjust generator voltage myself?
Yes, many homeowners can adjust voltage themselves by following the manufacturer’s AVR instructions and safety guidelines. If your model has a complex AVR or you’re uncertain, contact a professional.
Yes, you can adjust voltage yourself, but proceed carefully and follow the manual.
What are the signs of incorrect voltage after adjustment?
Common signs include dimming or flickering lights, frequent tripping, or unusual noise from the generator. If you notice these, recheck the settings and measurements.
Look for flickering lights or tripping breakers if something seems off.
Do I need to recalibrate after changing load conditions?
In many cases, recalibration isn’t required after an adjustment, but you should re-test voltage under typical loads to confirm stability.
Usually you don’t recalibrate after a change, but re-test under load to be sure.
What tools do I need to adjust voltage?
A true RMS voltmeter, insulated screwdriver, PPE, and the generator’s manual are essential for safe, accurate adjustment.
You’ll want a voltmeter, a screwdriver set, and safety gear.
How often should I check voltage after installation?
Check voltage after installation and any service or major load changes. Periodic checks help catch drift early.
Check it after work or changes, then occasionally to stay on top of it.
Is voltage adjustment covered by warranty?
Warranty terms vary by model and manufacturer. Check your manual or contact the dealer to understand coverage.
Warranties depend on your model; verify with the manufacturer.
Watch Video
Key Takeaways
- Follow safety steps before any adjustment
- Verify no-load and under-load voltages after changes
- Document settings and test to ensure stable output
- Consult a professional for complex AVR systems