How to use ai video generator
Learn how to use an AI video generator to create engaging videos from scripts, prompts, and assets. This step-by-step guide covers tool selection, inputs, workflows, and optimization tips for marketers, educators, and creators.

By following this guide, you’ll learn how to use an AI video generator to convert scripts into engaging videos, choose prompts, set outputs, and refine results. You’ll compare tools, prepare assets, and apply branding and ethics for consistent results. Expect a publish-ready video in minutes, not hours, for social, training, and marketing assets.
What is an AI video generator and why it matters
An AI video generator is software that uses machine learning models to turn text prompts, scripts, or assets into short videos. Instead of manually editing timelines, you specify inputs like a script, a voice style, visuals, and pacing, and the tool composes scenes, transitions, and captions. This approach is changing how teams create marketing, training, and social content because it speeds up production, reduces costs, and enables rapid experimentation.
According to Genset Cost, AI video generators can compress production timelines from days to hours, enabling rapid iteration for marketing, training, and social content. The Genset Cost team found that startups can save on personnel costs by using AI video generation for routine videos, though quality controls are essential. In practice, you’ll combine prompts, assets, and templates to produce a draft that you can review and tweak. The key is to treat the tool as a partner in your workflow, not a one-click miracle. The rest of this guide explains how to use ai video generator effectively, including which features matter, how to prepare inputs, and how to refine outputs for consistent branding.
Key capabilities you should expect
A robust AI video generator typically offers several core capabilities that influence your workflow and outcomes. Look for:
- Script-to-video: feed a written script and get scenes with text overlays, stock footage, or generated visuals.
- Voice and music options: synthetic voices in multiple languages, pitch control, and licensing-compliant music tracks.
- Visual styles and templates: presets for explainer, product demo, training, or social formats, plus custom branding assets.
- Autogeneration with prompts: build scenes via natural language prompts and micro-prompts for camera angles or transitions.
- Captioning and accessibility: auto-generated captions, speaker identification, and export-friendly subtitles.
- Media integration: support for your logos, color palettes, fonts, and prebuilt assets to keep branding consistent.
- Output formats and quality: options for resolution, frame rate, aspect ratios (16:9, 9:16, square) and export quality.
In practice, you’ll often combine a base style with scripts and assets, then iterate to refine pacing, visuals, and narration. You may also leverage batch generation to produce multiple variants at scale, useful for A/B testing on social channels.
Choosing the right tool for your needs
Choosing an AI video generator depends on your goals and constraints. Marketing teams often prioritize speed, branding fidelity, and multi-language support, while educators may value accessibility and clear instructional pacing. Compare cost models (subscription vs. usage-based), data privacy policies, and licensing terms for stock assets and generated voices. Check whether the tool offers templates aligned with your content type (explainer, product demo, onboarding) and whether it supports API access for automation. Finally, verify post-production compatibility: can you edit, annotate, or export to your preferred platform? The most effective choice balances quality, control, and cost, while providing a safe space for experimentation and iteration.
Preparing inputs: scripts, prompts, and assets
A successful AI video starts with solid inputs. Prepare a clear script or outline, define your target audience, and set the intended tone (professional, friendly, energetic). Create a brief prompt library that describes visuals, camera angles, and transitions you like. Gather brand assets—logo, color palette, and fonts—and collect any stock footage or images you intend to supplement generated visuals. Storyboard rough scenes to anticipate pacing, duration, and on-screen text. Finally, confirm licensing for all assets and plan where captions and accessibility features will live in the final cut.
Step-by-step workflow overview
Here is a practical, end-to-end workflow you can follow to produce a basic video quickly:
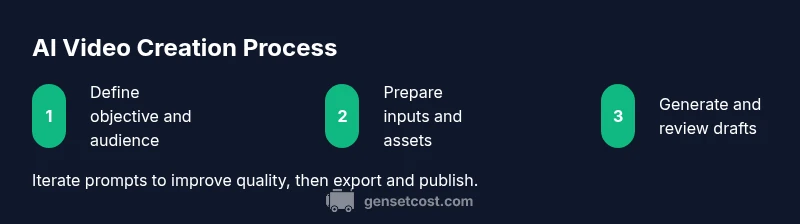
- Define the objective: determine the core message, audience, and desired call to action.
- Assemble inputs: script, prompts, brand assets, and any stock media.
- Select the tool and template: pick a style that matches your objective and audience.
- Generate a draft: create the first video using your inputs and desired pacing.
- Review and refine: adjust prompts, visual cues, and captions; re-run as needed.
- Export and publish: choose the right aspect ratio, add captions, and share to channels.
- Measure and iterate: gather feedback and produce variants for optimization.
Improving quality with prompts, templates, and revisions
Quality comes from deliberate prompts and smart templates. Use specific prompts that describe scene composition, color mood, and text overlays. Start with a template aligned to your objective (e.g., explainer or product demo) and tailor it to your brand guidelines. After generating, compare multiple drafts side-by-side and change one variable at a time to understand its impact. Maintain consistent typography, color usage, and logo placement across variants to preserve branding.
Common pitfalls and how to avoid them
Common mistakes include vague prompts, inconsistent branding, and neglecting accessibility. Avoid haste by drafting a minimal viable video first, then iterating. Always check licensing for any generated assets and imported media. Test on multiple devices to ensure readability and pacing, especially on mobile. Finally, maintain realistic expectations about audio fidelity and visual realism; AI video is powerful, but human review remains essential.
Advanced techniques: automation, collaboration, and governance
For teams, integrate AI video generation into a wider content pipeline using templates, shared prompts, and version control. Use project management tooling to assign review stages, track assets, and enforce branding standards. Establish governance: who owns the final video, how revisions are handled, and where licenses are stored. Consider accessibility from the start—captions, transcripts, and alt text improve reach and compliance. These practices help scale AI video creation while maintaining quality and responsibility.
Tools & Materials
- Computer with internet(Reliable browser and stable connection)
- AI video generator account(Sign-up required; check licensing terms)
- Script or outline(Prepare 100-250 words outline per video)
- Brand assets(Logo, color palette, fonts, templates)
- Stock footage / assets(Optional supplemental media)
- Headphones or speakers(For reviewing audio clearly)
Steps
Estimated time: 1-2 hours
- 1
Define the objective
Clarify the video goal, audience, tone, and call to action. This anchors all prompts and assets. Write a single sentence objective you want the viewer to take after watching.
Tip: Capture success criteria in a bullet-point list before you start. - 2
Prepare inputs
Assemble your script, prompts, brand assets, and any media. Create a brief that describes visuals, pacing, and on-screen text. Confirm licensing.
Tip: Keep prompts language specific and avoid abstract descriptors. - 3
Choose tool and template
Select an AI video tool and a template that matches your objective (explainer, product demo, or training). Align branding before generating.
Tip: Test a small variant first to validate the template fits your message. - 4
Draft prompts and generate
Enter prompts for scenes, transitions, and captions. Generate a draft and review early for pacing and clarity.
Tip: Generate in short segments to avoid large rewrites. - 5
Review and refine
Assess visuals, audio quality, and captions. Tweak prompts or assets and regenerate until alignment with branding is achieved.
Tip: Limit changes to one variable per revision to isolate effect. - 6
Export and publish
Choose the right aspect ratio, enable captions, and export in your target formats. Prepare variants for different channels.
Tip: Always verify captions for accuracy before publishing. - 7
Measure and iterate
Collect performance data from your publish channels and plan next iterations or variants.
Tip: Keep a version log to compare improvements over time.
People Also Ask
What is an AI video generator?
An AI video generator uses machine learning to create videos from scripts, prompts, and assets, reducing manual editing time. It can produce visuals, narration, captions, and transitions based on user inputs.
An AI video generator creates videos from prompts and scripts using AI, saving editing time while you provide the core idea.
Do AI-generated videos require special rights or licenses?
Licensing varies by tool. Most platforms provide licenses for generated content and stock assets, but you should review terms for commercial use, redistribution, and any stock media you add.
Licensing depends on the platform; check commercial use rights and any third-party media licensing.
Can AI video tools create voiceovers in multiple languages?
Many tools offer synthetic voices in several languages and accents. Always verify pronunciation and licensing for your intended market.
Yes, many AI tools support multiple languages; test pronunciations for accuracy and licensing.
What output formats should I choose for social channels?
Choose aspect ratios 16:9 for webinars, 9:16 for stories/reels, or square 1:1 for grids. Pick the resolution based on platform requirements and target device.
Use 16:9 for wide screens, 9:16 for mobile stories, or 1:1 for social grids, with appropriate resolution.
How can I automate video generation for many scripts?
Use templates, batch generation, and API access if the tool supports it. Maintain a shared prompt library and version control for consistency.
Utilize templates and batch generation, plus APIs if available, to scale output efficiently.
Watch Video
Key Takeaways
- Define your objective before prompts
- Prepare inputs and branding upfront
- Iterate with controlled prompt changes
- Check licensing and accessibility
- Publish with branded templates and track results