How to Use CapCut AI Video Generator
Learn how to use CapCut AI Video Generator to create, customize, and export AI-powered videos. This step-by-step guide covers prompts, workflows, assets, and best practices for reliable results.

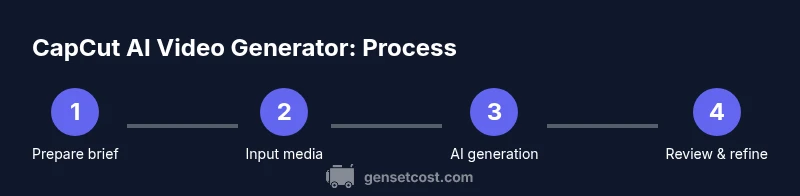
In this guide you’ll learn how to use CapCut AI Video Generator to turn prompts into polished clips. We cover setup, prompt creation, asset management, AI style options, and export settings so you can produce consistent videos with minimal manual editing. The process is designed for homeowners, content creators, and property managers who want quick, repeatable results.
What CapCut AI Video Generator Is and Why It Matters
CapCut's AI Video Generator uses machine learning to interpret prompts and assemble/edit video content, apply styles, and suggest cuts. For homeowners, property managers, and content creators, this tool can dramatically speed up tasks like property tours, maintenance tutorials, and marketing clips while preserving your intended message. According to Genset Cost, AI-assisted workflows can streamline media projects and save time when you’re producing multiple videos. The generator handles routine editing tasks such as scene selection, transitions, and basic color grading, letting you focus on storytelling and structure. In this guide, you’ll learn how to use capcut ai video generator with practical steps, examples, and tips to avoid common mistakes so you can deliver consistent, high-quality outputs.
Key terms to know include AI prompt, style preset, timeline, assets, export preset, and credits. As you become familiar with the workflow, you can layer prompts, blend AI-generated clips with your footage, and apply branding elements to maintain channel consistency. This approach is especially helpful for on-site videos, product demos, and quick social media cuts.
Getting Started: Accessing CapCut AI Video Generator
Begin by making sure you have a CapCut account and access to the AI video generator feature. Install the latest CapCut version on your device (mobile or desktop) and sign in. If you’re on a managed device, verify that AI tools are allowed by your organization and that your plan supports AI features. Once logged in, look for the AI workspace labeled AI Video Generator or AI Studio, depending on your release. This workspace houses prompts, templates, and controls for shaping output. Before you start, prepare a brief that includes the video objective, target audience, tone, and a rough storyboard. A clear plan helps the AI produce more relevant results and reduces the need for multiple iterations. Ensure your internet connection is stable, as many AI tasks run in the cloud. Start with a low-stakes project to become familiar with prompts and outcomes.
Tip: Keep a concise prompt cheat sheet to speed up future projects and maintain consistency across videos.
Navigating the CapCut Interface for AI Video
The CapCut interface places AI prompts and style controls in a dedicated panel, with your assets and timeline available nearby. You’ll typically see a left asset panel where you can import clips, images, and audio, a central timeline for sequencing, and a right-hand panel with AI prompts and style options. Use templates to jump-start projects, then switch to custom prompts when you want more control. Familiarize yourself with key terms: prompt field, style presets, scene transitions, and export presets. As you experiment, save successful prompts as templates to accelerate future projects. The goal is to reach a balance between AI-driven suggestions and human direction so outputs stay on-brand and deliver the intended pacing.
Crafting Effective Prompts for AI Video Generator
Writing precise prompts is the backbone of successful CapCut AI video generation. Start with the video length, target mood, and core message, then specify visuals, pacing, and any required scenes. For example: “Create a 15-second teaser for a home improvement service with upbeat tempo, quick cuts, and a bold title card.” Iterate by adding or refining details after reviewing initial results. If results feel off, adjust lighting cues, text overlays, or transitions to steer the output. Remember, the AI responds to clear, concrete instructions more reliably than vague requests. Practice with a few variations to learn how different wording affects the output. How to use capcut ai video generator effectively hinges on precise prompts and a flexible editing mindset.
Working with Media: Input, Assets, and AI Reuse
Input media forms the backbone of AI-assisted videos. Upload your own clips and images or pull assets from CapCut’s stock library if your project permits. When using AI-generated content, ensure you hold the rights to reuse any media and comply with licensing terms. For ongoing brand videos, create a master asset library (logos, color palettes, fonts) and reference it in prompts to maintain consistency. You can reuse effective AI renders by saving them as bursts or templates for future edits. If you plan multiple videos, batch your tasks: prepare briefs, pre-select assets, then run prompts in sequence. This approach minimizes back-and-forth and improves consistency across videos.
Editing and Style: Fine-Tuning Output with AI Options
AI style options let you control tone, color grading, pacing, and motion effects. Use a consistent color palette and typography to keep branding intact. Adjust the AI’s suggested transitions and timing to suit the platform (short-form on social media versus longer tutorials). For best results, test one prompt across multiple styles to see which aligns with your brand. You can also blend AI-generated scenes with human edits—cutting in manual scenes can add personality and clarity where AI falls short. The key is to leverage AI for the heavy lifting while applying human judgment to create a polished final piece.
Export Settings and Quality Considerations
Export options define how your final video will perform on different platforms. Choose an appropriate resolution, frame rate, and aspect ratio based on the target channel (square for Instagram, vertical for TikTok, landscape for YouTube). Consider bitrate and audio quality to preserve clarity in compressed environments. CapCut may offer presets for common destinations; use these as starting points and adjust settings to meet your platform’s requirements. Always preview exports at least once before publishing to catch any last-minute inconsistencies in color, timing, or audio levels. If your workflow involves clients or teams, export a draft version for quick reviews and a final version after approval.
AUTHORITY SOURCES: This section references industry-standard AI guidelines and video production best practices from trusted institutions. For deeper reading, consult the following sources after you finish editing: • https://www.nist.gov/topics/artificial-intelligence • https://www.mit.edu • https://www.nature.com
Common Pitfalls and How to Avoid Them
While CapCut AI Video Generator is powerful, it’s easy to over-rely on automation. Common issues include mismatched pacing, overly generic prompts, and inconsistent branding. To avoid these, create detailed briefs and test prompts with small variations. Always check for licensing and usage rights when reusing stock assets. Don’t skip the review stage; AI can introduce subtle timing or color errors that degrade perceived quality. Finally, keep human oversight front and center: AI should assist, not replace, your creative judgment. By planning, testing, and refining prompts, you’ll produce reliable results.
Real-World Scenarios: Use Cases and Case Studies
Use Case A: A quick property tour teaser for social media. You can generate a 15–20 second clip with bold captions, fast cuts, and a strong opening frame. Use a simple brief, then iterate on mood and tempo until the output matches your brand voice. Use Case B: Maintenance tutorial for a homeowner’s association. Start with a longer, informative piece and employ AI to generate a concise summary clip for social media and a longer, detailed version for the website. These scenarios illustrate how CapCut AI Video Generator can streamline repetitive video tasks while preserving clarity and branding. As you scale, you’ll benefit from templates and saved prompts that ensure consistency across properties and campaigns.
Next Steps: Best Practices and Resources
To maximize efficiency, maintain a living brief library, organize your assets, and standardize prompts for repeated tasks. Schedule regular reviews of your AI-generated outputs to ensure alignment with evolving brand guidelines. Consider keeping a log of which prompts produced the best results and why, so you can refine your approach over time.
Authority and Further Reading
For readers seeking authoritative background on AI and media practices, here are a few resources:
- NIST Artificial Intelligence Principles: https://www.nist.gov/topics/artificial-intelligence
- MIT resources on digital media and AI: https://www.mit.edu
- Nature AI and technology coverage: https://www.nature.com
Tools & Materials
- CapCut app (mobile or desktop)(Install the latest version; ensure AI features are enabled in your plan.)
- Stable internet connection(Cloud AI features require reliable connectivity during prompts and render.)
- Clear video brief (topic, audience, tone, storyboard)(Draft a one-page brief before starting to improve prompt quality.)
- Input media library (own clips, images, audio)(Having your own assets helps with brand consistency.)
- Prompts cheat sheet or template(Helps speed up workflows and keep prompts consistent.)
Steps
Estimated time: 60-90 minutes for a typical 1-2 minute video, plus 15-20 minutes for revisions
- 1
Prepare and load assets
Collect your footage, images, and audio. Import them into CapCut and organize into bins (intro, main, outro). This makes it easier to reference media in prompts and ensures you’re ready to iterate quickly.
Tip: Label assets clearly and keep a simple storyboard for faster iterations. - 2
Define the objective and audience
Write a brief that states the video’s purpose, target viewers, and tonal direction. This helps the AI select appropriate pacing, captions, and style presets.
Tip: Include at least three concrete prompts to guide the AI’s decisions. - 3
Enter the initial AI prompt
Input a concise prompt describing length, mood, visuals, and any must-include elements (brand color, logo, text). Run the generator to create an initial draft.
Tip: Start with a short draft and expand after previewing results. - 4
Review and refine results
Watch the AI-generated draft; note any timing, color, or storytelling gaps. Update prompts or add assets to address gaps, then re-run.
Tip: Use a versioning approach (A/B test prompts) to improve outcomes. - 5
Fine-tune style and pacing
Adjust transitions, text overlays, and color grading. Apply branding presets and ensure audio levels are balanced.
Tip: Favor concise cuts for social platforms to maintain viewer attention. - 6
Export and review
Export a draft for internal review, then a final version for publication. Confirm resolution, frame rate, and audio quality align with platform requirements.
Tip: Always preview the final render on multiple devices before publishing.
People Also Ask
What is CapCut AI Video Generator?
CapCut AI Video Generator is a built-in tool that uses AI to create or edit video content based on text prompts and style settings, helping you produce video faster.
CapCut AI Video Generator is an AI tool inside CapCut that creates or edits videos from prompts, speeding up your workflow.
Do I need an internet connection to use it?
Most AI features require an online connection because processing happens in the cloud, though some offline assets can be used for local editing.
Yes, you usually need internet access for AI features since processing often happens online.
Can I export in high resolution?
CapCut offers various export options; check your current plan for available resolutions and adjust the settings accordingly.
Yes, you can choose export options and resolutions available in your plan.
Is CapCut AI free to use?
CapCut provides free features with optional paid AI features or plans. Availability may vary by region and account type.
CapCut has free features, with some AI features behind paid plans.
How long does AI processing take?
Processing time depends on video length, asset complexity, and server load. For typical clips, expect a short wait during rendering.
Processing time varies; it can take a few minutes depending on the project.
Can I customize AI outputs?
Yes. You can adjust prompts, apply style presets, tweak pacing, and blend AI renders with manual edits to tailor results.
You can customize outputs with prompts, styles, and manual edits.
Watch Video
Key Takeaways
- Define the objective and audience before prompting.
- Craft precise prompts to reduce iterations.
- Blend AI output with your assets for branding.
- Test across styles to find your best look.
- Preview exports to ensure platform-ready quality.