How to Use a Bun Maker: A Practical Step-by-Step Guide
Learn how to use a bun maker to shape dough into uniform buns at home. This educational guide covers setup, dough prep, shaping, baking, and cleanup for consistent results.

According to Genset Cost, if you're wondering how do you use bun maker, this guide shows the full process—from dough prep to baking—so you can produce uniform, bakery-worthy buns at home. You’ll learn selection tips, dough readiness, shaping with a bun maker, proofing, baking, and cleanup for reliable results.
What is a bun maker and how do you use bun maker?
A bun maker is a compact kitchen device that portions dough into evenly sized buns using a mold and a gentle press. The device can dramatically reduce manual shaping time while improving consistency across batches. If you’re asking how do you use bun maker, the answer starts with dough readiness, mold preparation, and controlled pressing. In this guide we cover the main types—manual press vs. lever press—and how to choose a model that fits your kitchen, comfort level, and batch size. With the right setup, you’ll achieve uniform buns without the guesswork.
Dough readiness for bun maker and the importance of texture
The dough should feel soft, pliable, and just slightly tacky so it forms cleanly in the mold. Begin with fresh yeast and a warm liquid, then mix until a cohesive dough forms. Allow the gluten to relax briefly after mixing to reduce spring-back when pressed in the bun maker. If the dough grips the mold or tears, it likely needs a touch more resting time or a slight tweak to hydration. The goal is a dough that holds its shape under gentle pressure but still yields a light, airy crumb after baking.
Prep, loading, and first shaping with the bun maker
Clean and lightly flour the working surface and the bun maker molds before use. Portion dough evenly and place each piece into the mold portion of the device; if your model supports adjustable depths, set it to the standard depth recommended by the manufacturer. Apply steady, even pressure to form the bun while avoiding over-compression, which can squash the rise. Release the buns carefully and place them on a prepared baking sheet or rack for the next stage.
Proofing, baking, and cooling for consistent results
Let the shaped dough rest so that buns can rise to their full size before baking. Bake according to the recipe or device guidelines until the tops are lightly golden. Transfer buns to a cooling rack immediately after baking to allow steam to escape and crumb to set. Proper cooling helps prevent sogginess and keeps the crust crisp, which is essential for storing or serving.
Cleaning, safety, and maintenance for longevity
Disassemble the bun maker after use and wash all parts with warm, soapy water. Dry thoroughly before reassembly to prevent mold or rust, and store in a dry place away from heat. Regular cleaning reduces dough buildup and ensures consistent performance across batches. If your model has crevices, use a soft brush to remove trapped flour and dough.
Troubleshooting common issues and quick fixes
If buns spread too wide, check dough portions for uniformity and ensure the mold depth is appropriate for the dough type. If dough sticks to the mold, dust lightly with flour or use a tiny amount of oil on the mold surface. For inconsistent shapes, calibrate the mold alignment and verify the dough is adequately rested before loading.
Tools & Materials
- Bun maker(Choose a model compatible with your dough thickness and batch size.)
- Mixing bowl(Choose a large bowl for mixing and resting dough.)
- Measuring cup(Useful for following recipes accurately.)
- Digital kitchen scale(Helpful for precise portioning if you want uniform buns.)
- Baking sheet and parchment paper(Prevents sticking and makes moving buns easier.)
- Silicone spatula(For scraping dough and cleaning molds.)
- Pastry brush(Optional for glaze or moisture application.)
- Oven mitts(Always protect hands when handling hot trays.)
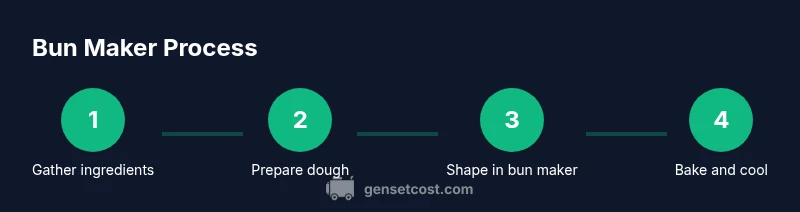
Steps
Estimated time: 60-90 minutes
- 1
Prepare dough and station
Set up your ingredients and workspace. Mix and knead until a soft, cohesive dough forms, then rest briefly to relax gluten. Having everything measured in advance speeds the process.
Tip: Keep ingredients at a consistent temperature to ensure predictable dough behavior. - 2
Pre-load and portion
Lightly flour the surface and mold, then portion dough into equal pieces. If your bun maker has adjustable depths, set to the manufacturer-recommended setting for uniform buns.
Tip: Using a scale for portions helps maintain consistency across batches. - 3
Load dough and shape
Place portions into the bun mold and press with steady, even pressure. Release slowly to preserve shape, avoiding over-compression that can inhibit rising.
Tip: Do not overfill the molds; leave space for expansion. - 4
Proof and bake
Allow the shaped dough to proof until plump, then bake according to recipe guidelines. Cool buns on a rack to set the crumb and prevent soggy bottoms.
Tip: Proper cooling is essential before storage to maintain texture. - 5
Clean and store
Disassemble and wash all parts; dry completely before reassembly. Store in a dry place away from heat to extend the device’s life.
Tip: Regular maintenance prevents dough buildup and improves results.
People Also Ask
What is a bun maker and how does it work?
A bun maker shapes dough into uniform buns using molds and a press. It speeds up shaping, improves consistency, and reduces manual effort. Most models require loading dough into the mold, applying gentle pressure, and releasing the finished bun.
A bun maker shapes dough into evenly sized buns with a simple press.
Can I use any dough in a bun maker?
Most bun makers work with standard yeast doughs, but enriched doughs with more sugar or fat may need adjustments. Always follow the manufacturer’s guidelines for the best results.
Yes, but check the dough texture first.
How long should dough rest before using a bun maker?
Let the dough relax after mixing so gluten can develop without tearing in the mold. Rest times vary by recipe; avoid over-kneading right before shaping.
Let the dough relax before shaping.
How do I clean and care for my bun maker after use?
Disassemble as the manual recommends, wash with warm soap and water, and dry completely. Reassemble and store in a dry place to prevent rust.
Clean it thoroughly and dry it well.
Is it safe for kids to use a bun maker?
With adult supervision, kids can help with dough prep. Keep hot surfaces away and store the device safely when not in use.
Supervised use is possible.
Watch Video
Key Takeaways
- Choose a bun maker suited to your batch size.
- Portion dough evenly for uniform buns.
- Rest dough before molding for best rise.
- Clean thoroughly after use to extend life.