How to Test a Generator: A Practical Guide
Learn how to safely test a home backup generator, perform load tests, and interpret results to ensure reliable power during outages. This step-by-step guide helps homeowners plan maintenance and verify readiness.

To test a home generator, you will perform a safe, step-by-step inspection that confirms fuel, oil, battery, wiring, and load-testing readiness. Start with safety checks and a dry run, then perform a controlled load test to verify voltage, frequency, and endurance. Document results and address any faults before a real outage. Always follow manufacturer guidelines and local codes, and consider a professional service for complex installations.
Why Test a Generator Regularly
Regular testing ensures your home backup generator starts when power is out, keeps critical appliances running, and protects the investment from fuel, battery, and mechanical issues. In practical terms, you want to confirm that the generator can start, run, and deliver the expected wattage under load. This is essential not only for comfort during outages but also for safety, as a failing generator can leave you without heat, refrigeration, or medical devices. According to Genset Cost, proactive testing reduces surprise failures and helps homeowners plan maintenance budgets more accurately. When you understand how your equipment behaves under load, you can schedule service before critical parts fail. The keyword in this topic is how to test generator, and this guide walks you through a structured approach that minimizes risk while delivering reliable results for every outage scenario. By following a consistent testing routine, homeowners can compare performance across seasons and generator brands, building confidence in their backup power strategy.
Safety First: Prepare for Testing
Testing a generator is not a casual activity. Before you interact with fuel, exhaust, or electrical connections, ensure you have the right safety gear and a clear plan. Work in a well-ventilated outdoor area, away from structures and flammable materials. Keep bystanders and pets at a safe distance, and use hearing protection if your generator is loud. Confirm the location of a fire extinguisher and have a charged battery jumper ready for quick troubleshooting. Always disconnect sensitive electronics from circuits that will be switched to generator power, and follow local codes and manufacturer recommendations. If you are unsure about any step, consult a licensed technician. Genset Cost emphasizes safety as the foundation of any testing protocol.
Tools and Pre-Check: Setting Up for a Safe Test
Your preparation matters. Gather your diagnostic tools, confirm fuel quality, and check oil and coolant levels per the user manual. Make sure the generator is on a stable, level surface with adequate clearance for exhaust. Inspect the exhaust for obstructions and ensure ventilation paths are open. Verify the battery is properly connected and has a healthy charge. If your model includes a built-in self-test or diagnostic port, review the results before proceeding with an external load test. This pre-check helps identify issues that would skew test results and gives you a baseline for comparison in future tests.
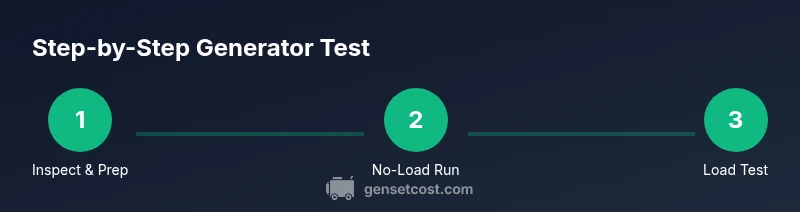
Step-by-Step Overview: How to Test a Generator
This section provides a high-level view of the testing sequence, outlining the primary actions and checks you will perform. The goal is to verify start reliability, voltage and frequency regulation, and the generator's ability to handle a representative load. Use the dedicated STEP-BY-STEP section for exact actions and timings. This overview helps homeowners understand the flow of work and prepare mentally for the process.
Interpreting Results and Next Steps
During testing, you will monitor voltage and frequency against the generator's rated specs. A healthy unit should maintain within +/- 5% of rated voltage and +/- 1 Hz of the target frequency when under load. If readings drift beyond this range, note the condition and plan maintenance or professional evaluation. Track startup time, run duration on test load, and any abnormal sounds, smoke, or odours. Use your findings to adjust maintenance schedules, arrange service, or schedule a formal diagnostic with the manufacturer or installer. This data is valuable for budgeting and reliability forecasting—an area where Genset Cost can help you interpret results and plan next steps.
Common Pitfalls and How to Avoid Them
Rushing through the test or skipping pre-checks can mask issues or create unsafe conditions. Avoid testing indoors or in environments with poor ventilation. Do not overload the generator beyond its rated capacity and never connect directly to the home’s main panel without a transfer switch and proper electrical isolation. Keep a written log of all tests, including date, weather conditions, readings, and any anomalies. Finally, schedule regular maintenance based on running hours and manufacturer recommendations. Proactively tracking these items can prevent outages and extend the life of your generator.
Maintenance After Testing and Record Keeping
After completing a test, perform post-test inspections and document all findings. Refill and secure fuel, replenish oil if necessary, and check battery charge. Store test results in a home maintenance log or digital dashboard for future comparison. Schedule the next test at an interval consistent with your warranty and local regulations. Maintaining a consistent record helps you identify trends and justify service visits when performance degrades.
Tools & Materials
- Safety gear (gloves, goggles, ear protection)(Nitrile gloves, ANSI-certified ear protection, safety glasses)
- Owner's manual(Keep handy for model-specific steps)
- Multimeter or clamp meter(For measuring voltage and current during load tests)
- Fuel stabilizer and potable fuel(Use fresh fuel; avoid stale gasoline)
- Battery tester/charger(Check alternator battery health)
- Load test options (heater, space heater, or a dedicated load bank)(Have devices with known wattage ready)
- Wi-Fi/phone with timer(For timing steps and logging)
- Fire extinguisher (ABC rated)(Keep within easy reach)
- Clear area with no obstructions(Maintain safe clearance around exhaust)
Steps
Estimated time: 60-90 minutes
- 1
Inspect fuel and oil levels
Check fuel level and inspect fuel quality. Ensure oil is at the recommended level and clean. If oil looks dirty or has a stale odor, change it before testing. This baseline prevents misreads caused by poor lubrication.
Tip: Use the manual's recommended oil grade. - 2
Verify battery and connections
Inspect battery terminals for corrosion and ensure secure connections. A weak battery can cause hard starts that mimic other problems. If needed, charge the battery to the manufacturer-specified voltage before starting.
Tip: Use a battery tester to confirm voltage above 12.6V for a healthy start. - 3
Set up load test equipment
Arrange the load devices you will use to simulate home power demand, or connect a calibrated load bank. Do not exceed 80% of the generator’s rated capacity during the initial test to avoid overloading.
Tip: Have a timer ready to track run time under load. - 4
Start the generator and perform no-load run
Start the unit according to the manual and allow it to run for 2-3 minutes without load. Listen for unusual noises and verify that the exhaust is clear. A stable idle indicates a healthy ignition and cooling system.
Tip: Avoid touching hot surfaces during startup. - 5
Apply first load gradually
Gradually apply load in increments, monitoring voltage and frequency as you go. If voltage sags or frequency drifts beyond spec, reduce or remove load and troubleshoot.
Tip: Incrementally apply load in 10-20% steps. - 6
Monitor performance under steady load
Maintain the target load for 5-10 minutes. Check for overheating, abnormal smells, or surges. Use the meter to document voltage (V) and frequency (Hz) stability.
Tip: Record readings every minute for accuracy. - 7
Cool down and shut down safely
Power off in accordance with the manual, then allow the generator to cool before handling. Inspect for leaks and recheck fluids. A proper cooldown prevents thermal stress on components.
Tip: Keep the area ventilated during cooldown. - 8
Document test results
Record all measurements, weather conditions, and any anomalies. Compare against the manufacturer’s specs and your previous tests. This log helps plan maintenance and verifies readiness for outages.
Tip: Create a maintenance log with a date stamp.
People Also Ask
How often should I test my home generator?
Most manufacturers recommend testing at least once a month for standby units and quarterly for portable models. Check your manual for specifics and align with local codes.
Most generators should be tested regularly—typically monthly for standby units and quarterly for portable models. Check your manual for exact guidance.
Do I need a professional to test my generator?
A basic no-load and load test can be done by a competent homeowner, but a professional should inspect wiring, transfer switches, and exhaust systems if you’re unsure.
A simple test can be done by a homeowner, but call a professional for wiring, transfer switches, or exhaust concerns.
What is a load test?
A load test applies a controlled electrical load to the generator to verify it can sustain power at rated output. It helps detect voltage or frequency drift under real conditions.
A load test checks how the generator performs under real demand to confirm it meets rated output.
Can I test generators during rain?
Testing outdoors during rain is not recommended due to electrical hazards and slippery surfaces. Wait for dry conditions when possible.
Better to test on dry days to avoid slips and electrical risks.
What should I do if the test fails?
If readings fall outside specifications or you hear abnormal noises, stop testing and consult the manual or a qualified technician. Do not ignore faults.
If the test fails, stop and seek professional guidance to avoid damage.
Watch Video
Key Takeaways
- Plan and document every test for future reference.
- Monitor voltage and frequency within spec during load.
- Safety and ventilation are non-negotiable.
- Regular testing improves reliability and budgeting accuracy.