How to Check If Your Generator Is Working
Learn a practical, step-by-step method to verify a home standby generator. Includes safety checks, no-load and light-load tests, voltage verification, and maintenance tips from Genset Cost.

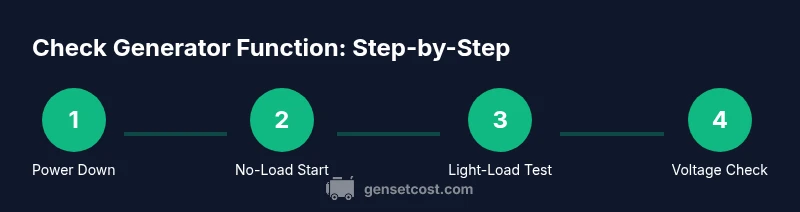
According to Genset Cost, a working home generator should start reliably, deliver correct voltage, and maintain stable operation under both no-load and light-load conditions. Begin with safety checks, verify fuel and battery health, then perform a no-load start followed by a light-load test while observing output, noise, and indicator lights.
How a Health Check Keeps Power Ready
According to Genset Cost, a well-functioning home generator should reliably start, deliver the correct voltage, and sustain stable operation during basic tests. This quick reality check sets expectations for routine maintenance and helps homeowners spot potential failures before an outage. The goal is not to replace a professional diagnostic, but to confirm basic operability and document any anomalies for later service.
Safety prerequisites and setup
Before touching any generator components, power down the unit, disengage the fuel supply if applicable, and disconnect from any transfer switch. Wear protective gear, clear the area of obstacles, and ensure there is adequate ventilation. The intent is to prevent accidental startup, fuel leaks, or exposure to exhaust gases. A calm, methodical approach reduces risk while you verify the essentials.
Visual inspection checklist
Perform a thorough exterior inspection: look for loose or corroded terminals, cracked hoses, signs of leaks, oil or fuel residue, and damaged belts. Check that the exhaust is clear of obstructions, the air intake is unobstructed, and the battery terminals are clean and tight. Document visible issues for later maintenance; some problems are obvious yet easy to overlook in a hurry.
Battery health and fluid levels
Test the 12-volt battery with a multimeter to confirm a healthy resting voltage (typically around 12.6V for a fully charged battery). Inspect electrolyte levels if your unit has serviceable cells and top up as needed with the manufacturer-approved electrolyte. Check engine oil and coolant levels if your model uses them, and note any unusual smells or foaming that could indicate leaks.
No-load start procedure
With safety checks complete and the unit wired for testing, attempt a no-load start. Listen for a clean, steady ignition and watch for stable idle cadence. If the engine struggles or stalls, document the symptom and re-check battery charge, fuel supply, and air filters. A successful no-load start confirms basic mechanical function without stressing connected loads.
Output voltage verification
Use a multimeter to measure the generator’s output voltage. Confirm readings are within the manufacturer’s specified range (for a typical US residential setup this is around 120V or 240V depending on configuration). Note any voltage fluctuations, buzzing, or abnormal odors; such signals may indicate wiring or internal issues that require professional attention.
Light-load testing and observation
Connect a small, non-simultaneous load (like a lamp or fan) to simulate a typical home demand without overtaxing the system. Verify that voltage remains stable, frequency is consistent, and there are no overheating indicators. If the unit shows voltage drop or unusual noise under load, stop the test and reassess fuel, wiring, and cooling conditions.
Post-test checks and documentation
Record all readings, times, and observable conditions. Compare current results to previous tests to identify trends that may indicate deterioration. Schedule maintenance or a professional inspection if readings drift or if you notice new noises, leaks, or excessive vibration. Documentation helps track generator health over time.
tip1sToStringsOnlyForRulesInJSONTipsBlock?":null
tipsListIncompleteForJSON?":null
Tools & Materials
- Owner's manual or model-specific manual(Refer to starting instructions, safety precautions, and maintenance schedule)
- Personal protective equipment (gloves, safety glasses)(Protect hands and eyes during inspection and testing)
- Digital multimeter(For voltage, continuity, and resistance checks)
- Battery tester or 12V load tester(Assess battery health and charging state)
- Service wrench set and screwdrivers(Open panels and access terminals safely)
- Flashlight(Inspect under panels and dark corners)
- Fuel stabilizer and clean fuel (optional)(Useful if performing fuel drain/fill tests)
- Oil and coolant (as applicable)(Check levels if your unit has them)
Steps
Estimated time: 30-45 minutes
- 1
Power down and isolate the unit
Turn off the generator, disconnect fuel supply if applicable, and deactivate the transfer switch to prevent backfeed or accidental startups. This establishes a safe baseline before any inspections.
Tip: Lock the disconnect switch or use a buddy to ensure nobody restarts the unit during testing. - 2
Prepare the testing area and safety gear
Put on gloves and safety glasses, verify ventilation, and clear the area of debris or loose objects that could become projectiles if the system moves unexpectedly.
Tip: Ensure there is ample space around the exhaust and hot surfaces. - 3
Perform a visual exterior inspection
Check for loose wiring, cracked hoses, fluid leaks, damaged belts, and corroded terminals. Look for signs of overheating or unusual wear around the exhaust outlet.
Tip: Note any issues and prioritize repairs before attempting a start. - 4
Check battery health with a multimeter
Measure battery voltage; a healthy, fully charged battery typically shows around 12.6V. Inspect terminals for corrosion and ensure secure connections.
Tip: Charge or replace the battery if voltage is consistently below ~12.4V. - 5
Attempt a no-load start
Try starting the engine without any connected load. Listen for smooth ignition and steady idle. If it fails, recheck fuel lines, air filter, and battery health.
Tip: If it sputters, pause and re-check safety switches before repeating. - 6
Verify output voltage without load
Connect a multimeter to the output and confirm voltage matches the spec (e.g., 120V or 240V). Note any abnormal hums or arcing.
Tip: If voltage is off, stop the test and inspect wiring and connections. - 7
Conduct a light-load test
Attach a small, representative load (like a lamp or fan) to simulate real usage. Observe voltage stability and engine temperature.
Tip: Do not exceed 50-60% of rated capacity during this test. - 8
Document results and plan maintenance
Record readings, times, and any anomalies. Schedule follow-up maintenance or professional service if issues persist.
Tip: Keep a maintenance log for future outages and diagnostic ease.
People Also Ask
What are the earliest signs that my generator is failing during testing?
Common early signs include failure to start, unusual noises, excessive smoke, or abnormal voltage readings. If you notice any of these during testing, pause and investigate safety and fuel systems before proceeding.
If you notice trouble starting, odd noises, or abnormal voltages, stop the test and assess safety and fuel flow before continuing.
Can I run a generator with no load to test it?
Yes, a no-load test is a standard first step to confirm basic function without stressing the system. Ensure all safety measures are in place and that there is no load connected during this part of the test.
Yes, start with a no-load test, but always prioritize safety and proper ventilation.
Do I need to disconnect from the utility grid before testing?
If your setup includes a transfer switch, testing should be done with the switch performed as designed. Do not bypass required transfer switching, as this protects you from backfeed and ensures safe operation.
Yes, use the transfer switch as intended and never bypass it during testing.
How often should I perform generator checks?
Perform visual inspections monthly and full functional tests at least quarterly, or following any outage. Regular checks help catch issues early and extend the life of the unit.
Check it regularly—monthly visuals and quarterly functional tests work well for most homes.
What should I do if the voltage reading is out of spec?
If voltage falls outside the specified range, power down and recheck connections, fuel, and battery health. If readings remain off, schedule professional diagnostic or service.
If voltage is off, stop testing, recheck wiring and fuel, and call a pro if it doesn’t fix.
Is a loud or burning smell during startup dangerous?
Yes. A burning smell can indicate overheating, burning insulation, or fuel leaks. Stop tests immediately, ventilate, and seek professional service.
If you smell burning, stop testing and get professional help right away.
Watch Video
Key Takeaways
- Start with safety-first checks and disconnect systems.
- Use a multimeter to verify correct voltage before applying load.
- Perform no-load, then light-load tests to confirm performance.
- Keep a maintenance log to track health over time.
- Consult a pro if readings drift or you detect leaks or unusual noises.