How to Check If a Generator Is Producing Electricity
Learn how to check if your generator is producing electricity safely and accurately with a practical, step-by-step guide, essential tools, safety tips, and troubleshooting steps from Genset Cost.

To check if your generator is producing electricity, first ensure it’s safely set up (fuel, oil, ventilation) and connected to the transfer switch. Then measure voltage at a designated outlet with a multimeter and verify the frequency and load are within normal ranges. This guide walks you through a safe, step-by-step process.
Understanding how a home generator produces electricity
A home generator converts mechanical energy from the engine into electrical energy via an alternator. The output is then conditioned by the voltage regulator and delivered to your home's electrical system through a transfer switch or ATS (automatic transfer switch). When you know how to check if generator is producing electricity, you can confirm power delivery to outlets, circuits, and essential appliances. The engine’s rotation drives the alternator, which generates alternating current that your home panels can accept. Properly coordinated with the transfer switch, this setup ensures power is supplied during outages and isolated from the grid to protect utility workers. From a maintenance perspective, understanding the electrical path helps homeowners identify where issues may occur, such as loose connections, worn contacts, or tripped protective devices. According to Genset Cost, starting with a well-prepared setup and documented procedures minimizes risk and improves accuracy. This awareness sets the foundation for safe testing and reliable results.
Safety first: assess risk and safeguards
Safety is non-negotiable when testing a live power source. Vehicle and generator exhaust, hot surfaces, and rotating parts pose risks of burns, carbon monoxide exposure, and electric shock. Before you start, verify you have a clear, well-ventilated testing area, protective eyewear, and insulated gloves. Keep children and pets away, and never work on or near live electrical equipment with wet hands. If you’re unsure about any step, pause and consult the owner’s manual or a licensed electrician. The goal is to confirm whether the unit is producing usable electricity without compromising your safety. Genset Cost emphasizes documenting every test so you can track performance over time and spot trends that may indicate deteriorating parts or misconfigurations.
Before you test: readiness and checks
Prior to any measurement, check fluid levels, battery condition, and the transfer switch status. Ensure the generator has fresh fuel appropriate to its design and that exhaust venting is clear. Confirm the engine turns over smoothly and that safety interlocks are intact. If you’re relying on an automatic transfer switch, make sure the utility power source is isolated and the generator is primed for operation. Document the exact model, serial number, and test conditions to compare against expected behavior later. This preparation reduces variability in readings and helps you distinguish a real issue from a routine variance.
Tools and setup: what you need to measure output
You’ll want a basic set of tools to verify generator output: a digital multimeter (capable of AC voltage and frequency measurements), test leads with proper insulation, a non-contact voltage tester as a quick check, and PPE such as safety goggles and gloves. Optional accessories include a clamp meter for current measurement and a load bank for controlled testing. Ensure you have the manuals for both the generator and the transfer switch on hand. Having a logbook or digital notes makes it easier to track readings over time and to spot trend changes that could indicate wear or drift in electrical characteristics.
Reading the outputs: what to look for and how to interpret
When you test, you’re looking to confirm that the generator is producing voltage within the expected range and that the electrical frequency is stable. A healthy output should show a steady voltage with minimal fluctuation, a clean sine wave, and the appropriate frequency for your region. If the readings drift or show excessive ripple, there may be alternator winding issues, loose connections, or grounding problems. Remember that different regions use different voltages and frequencies, so always compare against your system’s expected specifications. If readings appear off, don’t assume a fault—consider recent maintenance, fuel quality, altitude, and load on the system. The main objective of this step is to validate that the generator is generating electricity that your home can safely use.
Troubleshooting and what to do if no electrical output is detected
If you don’t observe electricity at the outlets after following the previous steps, revisit each connection point in the power path. Check the transfer switch for fault codes or tripped indicators, inspect fuses and circuit breakers, and ensure the generator is supplying power to the transfer switch input. Consider performing a controlled load test with a known, low-wattage appliance to confirm the circuit is capable of handling load. If you still see no output, consult the maintenance schedule and consider professional testing—persistent lack of output can indicate a deeper issue such as a failing alternator, worn brushes, or fuel supply problems. Documentation and methodical checks help you differentiate between simple wiring issues and component failures.
What this means for homeowners: practical takeaways and ongoing checks
Regularly confirming generator output helps ensure you have power when you need it most. Establish a routine that includes pre-test safety checks, a quick functional test, and a recorded log of voltages and frequencies. Use this knowledge to determine if maintenance or part replacement is necessary, and align testing with manufacturer recommendations and local codes. By staying methodical and using the right tools, you’ll minimize the chance of surprises during an outage and extend the life of the backup system.
Tools & Materials
- Digital multimeter (AC voltage and frequency)(Must be rated for the expected voltage in your region; verify accuracy and battery condition before use)
- Test leads with insulated probes(Use probes rated for electrical testing; keep grips clean and dry)
- Non-contact voltage tester(Helpful for quick live-checks without contact)
- Personal protective equipment (PPE)(Safety glasses and insulated gloves rated for the generator’s voltage)
- Owner and transfer switch manuals(Reference for correct wiring, warning signals, and safety cautions)
- Flashlight(Illumination for dark panels or cabinet spaces)
Steps
Estimated time: 45-75 minutes
- 1
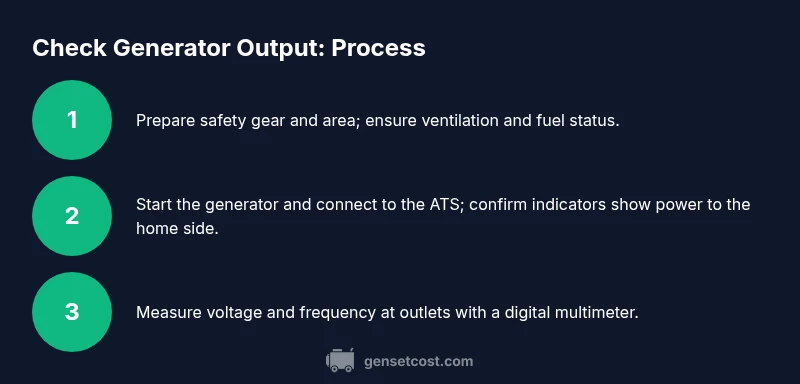
Prep safety and area
Clear the testing area, verify ventilation, and confirm the generator is on stable ground with unobstructed exhaust. Put on PPE and ensure no liquids or flammables are nearby.
Tip: Always test with the vehicle doors closed and the area well ventilated to avoid carbon monoxide buildup. - 2
Inspect basic conditions
Check fuel level, oil level, battery voltage, and that the transfer switch is in the standby or off position before you start. Look for loose wires or damaged components.
Tip: If you notice unusual smells or leaks, stop and address them before attempting power tests. - 3
Start the generator
Follow the manual to start the unit. Let it reach normal operating temperature and listen for smooth operation without knocking or abnormal noises.
Tip: Do not pull the start cord or operate near exposed belts while unprotected. - 4
Engage the transfer switch
Switch the transfer switch to the appropriate position to feed the house circuits. Confirm indicators or status lights show the generator is supplying power to the home side.
Tip: If you use an ATS, verify the interlock or control panel shows a normal status. - 5
Measure voltage at a receptacle
Using the multimeter, measure AC voltage at a standard outlet, away from high-draw appliances. Record the reading and check for a stable value.
Tip: Measure at multiple outlets to verify consistency across the circuit. - 6
Check frequency and waveform
If your meter supports it, verify the frequency (Hz) is within your region’s standard range and observe the waveform for a clean sine shape.
Tip: Small fluctuations are normal; large deviations indicate a problem. - 7
Perform a light-load test
Connect a small load (like a lamp or fan) and re-check voltage and current. Ensure the readings remain stable with the added load.
Tip: Avoid hot-plugging heavy loads; introduce load gradually. - 8
Shutdown and log results
Turn off the load, switch the transfer switch to the appropriate position, and safely shut down the generator. Record the measurements, conditions, and any anomalies for future reference.
Tip: Keep a maintenance log with dates and test outcomes to spot trends.
People Also Ask
Do I need to run the generator regularly to check its output?
Regular testing helps ensure reliability, especially after maintenance or fuel changes. Follow manufacturer guidance and log results to spot trends that indicate wear or drift.
Regular testing helps you confirm reliability after maintenance or fuel changes. Follow the manual and keep a log to spot trends.
What should I do if there is no voltage at the outlets during testing?
Recheck the transfer switch position, verify connections between the generator and ATS, and inspect breakers. If the issue persists, it may indicate a faulty alternator, wiring problem, or fuel delivery issue requiring professional service.
If you see no voltage, double-check the switch, wiring, and breakers. If it still fails, you may need professional service.
Can I perform these checks without using any load?
Yes, you can perform basic voltage and frequency checks with no substantial load to verify generation, but a light-load test helps confirm the system can sustain power under real conditions.
You can do no-load checks, but a light load test gives a better sense of real performance.
Why might readings vary between outlets?
Variations can come from wiring resistance, cable length, or loose connections. Check each outlet, verify neutral and ground paths, and test with a consistent load.
Differences often come from wiring or loose connections; test multiple outlets to pinpoint inconsistencies.
Is it safe to test during a power outage?
Testing during an outage is acceptable if the generator is properly connected and the area is ventilated, but avoid high-risk environments and follow all safety protocols.
Yes, with proper safety and ventilation, but follow all protocols.
Which tools are essential for the test?
A digital multimeter, insulated test leads, PPE, and the generator/ATS manuals are essential. A non-contact tester is helpful for quick checks.
Essential tools are a multimeter, insulated leads, PPE, and manuals; a non-contact tester can help with quick checks.
Watch Video
Key Takeaways
- Verify safety and setup before testing any generator output.
- Use a multimeter to confirm voltage and frequency at outlets.
- Document readings and conditions for ongoing maintenance.
- If readings are off, investigate transfer switches, connections, and fuel supply.