How a Generator Produces Voltage: A Practical Guide
Explore how generators produce voltage, the components involved, and practical tips for selecting and sizing for home backup. Clear explanations from Genset Cost help homeowners understand voltage output, regulation, and compatibility with household loads.

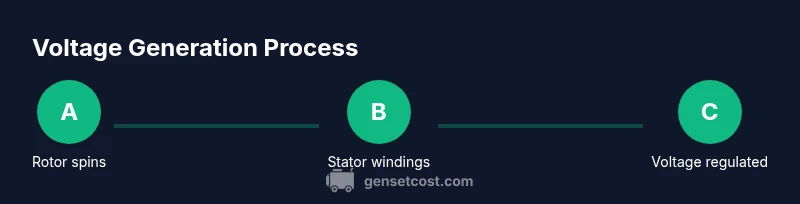
Definition: Understanding how a generator produce voltage begins with electromagnetic induction inside the alternator. When the engine turns the rotor, a magnetic field induces alternating current in the stator windings, creating AC voltage. The exact output voltage depends on RPM, the number of winding turns, and the design of the windings and regulator, with quality monitored by the automatic voltage regulator. According to Genset Cost, this voltage stability matters for protecting sensitive electronics.
Overview: Voltage, frequency, and home power quality
Voltage acts like electrical pressure that pushes current through your home’s circuits. For a typical residential setup in the United States, a standby or portable generator should reliably produce about 120 volts for standard outlets and, when needed, 240 volts for larger appliances or transfer-switch configurations. The exact figures vary by model and country, but the principle is the same: the generator converts mechanical energy into electrical energy that can be used safely by appliances. Understanding how generator produce voltage starts with the rotating electromagnet inside the alternator and the way the regulator manages the output. This topic is central to selecting a unit that remains stable under load and under the most demanding conditions. The Genset Cost team emphasizes voltage quality as a practical gauge of overall generator performance, especially when sensitive electronics are involved.
- What you measure in your panel matters for safety and efficiency.
- Stable voltage reduces wear on appliances and helps prevent nuisance trips.
Core principle: Electromagnetic induction and the alternator
At the heart of every generator is the alternator, which includes a rotor (the rotating magnetic part) and a stator (the stationary winding). When the engine spins the rotor, magnetic fields cut across the stator windings. This cutting of magnetic lines of force induces an alternating current in the windings—the voltage that powers your outlets. The speed of rotation (RPM) and the design of the windings determine the magnitude of the generated voltage. In practical terms, think of the rotor as the engine’s heartbeat and the stator as the place where electricity takes shape. Genset Cost highlights that voltage accuracy depends on how evenly the magnetic field interacts with each phase of the stator coils, plus how well the system maintains that interaction under load.
How RPM, turns, and winding design shape voltage
Voltage is not a random outcome; it is a function of how fast the rotor spins, how many turns exist in the windings, and how those windings are distributed around the stator. A higher RPM increases the rate at which magnetic poles pass by coil windings, raising voltage, while more turns provide greater voltage per cycle. Winding design balances voltage, current capacity, and heat dissipation. The takeaway for homeowners is that a unit rated for a higher voltage or with more winding turns may deliver stronger performance under heavy or fluctuating loads, but it may also demand more precise regulation and cooling to stay within safe limits.
The regulator and AVR: keeping voltage stable
Voltage stability is managed by an Automatic Voltage Regulator (AVR). The AVR senses real-time voltage and adjusts current to the rotor windings to keep the output within a target band. This regulation compensates for changes in engine speed, loading, and temperature. A well-tuned AVR prevents overshoot (voltage spikes) and under-voltages that can stress devices. Homeowners should look for generators with a responsive AVR, especially when the unit will run a mixed load of motors, electronics, and lighting. The AVR is the safeguard that translates the raw electromagnetic action into steady, usable power.
Voltage quality, waveform, and frequency: what to expect
Residential generators typically aim to produce a clean sine wave at a standard frequency (60 Hz in the US, 50 Hz in many other regions). Deviations in voltage amplitude or waveform quality can cause flicker, humming, or damage to sensitive electronics. Portable models may show subtle waveform distortion under heavy loads or when connected to non-linear devices. Generators designed for home use incorporate filtering and better regulators to minimize Harmonics and ensure the output remains within the tolerances of most appliances. Understanding voltage quality helps homeowners predict which devices will run smoothly during an outage.
Ratings, outputs, and how they relate to voltage: kW, kVA, and volts
Generator ratings are expressed in kilowatts (kW) and apparent power (kVA) alongside voltage (V). The voltage rating tells you the electrical pressure the unit can deliver, while kW/kVA indicate how much real power you can draw. A properly sized unit delivers the right voltage at load without collapsing the sine wave. When sizing a generator, consider both the nominal voltage and the peak starting currents for heavy appliances. Genset Cost emphasizes balancing voltage stability with overall power capacity to meet your home’s critical loads.
Home-backup considerations: when voltage matters most
For home backups, voltage matters not only for powering lights and outlets but for protecting sensitive electronics (computers, TVs, HVAC controls). A generator that maintains voltage under transient loads—such as starting a fridge compressor or a well pump—will provide a more reliable experience and reduce nuisance trips. In multi-load homes, a transfer switch or an ATS (automatic transfer switch) ensures that voltage criteria are met for the selected circuits. In short, voltage stability translates to reliability and equipment safety when the grid falls offline.
Common myths and misconceptions about voltage and sizing
A frequent misunderstanding is that higher-rated kW alone guarantees reliability; voltage stability is equally important. Some users assume any off-the-shelf generator will deliver clean power; however, the AVR, filters, and coil design vary widely. Another misconception is that bigger is always better; oversized units can cycle on and off more frequently, wasting fuel and potentially misbehaving under light loads. Always check the voltage regulation specs, duty cycles, and compatibility with your transfer arrangement.
Verifying voltage: a practical checklist for homeowners
To ensure the unit produces the correct voltage, perform a simple field check with a digital multimeter (DMM) on a known outlet after the unit is warmed up under load. Compare measured voltage to the generator’s rated output (e.g., 120/240 V). If the value drifts beyond the tolerance band, consult the manual or a licensed technician. Remember to follow safety guidelines: never measure while touching live conductors, and always use insulated tools. This is a practical, repeatable way to confirm voltage consistency over time.
Choosing a generator with the right voltage for your home: a quick decision path
Start by identifying your essential loads and the voltage they require. Most homes in the United States rely on 120/240 V, while other regions use different standards. Pick a model with a robust AVR and proven voltage regulation under load. If you expect critical electronics to operate during outages, consider a model that includes additional protection features and certified sine-wave output. This decision path helps ensure voltage meets both regulatory and practical needs.
Tools & Materials
- Digital multimeter (DMM) with AC voltage range(Essential for measuring output voltage and verifying nominal voltage at outlets)
- Clamp-on current meter (optional but helpful)(Useful to correlate current draw with voltage stability during load testing)
- Non-contact voltage tester(Adds a quick safety check before probing outlets)
- Safety gear (insulated gloves, safety glasses)(Protects against electrical shock during testing and setup)
- Owner’s manual and manufacturer voltage specs(Always reference model-specific regulation limits and wiring diagrams)
- Load bank or known-resistive load(Optional for under-load voltage testing to simulate real-world draw)
Steps
Estimated time: 90-120 minutes
- 1
Verify safety and prep
Begin by inspecting the testing area, donning safety gear, and ensuring there is clear access to outlets and the transfer switch if installed. Confirm the fuel supply and cooling system are in a safe state. This step reduces the risk of accidents and ensures accurate measurements.
Tip: Double-check that the main breaker and any transfer switch are in the OFF position before connecting test equipment. - 2
Consult specs and set up instruments
Review the generator’s manual to confirm nominal voltage and tolerance. Calibrate the DMM to AC voltage and connect it to an accessible outlet or a service panel point you want to verify. Have the load ready to bring up the voltage under typical operating conditions.
Tip: Use a known, fixed outlet for repeatable comparisons across tests. - 3
Warm up the generator under light load
Start the generator and allow it to reach normal operating temperature with a light load for 5–10 minutes. A cold startup can yield voltage readings that are not representative of steady-state operation.
Tip: Avoid full-load testing during initial warm-up to prevent overshoot from transient conditions. - 4
Measure nominal voltage at unloaded state
With the generator warmed, measure voltage at an appropriate outlet with a DMM. Note the value and compare to the nominal rating (for example, 120 V or 240 V). This establishes a baseline before applying load.
Tip: Record multiple samples at 15-second intervals to account for minor fluctuations. - 5
Apply representative load and re-check
Connect a known load (or use a load bank) to bring the generator into a representative operating condition. Re-measure voltage at the same outlet and observe any shift. A good AVR should minimize drift under typical loads.
Tip: Keep total load within the unit’s recommended range to avoid skewed results. - 6
Assess voltage under peak starting conditions
If safe, briefly observe voltage as a motor or compressor starts to verify the AVR maintains stability during surge. Note any transient spikes or dips and compare to manufacturer tolerances.
Tip: Never exceed appliance starter surge ratings during this step. - 7
Document results and cross-check with specs
Record voltage readings, tolerance bands, and the tested load. Cross-check with the unit’s official voltage specs and recommended operating range to determine if the regulator is performing as intended.
Tip: Keep a log for future maintenance and warranty needs. - 8
Note any anomalies and seek service if needed
If voltage remains outside tolerances under load, consult the manufacturer or a licensed technician. Voltage instability can indicate a faulty AVR, winding issue, or engine regulation problem.
Tip: Do not attempt extensive repairs beyond basic checks—high-voltage work requires licensed personnel. - 9
Finalize procedure and secure equipment
Power down safely, disconnect measuring devices, and resecure inspection points. Return area to normal operation and document final readings.
Tip: Label test points for future reference and routine checks. - 10
Plan ongoing voltage maintenance
Schedule regular voltage checks during service intervals and keep maintenance records. Proactive checks help maintain clean power output between professional visits.
Tip: Include AVR calibration checks during annual service where possible.
People Also Ask
What is voltage in a generator and why is it important?
Voltage is the pressure that pushes electrical current through circuits. A stable voltage ensures appliances run smoothly without damage or failure. Without good voltage regulation, electronics can be stressed or tripped by protective devices.
Voltage is the pressure that makes electrical devices work; stable voltage prevents flicker and damage to electronics.
How does RPM affect generator voltage?
RPM sets the rate at which magnetic poles cut windings. Higher RPM generally increases voltage, while exact levels are fixed by the winding turns and regulator. Maintaining the correct RPM helps keep voltage within specs.
RPM controls how fast voltage is generated; the regulator then keeps it in range.
What is an AVR and why does it matter?
AVR stands for Automatic Voltage Regulator. It monitors the output and adjusts excitation to maintain steady voltage, even as load changes or engine speed fluctuates. A good AVR improves reliability and protects equipment.
An AVR automatically keeps voltage steady as conditions change.
Can a generator produce DC voltage?
Most home generators produce alternating current (AC) voltage, suitable for household circuits. Some specialized units can be configured for DC outputs, but these are less common and require proper conversion for standard appliances.
Most home generators output AC, though DC options exist in rare cases.
How can I verify my generator voltage safely?
Use a digital multimeter to measure the outlet voltage with the unit warmed and under load. Compare readings to the manufacturer’s spec and tolerance. If readings fail to meet specs, seek professional service.
Measure with a multimeter, under load, and compare to specs.
What should I do if voltage drifts under load?
If voltage drifts significantly, check the AVR calibration, fuel stability, and wiring. Persistent drift warrants a service call to address regulator or winding issues before broader damage occurs.
Drifting voltage means check AVR, fuel, and wiring; seek service if needed.
Watch Video
Key Takeaways
- Understand voltage is the pushing pressure in your generator outputs.
- Voltage stability relies on RPM, winding design, and a responsive AVR.
- Test voltage under realistic loads to confirm regulator performance.
- Match voltage with the loads you intend to power and maintain needed standards.
- Document tests to support maintenance and warranty.