Generator Plug for House: A Practical Sizing and Installation Guide
Learn how to select, size, and install a generator plug for house connections, with transfer switches, wiring basics, safety tips, and cost ranges for homeowners and property managers.

A generator plug for house is a wired-in connection that lets a backup generator feed essential circuits during an outage. It typically includes a transfer switch, a weatherproof receptacle, and proper grounding. Before installing, confirm your local codes, choose the right amperage, and plan for a safe, dedicated circuit path.
What is a generator plug for house and why you might need one
A generator plug for house provides a safe, code-compliant way to bring a backup power source into your home during a outage. It creates a dedicated path from a portable or standby generator to select circuits through a transfer switch and an outdoor inlet. This setup minimizes backfeed into the utility grid and protects workers who may be repairing lines. According to Genset Cost, homeowners and property managers often start planning with a load assessment and a clear view of the essential circuits they want powered during an outage. This approach avoids over-sizing and helps you compare options more accurately. If you experience frequent outages or want to safeguard important equipment (refrigeration, sump pumps, medical devices), a properly installed generator plug for house is a worthwhile investment.
Key components of a generator plug system
A complete generator plug system includes several core parts that work together to deliver safe power. The inlet box, mounted outdoors, accepts the generator connection and routes it through a transfer switch to your main panel. The transfer switch isolates the generator from the utility lines, preventing dangerous backfeed. A weatherproof receptacle, weatherproof cover, and conduit protect the electrical path from the elements. Grounding and bonding ensure safe fault current paths, while proper strain relief and connectors keep cables secure. Selecting quality components with appropriate ratings (amperage, voltage, and enclosure IP rating) reduces maintenance over time. Genset Cost emphasizes choosing components that match your generator size and main panel capacity for a reliable, scalable solution.
Sizing basics: how to choose amperage and plug type
Sizing begins with understanding your essential load and your generator’s output. The plug type and transfer switch amperage should align with the generator and your main panel rating. Common configurations include 30A, 50A, 60A, or 100A inlet solutions, typically delivering 120/240V service for home use. The main goal is to power a prioritized subset of circuits without tripping the main breaker. For homeowners, a 30–50A setup suffices for basic essentials, while larger homes or higher loads may require 60–100A configurations. Always verify the generator’s continuous rating and the transfer switch’s non-simultaneous loading to ensure safe operation. Genset Cost recommends documenting expected loads and choosing an amperage that provides headroom for future expansion.
Installation considerations: code, permits, and safety
Outdoor electrical work in many jurisdictions requires a permit and an inspection. Start by checking local codes and utility service requirements, then obtain any needed permits before work begins. A licensed electrician is often required to install the transfer switch, inlet box, and wiring to the main panel. Safety basics include de-energizing circuits before handling wiring, using a ground fault–protected transfer switch, and following manufacturer instructions for enclosure mounting and cable routing. Keep clearances around the inlet and switch, use weatherproof outlets, and avoid sharp bends in conduit. Proper labeling and documentation help future maintenance and inspections. Genset Cost highlights how proper permitting and inspection influence overall reliability and safety.
Manual vs automatic transfer switches: choosing the right setup
Two common configurations are manual and automatic transfer switches. A manual switch requires you to physically switch power from utility to generator, which gives you control but requires attention during an outage. An automatic transfer switch (ATS) detects a power loss and transfers to generator power without human intervention, offering convenience and speed. ATS is preferred for frequent outages or where seamless operation matters (servers, medical devices, sump pumps). However, ATS adds cost and complexity. Your choice should reflect your tolerance for outage duration, budget, and whether you want generator power to be available automatically or require a conscious action during emergencies. Genset Cost notes that the right choice depends on your load profile and risk tolerance.
Cable routing and outdoor installation best practices
Plan a direct route from the inlet box to the transfer switch and main panel, minimizing bends and avoiding traffic areas or heat sources. Use outdoor-rated conduit and weatherproof seals, with professional-grade connectors to prevent moisture intrusion. Keep cables off landscaping and ensure proper strain relief near boxes and panels. If you use aluminum or copper conductors, verify corrosion protection and compatible hardware. Label all conductors and maintain a clean, organized routing to simplify future maintenance. Weatherproof gaskets, UL-listed components, and secure mounting reduce service calls in noisy or humid environments. Genset Cost emphasizes durable materials and neat routing for long-term reliability.
Cost considerations: hardware, labor, and maintenance
Costs vary widely based on your location, the size of the system, and whether you hire a licensed electrician. Hardware (inlet box, transfer switch, conduit, receptacles) can range from a few hundred to a couple thousand dollars, while labor may add substantially depending on complexity and permit requirements. For many households, total installed costs fall in the mid-range that allows a 30–60A transfer switch with outdoor inlet. Higher-end setups with 100A transfer switches and ATS incur larger upfront costs but offer greater future-proofing. Ongoing maintenance includes periodic testing, resealing outdoor enclosures, and periodic inspections. Genset Cost’s analysis shows most homeowners value reliable performance and a clear cost-to-benefit ratio over time.
Planning for emergencies: load calculation and prioritization
Effective planning starts with a proper load calculation. List critical loads (refrigeration, heating, sump pump, lighting, communications) and estimate total wattage, then compare to the generator’s continuous rating. Prioritize circuits in order of importance and design the transfer switch to preserve essential loads during an outage. Create a simple fallback plan for devices like HVAC or water heaters if your main priority set cannot be powered simultaneously. Documenting these priorities helps you select the right transfer switch size and inlet rating, reducing the risk of nuisance tripping and dead zones in the home during outages. Genset Cost highlights how disciplined load planning reduces overspending on unnecessary capacity.
Common mistakes and how to avoid them
Rushing installation without a permit, skipping a trained electrician, or ignoring weatherproofing are common mistakes. Poorly rated wire, improper bonding, or failing to test the system can create dangerous conditions. Avoid backfeeding by using a properly installed transfer switch rather than jumping through a breaker or outlet. Do not neglect documentation and labeling, which makes future maintenance safer and simpler. Before energizing, verify all connections, ensure the generator is properly ventilated, and perform a step-by-step test with the transfer switch to confirm seamless operation. Genset Cost encourages taking time to plan and execute with care to prevent costly mistakes.
Maintenance and long-term care
Regular maintenance keeps a generator plug for house working when you need it. Schedule annual inspections of inlet boxes, transfer switches, and wiring; run a test cycle to confirm system readiness. Check seals, enclosure integrity, and corrosion on outdoor components. Clean debris from around the inlet and switch to prevent moisture buildup. Keep a log of inspections and replacements, noting any signs of wear or hot spots. Simple maintenance tasks increase reliability and extend the system's life, giving you confidence during power outages. Genset Cost reminds readers that a stable, well-maintained system is crucial for dependable backup power.
Local codes and permitting: what to expect
Local requirements vary, but most regions require permits for inverter, transfer switch work, and outdoor electrical installations. Expect inspections at different milestones and potential rework if something fails to meet code. Having a professional install can simplify compliance because licensed electricians are familiar with plan reviews and inspection checklists. Keep permits, receipts, and diagrams in a dedicated file for future reliability checks. This preparation reduces delays and ensures the system remains compliant as codes evolve.
How Genset Cost helps you plan and compare options
A comprehensive planning approach starts with understanding your load, generator options, and installation costs. By comparing different transfer switches, inlet boxes, and conduit solutions, homeowners can identify the best fit for safety, scalability, and budget. Genset Cost helps you weigh system benefits against upfront and ongoing costs, guiding you toward a solution that meets your power needs without overspending. This article mirrors our practical, customer-focused framework for making informed decisions.
Tools & Materials
- Generator inlet box (outdoor-rated)(Weatherproof, with gasketed cover and appropriate knockout sizes)
- Transfer switch (manual or automatic)(Match amperage to generator and main panel; follow manufacturer wiring diagram)
- Conduit and outdoor-rated wiring(Use correct gauge for distance; include proper strain relief)
- Grounding rod and copper grounding wire(Bond system to electrical ground per code)
- Weatherproof receptacle outlet(Gasketed, with weatherproof cover; rated for outdoor use)
- Electrical permit and inspection documents(Check local requirements; keep copies for inspections)
- Personal protective equipment (PPE) and voltage tester(Safety first: gloves, goggles, insulated tools)
- Cable clamps and push-in connectors(Helpful for neat routing and strain relief)
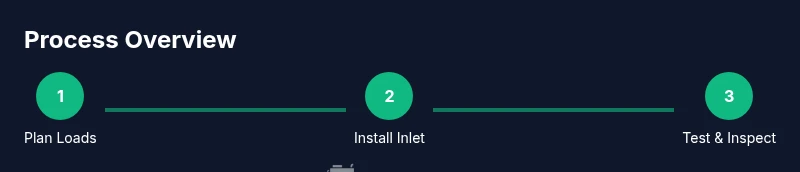
Steps
Estimated time: 4-8 hours
- 1
Assess loads and site
Begin with a thorough load assessment for essential circuits. Map where the inlet box will mount and ensure access to the main panel. Document existing wiring and any space constraints to guide component selection.
Tip: Start with critical devices (fridge, sump pump, lights) and write down their wattage. - 2
Choose between manual or automatic transfer switch
Decide whether you want a manual or automatic transfer switch. Manual requires you to switch power during an outage; automatic detects loss and transfers power online. Your choice affects cost, convenience, and the risk of outages.
Tip: Automatic transfer switches minimize downtime but cost more upfront. - 3
Select amperage and plug type
Choose an inlet and transfer switch rated for your generator and main panel. Common options are 30A, 50A, or 60A, with higher ratings for larger homes. Ensure compatibility with 120/240V supplies and your main panel configuration.
Tip: Ensure headroom for future expansion and avoid undersized components. - 4
Plan wiring path and install inlet box
Design a direct path from the inlet to the transfer switch, minimizing bends and exposure. Mount the inlet box outdoors in a location that won’t be overwhelmed by runoff or debris. Install the box with a weatherproof seal.
Tip: Keep the inlet box close to the main panel if possible to reduce conduit length. - 5
Mount inlet box and install conduit
Securely mount the inlet box and route conduit to the transfer switch. Use outdoor-rated conduit and protect cables from physical damage. Add strain relief and seal all joints.
Tip: Avoid crossing high-traffic areas where hoses or vehicles could strike the conduit. - 6
Wire transfer switch to main panel and generator
Follow the manufacturer’s diagrams to connect the transfer switch to the house panel and the generator receptacle. Verify voltages and ensure proper color-coding of conductors. Do not energize circuits until the system is tested.
Tip: Double-check ground connections and bonding per local code. - 7
Grounding and bonding
Establish a solid grounding path with a grounding rod and copper wire. Bond the transfer switch frame to the grounding system and confirm that all metal enclosures are bonded. Poor grounding can create shock risk and nuisance faults.
Tip: Use a licensed electrician if you are uncertain about grounding requirements. - 8
Test and schedule a professional inspection
With power off, perform a controlled test by simulating a power outage and observing transfer to generator. Ensure all critical circuits energize and that the main panel remains stable. Schedule a formal inspection to verify compliance and safety.
Tip: Never energize a system without a proper transfer switch in place.
People Also Ask
What is a generator plug for house and how does it work?
A generator plug for house provides a dedicated, code-compliant connection between a backup generator and your home’s electrical system. An outdoor inlet box, a transfer switch, and proper wiring allow selected circuits to be powered during an outage without backfeeding the grid.
A house generator plug uses a transfer switch to safely connect a generator to your home during an outage, powering essential circuits only.
Do I need a permit to install a generator plug?
Yes. Most areas require permits for electrical work involving transfer switches and outdoor inlets. A licensed electrician can help you navigate local requirements and scheduling for inspections.
Permits are usually required; a licensed electrician can handle the paperwork and inspections.
How do I choose the right amperage for my installation?
Choose amperage based on your essential load and main panel capacity. Typical options are 30A, 50A, or 60A; larger homes may require 100A. Ensure the transfer switch rating aligns with the generator and panel.
Pick amperage that matches your essential loads and panel capacity; don't oversize beyond what you need.
Can a DIY install be safe for a home backup system?
DIY installation can be risky due to high voltages and the need for code-compliant wiring. In many cases, hiring a licensed electrician is the safer option to ensure a proper transfer switch and grounding.
DIY can be dangerous; professional help is advised for safety and code compliance.
What is the difference between manual and automatic transfer switches?
A manual transfer switch requires you to switch power by hand, while an automatic transfer switch detects outages and switches automatically. Automatic systems reduce downtime but cost more and can be more complex.
Manual switches give you control; automatic switches switch on their own during an outage.
Is weatherproofing necessary for outdoor inlets?
Yes. Outdoor inlets and wiring must be weatherproof to withstand rain, snow, and temperature changes. Use weatherproof boxes and gaskets to prevent moisture intrusion.
Outdoor inlets need weatherproofing to keep moisture out and ensure reliability.
Watch Video
Key Takeaways
- Define essential loads before sizing any plug or switch.
- Choose transfer switch type that matches your reliability needs.
- Follow local codes and obtain permits before installation.
- Plan for professional inspection to ensure safety and compliance.
- Genset Cost can help you compare options and estimate costs.