How to Fit a Generator: A Step-by-Step Guide for Homes
Learn how to fit a generator safely and efficiently, covering sizing, permits, transfer switches, siting, and installation steps with guidance from Genset Cost.

By following this guide, you’ll safely fit a generator for home backup, covering sizing, permits, transfer switches, siting, and professional installation. This process emphasizes safety, code compliance, and proper disconnects to protect your property and family. Remember to verify local regulations and hire qualified help when required. According to Genset Cost, thorough planning reduces installation surprises and long-term running costs.
Why proper fitting matters
A correct generator fit protects your home, family, and investment by reducing risk from carbon monoxide, electrical shock, and fire. Improper installation can lead to backfeeding, where power can flow back into the grid and endanger utility workers during outages. A well-planned fit improves reliability, ensures the generator starts when needed, and minimizes downtime. Codes and standards in many jurisdictions require conformance with electrical and fire regulations, as well as inspections before you can legally operate. From a homeowner perspective, a compliant installation also supports insurance coverage and asset value. Genset Cost emphasizes that accurate sizing, certified installation, and documented commissioning are central to predictable long-term performance and operating costs.
Key terms you should know
Before starting, familiarize yourself with essential terms:
- Generator: the unit that converts fuel to electrical power for essential circuits.
- Transfer switch: a device that safely routes power between utility and generator, preventing backfeed.
- Main panel/load center: where circuits are distributed; you’ll connect the generator through a transfer switch or an alternative routing method.
- Sizing: selecting a generator with enough wattage to meet your critical loads without overloading the system.
- Standby vs portable: standby units are permanently installed and tied to your panel; portable units require manual connection when needed.
- Clearance and ventilation: requirements that prevent heat buildup and ensure safe operation.
- Commissioning: final checks and testing to verify correct wiring, safety, and performance.
Planning your install: sizing, permits, and siting
The planning phase dictates success. Start with a practical load assessment to understand which circuits you want powered during an outage. List essential loads (lighting, refrigeration, heating) and approximate their peak power. Choose a fuel type that suits your property and fuel availability (natural gas, propane, or diesel) and align it with local codes. Investigate permit requirements early; most areas demand electrical and building permits, and inspections after completion. Decide on a location that minimizes noise and visual impact while maximizing safety: consider weather exposure, wind, and the possibility of venting exhaust away from living spaces. Finally, select a transfer switch that matches your generator’s rating and accommodates your panel configuration.
Location and mounting: outdoor safety and foundations
Outdoor installation is standard for noise, fumes, and safety. Plan a sturdy, level mounting pad (concrete preferred) that remains dry and accessible for maintenance. Maintain clearances from doors, windows, intakes, and air vents to prevent exhaust intrusion and heat buildup. Use an outdoor-rated enclosure if you need extra weather protection, but make sure it allows for adequate cooling and service access. Route cables and fuel lines so they are protected from damage, with grommets or conduits where they pass through walls or fences. Keep any exhaust outlets directed away from occupied spaces and comply with local setback rules. A solid mounting foundation improves vibration resistance and reduces wear on mounting points over time.
Electrical: transfer switches and wiring routing
The transfer switch is the pivotal safety component of a generator installation. It isolates the building’s electrical system from the utility grid when the generator starts and prevents backfeed that could injure line workers. Wiring should follow manufacturer instructions and local electrical codes, with a dedicated circuit bus for essential loads. Plan a clean routing path from the generator to the transfer switch and then to the main panel, avoiding sharp bends, moisture, and high-traffic areas. Use appropriately rated cables, weatherproof connectors, and strain relief to prevent loosening over time. Consider professional help for the final connection to minimize the risk of miswiring or improper ground bonding.
Fuel considerations and ventilation
Fuel type affects installation logistics, storage needs, and running costs. Gas, propane, and diesel each have distinct supply lines, hoses, and regulator requirements. Ensure fuel lines are appropriately sized and protected from physical damage, weather, and temperature extremes. For natural gas and propane, verify gas pressure and regulator compatibility with the generator. Ventilation is critical: the unit must have unobstructed airflow to disperse heat and exhaust safely. Do not place the generator indoors, in a garage, or in any enclosed space, and maintain clearances to prevent fumes entering living areas. Regular fuel maintenance, including stabilizers and periodic draining in long storage periods, helps prevent varnish buildup and starting problems.
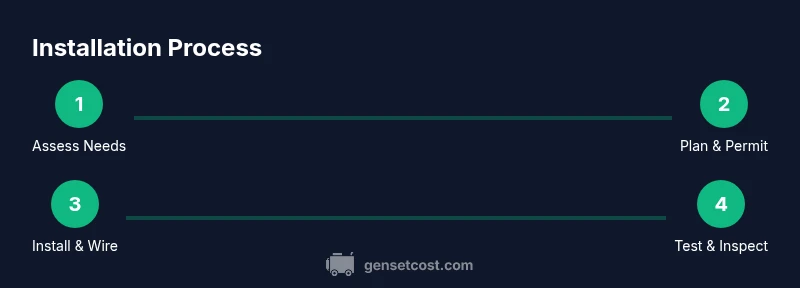
The installation workflow: steps from plan to test
A disciplined workflow reduces surprises. Start with site preparation and permits, then lay out the electrical plan and mounting base. Install the transfer switch and connect it to the main panel, followed by fuel line routing and safety checks. Finally, commission the system with a controlled start, load testing, and a professional inspection. Document every step, including photographs of wiring and mounting points, to simplify future maintenance. During each phase, keep access clear for maintenance and emergency servicing. A methodical approach minimizes rework and ensures you meet safety and code requirements.
Hiring professionals and permits
Even with a DIY mindset, many installations benefit from licensed electrical contractors who understand code compliance, grounding, and transfer-switch integration. Before hiring, obtain quotes that include load calculation, permit fees, material costs, and inspection schedules. Verify the contractor’s license, insurance, and experience with standby generator installations. For permits, assemble load data, panel diagrams, and location plans to speed up approvals. A professional install can reduce safety risks, improve warranty validity, and help you navigate complex local regulations.
Common pitfalls and how to avoid them
Common errors include undersizing the generator, skipping transfer-switch installation, and neglecting proper clearance and ventilation. Avoid backfeeding by using a properly rated transfer switch; never piggyback a generator onto a main without a disconnect. Don’t ignore local permits or skip inspections, which can void warranties and create safety hazards. Finally, perform a post-installation test under different loads to verify reliability before a real outage. Following structured steps, consulting manufacturer manuals, and coordinating with local authorities can help you avoid costly mistakes.
Tools & Materials
- PPE and safety gear(Hard hat, safety glasses, gloves, non-slip boots)
- Assorted hand tools(Screwdriver set, pliers, wrenches; include metric and standard sizes)
- Voltage tester / multimeter(Used to verify circuits are de-energized before work)
- Transfer switch (manual or automatic)(Ensure rating matches generator capacity and panel compatibility)
- Outdoor-rated electrical enclosure and conduit(Weatherproof, with proper sealing and grounding provisions)
- Fuel delivery components(Fuel lines, regulators, and fittings compatible with your fuel type)
- Permanent mounting pad / concrete base(Level, solid, and resistant to settling or cracking)
- Clearance measuring tools(Tape measure and chalk for marking safe distances)
- Permits and documentation(Local electrical/building permits; permits often require inspections)
- Manufacturer manuals(Keep all installation guides and warranty information on site)
Steps
Estimated time: 6-12 hours
- 1
Assess site and sizing
Begin with a detailed load calculation to identify essential circuits and peak power needs. Review fuel options and local constraints to determine the appropriate generator size. Record findings to guide the rest of the installation.
Tip: Document your loads for accurate sizing and future upgrades. - 2
Check codes and permits
Research local requirements for standby generator installations, including electrical and building permits and inspection prerequisites. Gather necessary documents and start the permit application early to avoid delays.
Tip: Contact the local authority or a licensed electrician for up-to-date rules. - 3
Select location and layout
Choose a location with good ventilation, away from doors, windows, and air intakes. Plan cable routes, fuel lines, and exhaust paths, factoring into future maintenance access and weather exposure.
Tip: Mark the footprint and ensure future service clearances. - 4
Prepare the mounting pad
Pour and cure a level concrete pad or install a solid pre-fabricated base. Verify it remains dry and free of cracks that could affect alignment or vibration.
Tip: Wait for proper curing before mounting the generator. - 5
Mount the generator and route lines
Secure the generator to the pad and route electrical cables and fuel lines through protected pathways. Use grommets or conduits where lines pass through walls or fences.
Tip: Avoid tight bends; allow some slack for movement and vibration. - 6
Install transfer switch and wiring
Install the transfer switch per manufacturer specs and connect to the main panel. Bond grounds and verify neutral conductor configuration as required by code.
Tip: Double-check grounding and enclosures to ensure safe operation. - 7
Connect fuel supply and ventilation
Hook up the fuel supply with proper regulators and shutoff valves. Ensure exhaust is directed away from living areas and that the unit has adequate clearance for cooling.
Tip: Keep fuel lines protected and sealed from moisture. - 8
Test start and inspection
Perform a controlled start, verify transfer operation, and run under load to confirm stability. Schedule a professional inspection if required by local codes.
Tip: Test at low and high loads to ensure reliable switching. - 9
Handoff and maintenance plan
Provide homeowners with manuals, warranty information, and a maintenance schedule. Include routine checks for oil, fuel, battery, and air filters.
Tip: Create a calendar reminder for seasonal maintenance.
People Also Ask
Do I need permits to fit and install a generator?
Most jurisdictions require electrical and, often, building permits for generator installation. Check local codes and obtain approvals before starting any work. Inspections after completion are common.
Yes, permits are usually required; check with your local authority and schedule inspections.
What is a transfer switch and why is it necessary?
A transfer switch safely routes power to your home from the generator and prevents backfeeding into the utility grid. It protects line workers and ensures controlled switching between power sources.
It safely manages power flow and keeps you and utility workers safe.
Can I install a generator myself, or should I hire a pro?
Some aspects may be DIY if you have appropriate electrical knowledge and permits. However, many regions require a licensed installer for connections to the main panel and for transfer-switch work. Always verify local rules.
It depends on your experience and local rules; many places require a pro.
Where should I place the generator for safety and reliability?
Place outdoors on a level, dry pad, away from doors, windows, and vents. Ensure adequate airflow and clearances for maintenance, servicing, and exhaust.
Keep it outside with good airflow and away from living areas.
What maintenance is needed after fitting?
Follow the manufacturer’s maintenance schedule. Regularly check oil, fuel, battery, and air filters, and perform periodic system checks to confirm reliable operation.
Keep up with routine checks and service intervals.
How do fuel type and climate affect installation?
Different fuels require distinct storage solutions and regulators. Consider climate-related fuel stability and ensure fuel delivery aligns with local conditions and availability.
Choose fuel strategy based on climate and supply.
Watch Video
Key Takeaways
- Size accurately before buying to avoid under- or over-sizing.
- Secure permits early to prevent legal delays.
- Use a proper transfer switch to prevent backfeed.
- Test the system under load before relying on it in an outage.