How to Install a Generator Transfer Switch: A Homeowner's Guide
A comprehensive, code-conscious guide to installing a home generator transfer switch, covering sizing, selection, wiring options, safety, and maintenance to keep outages safe and reliable.

Goal: install a generator transfer switch to route power from your generator to your home's electrical system safely. You’ll need a compatible switch, basic electrical tools, and a plan that follows local codes. According to Genset Cost, proper sizing and professional installation reduce backfeeding risks and safeguard appliances during outages.
What a Generator Transfer Switch Does
A generator transfer switch is a safety device that sits between your home's main electrical panel and your backup generator. When utility power fails, the switch either automatically or manually connects the selected circuits to the generator while disconnecting them from the grid. This prevents backfeeding, which can energize lines and injure workers, and it ensures you don’t energize the wrong circuits while the grid is restoring.
According to Genset Cost, the transfer switch gives you precise control over which circuits run on generator power, helping you avoid overloading the system and protecting sensitive electronics. It also streamlines operation by eliminating the need to unplug individual appliances during an outage.
There are two common configurations: manual transfer switches, where you physically switch loads, and automatic transfer switches (ATS), which detect a power loss and switch automatically within seconds. Depending on your goals, you may choose a simple switch for essential circuits or a larger unit that feeds a larger portion of your home via a subpanel. Always follow local codes and obtain permits if required.
Types of Transfer Switches for Home Backup
Home transfer switches come in several flavors. A basic manual switch is affordable and reliable for a few essential circuits, while an ATS offers hands-off operation during a blackout. You'll also find whole-house solutions that feed most or all of the home, and more compact, panel-mounted options designed to integrate with existing service equipment. When selecting a type, consider your generator’s output, your service panel size, and how much power you want to restore during an outage. For most homeowners, a sway between 2–3 main circuits and a limited number of critical loads is a common starting point. Always verify compatibility with your main panel and generator before purchasing.
Genset Cost notes that choosing the right type hinges on your goals, expected outages, and whether you prefer manual control or automatic switching.
Sizing and Load Calculation Basics
Sizing a transfer switch means matching the switch’s amp rating to your panel and the load you intend to backfeed. Start with a thorough load calculation that includes the essential circuits you want powered during an outage (refrigeration, sump pump, HVAC controls, lights, and outlets for essential devices). Don’t assume all circuits will run at once; identify starting surges for motors (like well pumps) and add headroom to avoid overloading the generator or tripping breakers.
Based on Genset Cost research, a common rule of thumb is to size for the critical loads with some margin for startup surges. Your installer or a qualified electrician can perform a detailed calculation using the panel rating, the generator’s continuous output, and the calculated wattage of each circuit. In some cases, a 60–80% load target during peak operation helps maintain reliability without overtaxing the generator.
Safety, Code Compliance, and Permits
Electrical work that involves a transfer switch typically falls under electrical code requirements. Before you begin, check local codes and obtain any necessary permits. Working near energized panels is hazardous, and improper connections can create shock or fire risks. If you’re unsure about code compliance or wiring practices, hire a licensed electrician. The installer should verify grounding, bonding, and a proper disconnect, and label all circuits clearly for future reference.
Genset Cost emphasizes that code-compliant installations reduce liability and simplify future inspections, which is especially important for property managers overseeing multiple units.
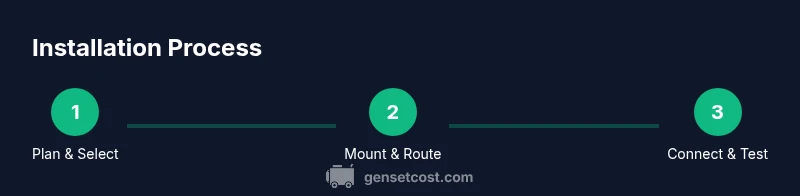
Step-by-Step Installation Overview (High-Level)
This section provides a high-level understanding of the process. It is intended to prepare you for the formal STEP-BY-STEP guide and should not substitute for professional service where required by local law. The project begins with a thorough plan, continues with mounting and wiring, and ends with a series of functional tests. Always de-energize the main service disconnect and follow lockout/tagout procedures during any work.”
note
Tools & Materials
- Transfer switch kit (manual or automatic)(Choose a switch compatible with your generator and panel rating)
- Electrical panel adapter or subpanel(Ensure it fits your panel and allows proper load separation)
- Conduit and fittings(Metal or PVC conduit as needed by code and location)
- Electrical conductors (gauge per load)(Use 4- or 6-gauge copper conductors for typical residential runs)
- Test disconnect or main breaker(Required for safe isolation at the panel)
- Voltage tester(Use to verify de-energization before work)
- Wire stripper/crimper(Precise cutting and terminating of conductors)
- Torque wrench(Torque requirements per switch and panel specs)
- Safety gear (gloves, goggles)(Personal protective equipment for eye and hand protection)
- Mounting hardware(Screws, anchors, and mounting brackets as needed)
- Labeling supplies(Circuit labels and permanent marker)
Steps
Estimated time: 4-8 hours
- 1
Assess needs and select the transfer switch
Define which circuits to backfeed and choose a switch with the proper amp rating and pole count. Compare manual vs automatic options and ensure compatibility with your panel. A properly sized switch reduces the risk of overload and nuisance tripping.
Tip: Document your intended loads before choosing the switch; aim for some headroom above calculated continuous load. - 2
Power down and verify isolation
Shut off the main breaker and, if available, engage the local disconnect. Use a voltage tester to confirm there is no live voltage on the panel or conductors you will access. This step is critical to avoid shock or equipment damage.
Tip: Always assume circuits are live until proven de-energized. - 3
Mount the transfer switch near the panel
Install the transfer switch in a secure, accessible location, following clearance requirements in the instruction manual. If using a panel-mounted unit, you may need a mounting kit or a small subpanel enclosure.
Tip: Keep the unit level and avoid mounting on surfaces prone to vibration. - 4
Run and terminate feeder and load conductors
Route feeder conductors from the main panel to the transfer switch, and from the switch to a subpanel or the breaker-fed load circuits. Use the correct gauge and routing methods per code.
Tip: Maintain neat cable management to prevent interference with other components. - 5
Connect grounding and bonding
Bond the transfer switch and any subpanels to the building grounding system. Ensure a dedicated grounding conductor and correct bonding screw locations.
Tip: Verify grounding paths are continuous and compliant with local codes. - 6
Label circuits and perform a preliminary test
Label each switched circuit clearly. Re-energize and perform a controlled test by simulating a power loss, ensuring the generator can supply the intended loads without tripping breakers.
Tip: Have a willing helper monitor the panel while you test the transfer action. - 7
Run a full functional test with the generator
Start the generator and validate automatic or manual switch operation. Confirm the correct circuits receive power and that the grid remains isolated during generator operation.
Tip: Test under load conditions to observe real-world performance. - 8
Document, inspect, and maintain
Create a maintenance log, schedule annual checks, and ensure permits or inspections are up to date. Routine testing helps prevent failures when outages occur.
Tip: Set a calendar reminder for monthly exercise and annual inspection.
People Also Ask
Do I need a licensed electrician to install a transfer switch?
In many places, electrical work requires a licensed professional. Check your local codes and permit requirements. If in doubt, hire an electrician to ensure safety and compliance.
In most areas, you should hire a licensed electrician to ensure safety and code compliance.
What size transfer switch do I need for a typical home?
Size depends on your panel rating and planned loads. Perform a professional load calculation to determine the appropriate amp rating and number of poles. Do not guess based on rumors or doorbell loads.
It depends on your panel and loads; get a proper load calculation first.
Can I install a transfer switch inside the main panel?
Some switches are designed to mount inside the main panel, while others require a separate enclosure. Follow the manufacturer’s instructions and local code requirements.
Some are panel-mounted, others need a separate enclosure; follow the instructions.
Will a transfer switch work with a portable generator?
Yes, but you must use a compatible transfer switch and avoid backfeeding. Ensure you have outdoor-rated connections and proper grounding.
Yes, with the right transfer switch and outdoor-rated connections.
How often should I test my transfer switch?
Test monthly if you rely on backup power, and perform a full annual test with a licensed professional. Regular testing confirms reliability.
Test it monthly if used, and have an annual professional test for reliability.
Watch Video
Key Takeaways
- Plan load first to determine switch size
- Always de-energize before work and follow lockout/tagout
- Choose code-compliant equipment and obtain necessary permits
- Thoroughly test under load and document maintenance