Fix Generator: A Practical Home Backup Repair Guide
Learn to diagnose, troubleshoot, and safely fix a non-starting generator. Practical steps, safety guidelines, maintenance tips, and when to call a pro for reliable home backup power.

Quick answer: You can diagnose and fix a non-starting generator by following a structured troubleshooting process, including safety checks, fuel and battery verification, air filter and spark plug inspection, and component tests. This guide covers steps you can perform, common failure modes, and when to call a pro. You’ll save time and reduce downtime for home backup power.
Why fixing generator reliability matters
Routine maintenance and timely fixes keep essential power available during outages. A generator that won’t start or runs poorly can leave a home without heat, cooling, or power for appliances. Fix generator issues promptly to avoid expensive damage and to extend the life of your unit. According to Genset Cost, a methodical approach to diagnosing generator issues can save homeowners time and money. For homeowners and property managers, prioritizing reliability reduces downtime, supports occupant comfort, and helps keep budgets predictable during outages or peak demand seasons.
Common causes of generator failure
Most failures fall into a few predictable categories: fuel problems (stale gas, varnish, clogged carburetors), a weak or dead battery, fouled or worn spark plugs, dirty or restricted air filters, and worn belts or failing alternators. Ethanol-blended fuels can degrade quickly, leaving gum and varnish that clog jets. An idle generator also suffers from battery self-discharge and oil degradation. When you fix generator issues, you’ll often discover that addressing a single subsystem (fuel or ignition) resolves multiple symptoms at once.
Safety first: essential precautions before troubleshooting
Before touching any component, ensure you’re in a well-ventilated area and wearing eye protection and gloves. Power down the unit, switch off the fuel valve where applicable, and disconnect the battery if the setup allows it. Allow the system to cool and keep sparks and flames away from fuel residues. Never work near running motors or hot exhaust. If you’re unsure, pause and consult the owner’s manual to avoid dangerous conditions. These precautions reduce the risk of electrical shock, fuel ignition, and carbon monoxide exposure during diagnostics.
Diagnostic approach: non-destructive checks
Start with the basics: check the fuel level and fuel quality, drain stale fuel if needed, and verify battery voltage with a multimeter. Inspect the air intake and replace a dirty air filter. Remove and inspect a spark plug for wear or fouling, replacing it if needed. Check wiring connections for looseness, corrosion, or damaged insulation. If the unit has an electronic control module, look for loose ground connections and test basic sensor circuits. Avoid disassembly of carburetors or sealed components unless you’re confident in doing so; many fixes can be achieved with cleaning and tightening.
Pre-troubleshooting checklist you can perform
- Verify the unit is in a safe, ventilated area and that ignition sources are removed.
- Confirm fuel is fresh and the fuel valve is open during start attempts.
- Check the battery and wiring for corrosion or loose terminals.
- Inspect the air filter and spark plug; replace if worn or dirty.
- Look for obvious leaks or damaged hoses and tighten clamps as needed.
- Review the owner’s manual for model-specific procedures and torque specs.
This checklist helps you avoid unnecessary part replacements and focuses on the most likely culprits.
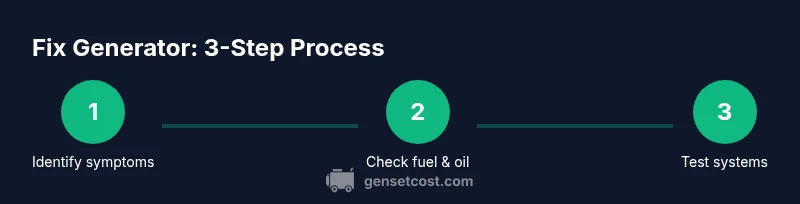
Step-by-step troubleshooting overview
This section outlines the logical sequence used to diagnose and fix generator issues without jumping to conclusions. The steps emphasize safety, verification, and documentation. You’ll move from high-level checks (fuel, battery, air, ignition) to targeted tests (voltage, continuity, and component function). The goal is to identify root causes efficiently and minimize downtime while preserving the unit’s longevity. Each action builds on the previous one to avoid wasted effort or irreversible adjustments.
Maintenance habits to prevent future outages
Prevention is cheaper than repair. Establish a routine that includes periodic fuel stabilization, oil changes on schedule, air filter maintenance, and battery testing every 3–6 months of non-use. Run your generator under load at least once a season to ensure reliability. Keep a service log to track parts replacements, saw-tooth voltage patterns, or unusual noises. Proper storage and seasonal checks reduce corrosion, varnish formation, and fuel deterioration, helping you fix generator issues before they become outages.
When to call a professional and what to expect
If you encounter complex electrical issues, persistent hard starts, or recurring faults after basic checks, it’s time to call a licensed technician. A pro can perform advanced diagnostics, carburetor servicing, and electrical testing with specialized tools. Expect a technician to review safety steps, test real-world performance, and provide a written report with recommended parts and a maintenance plan. The Genset Cost team emphasizes that professional service is prudent for high-risk repairs or warranty considerations.
Budgeting for repairs and upkeep
Repair costs vary with model, parts availability, and labor, but you can estimate by category: basic maintenance (oil, air filter, spark plug) is usually lower than carburetor or ignition system work. Use a simple annual maintenance budget to cover routine service visits and unexpected repairs. Genset Cost analysis shows that budgeting for preventive maintenance can significantly reduce total ownership costs by avoiding major overhauls and downtime during outages.
Tools & Materials
- Digital multimeter(Measures voltage, resistance, continuity; pick a range suitable for automotive/generator circuits)
- Spark plug wrench(For inspecting/cleaning spark plugs; ensure correct size (e.g., 13/16 inch))
- Screwdriver set (flat and Phillips)(For panel access and carburetor adjustments)
- Wrench or socket set(Common sizes 8-19 mm; used to remove panels and components)
- Fuel stabilizer(Prevents gumming if the generator has been sitting; add to fuel tank)
- Clean rags and a small brush(For cleaning surfaces and removing debris)
- Gasoline-safe container(For safely draining old fuel if needed)
- Owner’s manual or service guide(Reference for torque specs and part locations)
Steps
Estimated time: 90-120 minutes
- 1
Power down and secure the unit
Turn off the generator, shut the fuel valve, and disconnect the battery if applicable. Allow the system to cool and remove any spark or flame sources. This first step prevents accidental starts or fuel leaks during inspection.
Tip: Always disconnect the battery first to avoid sparks while testing circuits. - 2
Check fuel system and battery
Verify fuel level and quality; drain stale fuel and replace with fresh fuel if necessary. Test the battery voltage with a multimeter; replace if below the recommended level. These checks resolve many 'won’t start' issues.
Tip: If fuel smells sour or varnish is evident, clean or replace the carburetor jets after draining old fuel. - 3
Inspect air filter and spark plug
Remove the air filter and inspect for dirt or damage; replace if obstructed. Remove and examine the spark plug for wear or fouling; clean or replace as needed. A clean air-fuel mix improves starting reliability.
Tip: Ground the spark plug to prevent accidental shock while inspecting. - 4
Test ignition and wiring connections
Check ignition wires for cracks or loose connections; test continuity with a multimeter where applicable. Inspect the starter solenoid and battery cables for corrosion. Replace damaged wiring before attempting to start.
Tip: Do not bypass safety interlocks; faulty interlocks can cause dangerous starts. - 5
Check for fault codes and perform light diagnostics
If the generator features an LCD or diagnostic port, retrieve fault codes and consult the manual for meanings. Perform basic voltage checks at the output to confirm if the alternator or control board is functioning.
Tip: Record any codes and look them up in the service guide. - 6
Perform targeted cleaning or component replacement
Clean carburetor jets, replace a worn spark plug, and reseat connectors as needed. Avoid over-tightening carburetor screws; use manufacturer torque specs if available.
Tip: Use fresh gaskets and ensure seals are intact when reassembling. - 7
Reassemble, refuel, and test run
Reinstall panels, reconnect the battery, and add fresh fuel with stabilizer. Start the unit and run under load for 10–15 minutes. Observe for abnormal noises, smoke, or leaks, and stop if anything unusual appears.
Tip: Run outdoors or in a well-ventilated space during the test. - 8
Document results and plan maintenance
Log actions taken, parts replaced, and test results. Schedule routine maintenance and set reminders to check fuel, oil, air filters, and battery every 3–6 months.
Tip: Keep a copy of the service log with the generator’s manual.
People Also Ask
What are the first steps to fix a generator that won't start?
Begin with safety: power down, disconnect the battery if possible, and ventilate the area. Then verify fuel, battery, and ignition components before moving to deeper diagnostics.
First, power down and ventilate the area, then check fuel, battery, and ignition components. If the issue isn’t obvious, consult the step-by-step guide for deeper checks.
Is it safe to troubleshoot a generator by myself?
DIY troubleshooting is safe if you follow safety guidelines, use proper tools, and avoid disassembly of sealed or high-voltage components. If in doubt, contact a licensed technician.
DIY is okay if you follow safety steps and avoid risky electrical work. When unsure, call a professional.
How often should I service my generator?
Regular maintenance is typically every 6–12 months or after a set number of runtime hours, depending on the model and usage. Check the owner’s manual for model-specific guidance.
Most generators benefit from service every six to twelve months or after certain hours of use, per your manual.
Will DIY fixes void my warranty?
Some warranties require professional service for certain repairs. Review the warranty terms and consider manufacturer guidance before DIY repairs.
DIY repairs can affect warranty. Check your warranty terms before starting major fixes.
What maintenance reduces future outages?
Regular oil changes, fuel stabilization, air-filter cleaning, battery checks, and seasonal test runs dramatically reduce the chance of unexpected outages.
Regular oil, fuel, air-filter, and battery upkeep with seasonal test runs lowers outage risk.
Watch Video
Key Takeaways
- Identify the root cause before replacing parts
- Verify safety steps before touching components
- Keep fuel clean and fresh for reliable starts
- Test run after repair to confirm operation
- Schedule regular maintenance to prevent failures