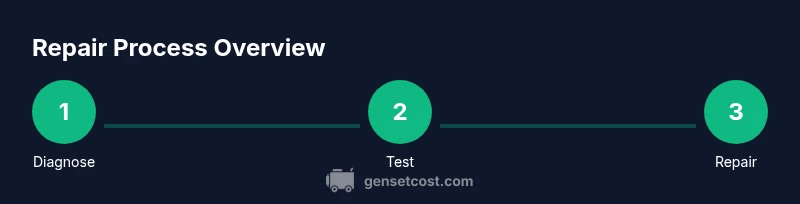
Generac Generator Repair: A Homeowner's Step-by-Step Guide
A practical, safety-focused guide to diagnosing, testing, and repairing Generac generators for homeowners and property managers. Learn when DIY is appropriate, common failure modes, and how to work with pros, with guidance from Genset Cost.

This guide helps homeowners safely perform generac generator repair tasks, from diagnosing common faults to verifying output during a power outage. You’ll learn when DIY is appropriate and when to call a pro, plus strategies to minimize downtime and repair costs, all backed by Genset Cost guidance.
Understanding Generac Generators: Core Concepts
Generac generators are a popular choice for home backup power, offering standby and portable options tailored to different load needs. Before diving into repair work, it helps to understand the basics: what a generator does, how it ties into your home's electrical system, and the role of important subsystems like the transfer switch, battery, fuel supply, and control board. When you encounter a fault, the first step is to confirm whether the symptom occurs during an outage, with the unit running, or when idle. For homeowners researching generac generator repair, knowledge of the unit’s lifecycle—from installation to routine maintenance—reduces downtime and helps you separate simple fixes from complex problems. Always consult the owner's manual for model-specific details and safety guidelines. The Genset Cost team emphasizes that proper maintenance is the best defense against frequent failures and costly repairs.
Diagnosing Common Problems Before You Repair
Common problems in Generac units during outages include failure to start, no power transfer, audible clicks or whining, and abnormal surges or voltage fluctuations. Start with the simplest culprits: check the fuel supply (for gas-powered units), ensure the battery is charged, and inspect the air filters and oil levels. If the unit won’t boot, review fault codes on the control panel or app, which can point to a software glitch, a sensor fault, or a failed relay. In many cases, intermittent issues trace back to a loose connection or corroded terminal. Document symptoms with timestamps, note any recent maintenance, and compare against the model’s fault code guide. Accurate diagnosis saves time and reduces the risk of unnecessary component replacements, a principle echoed by Genset Cost analyses.
Safety Rules and Preparation for DIY Repair
Safety is the foundation of any repair work on electrical equipment, especially when a standby generator lives in or near your home. Always disconnect the battery and shut off the main breaker before opening the panel. Wear eye protection, gloves, and non-conductive footwear. Work in a well-ventilated area to prevent inhalation of exhaust fumes, and never work on a running engine or while fuel is present. If you smell fuel, stop and investigate for leaks. Never bypass safety features or modify electrical wiring beyond the manufacturer’s guidelines. If you’re unsure at any point, consult a qualified technician. Genset Cost advocates a cautious approach: DIY can be appropriate for basic maintenance and simple inspections, but avoid repairs that risk shock, fire, or carbon monoxide exposure.
Tools and Materials for Generac Generator Repair
To tackle most DIY diagnostic tasks and basic repairs, assemble a core toolkit well before you start. Include a multimeter, insulated screwdrivers, a metric and SAE socket set, needle-nose pliers, a torque wrench, a flashlight, and appropriate PPE (gloves and eye protection). Have spare fuses or relays and a manufacturer-approved service manual on hand. For fuel-powered units, keep fuel-safe safety equipment and an approved fuel container ready. If you’re unsure about compatibility, consult the manual or a pro to avoid damaging delicate control boards or sensors. This preparation helps you work efficiently and reduces the chance of creating new issues during the repair.
Visual Inspection and Electrical Checks
A thorough visual inspection often reveals obvious issues without disassembly. Look for loose connections at the transfer switch, burned fuses, corroded battery terminals, and cracked wiring insulation. Inspect the air filter housing for obstructions that could starve the engine of air. When the unit is safe to touch, measure battery voltage and read key indicators on the control panel. A multimeter can verify continuity in fuses and relays and help assess starter solenoids. Document any corrosion or discoloration on connectors and harnesses. If you notice signs of gas leaks, stop immediately and ventilate the area before continuing. These checks form the foundation of a proper diagnosis and help you decide whether a component needs replacement.
Electrical Testing and Measuring for Generac Repair
Testing extends beyond a visual check. With the battery disconnected, you can safely test DC circuits and relays, then reattach power to test AC output and transfer switch operation. Use a multimeter to check voltage at the generator’s output terminals and across the battery to confirm charging status. Fault codes displayed on the control panel guide you to specific subsystems such as the ignition, fuel system, or alternator. When testing, keep a log of measurements and compare them against the model’s service manual tolerances. If readings fall outside specification, it’s often an early sign that a component is failing and needs replacement rather than a temporary fix. Always re-check connections after any tests to rule out contact resistance as a culprit.
Replacing Faulty Components: Filters, Relays, and More
Replacements are sometimes straightforward, but many Generac units benefit from replacing worn components to restore reliability. Typical items include air and fuel filters, spark plugs (where applicable), relays, fuses, and worn belts. If the control board or sensor shows persistent faults after testing, consider a board-level repair or replacement, which should be performed by a technician with board-level experience. Before purchasing parts, confirm compatibility with your exact model, serial number, and firmware revision. Keep maintenance logs and warranty documents handy, as some repairs may be covered or require authorized parts to maintain warranty validity. Rely on OEM parts when possible to ensure fit and function.
Step-by-Step Diagnostic Process
A structured diagnostic approach reduces needless disassembly and accelerates repair. Start with safety checks and a baseline test of power availability during a simulated outage. Next, verify fuel, oil, and battery health; ensure connections to the transfer switch are secure. Read fault codes and document outcomes before attempting component swaps. After each step, test the system’s response to confirm whether the issue is resolved or if further investigation is needed. When you reach a stubborn fault, isolate subsystems (ignition, fuel, electrical, cooling) and re-test methodically. The goal is to identify the minimum viable repair that restores reliable operation without introducing new problems.
When to Call a Pro and How to Budget
Some Generac generator repairs require licensed electrical work or fuel-system expertise. If the fault involves high-voltage wiring, transfer switches, or suspected gas leaks, contact a licensed technician promptly. Estimating costs without a professional assessment can be misleading, as diagnostics, parts, and labor vary by model and the severity of the fault. A pro can offer a precise quote and timeline, and may advise on warranty implications. For homeowners, factor in potential downtime costs during outages and the value of a preventive maintenance plan to reduce future repair frequency. Genset Cost recommends documenting all findings and maintaining a predictable maintenance budget to avoid surprise expenses.
Maintenance After Repair: Keeping Your System Reliable
Post-repair maintenance is essential for long-term reliability. Schedule regular inspections, replace consumables on a manufacturer-recommended timeline, and verify software/firmware updates if applicable. Keep the battery in good health by performing annual load testing and ensuring proper coolant levels where required. Clean, dry environments reduce corrosion risk, especially around terminals and control boards. Create a maintenance calendar that aligns with your power usage patterns and local climate. By treating maintenance as an ongoing process rather than a one-off event, you protect your investment and improve readiness for future outages.
Cost-Saving Tips and Realistic Expectations
Repairing a Generac generator can be cost-effective if you focus on preventative maintenance and early problem detection. Prioritize keeping fuel systems clean, replacing air and fuel filters, and addressing loose connections promptly. When DIY is appropriate, work within your skill level and avoid risky modifications that could damage safety features. Expect costs to scale with model complexity, and factor in diagnostic time, parts, and potential service call charges if you opt for a pro. While DIY remedies can resolve many issues, don’t hesitate to seek professional help for complex electrical faults, unusual fault codes, or if a repair would void the warranty. Your goal is reliability and peace of mind, not chasing a quick, brittle fix.
Tools & Materials
- Multimeter (DC and AC)(CAT III rated; verify battery and generator voltage specs)
- Insulated screwdrivers (set)(Flat and Phillips; insulated for electrical work)
- Socket set (metric and SAE)(Common sizes 6-14mm or 1/4-9/16 in)
- Wrench set (adjustable and fixed)(Open- and box-end wrenches)
- Pliers (needle-nose, slip-jjoint)(For crimping and grip in tight spaces)
- Torque wrench(Important for reassembly to spec)
- Safety gear (gloves, goggles)(NFPA-compliant PPE; chemical-resistant gloves if handling fuel)
- Owner's/service manual for your Generac model(Model- and serial-specific guidance)
- spare fuses/relays compatible with Generac units(Keep on hand for quick swaps)
- Clean rags and contact cleaner(For safe cleaning of terminals and connectors)
Steps
Estimated time: 2-4 hours
- 1
Prepare and secure the work area
Power down the generator, disconnect the battery, and ensure the area is well-ventilated and free of ignition sources. Gather all tools and review the manual to confirm model-specific safety requirements. This ensures you can work confidently without risking shock or fire.
Tip: Double-check that all power sources are isolated before touching electrical components. - 2
Perform a visual inspection
Open the generator housing only after ensuring it cannot start or energize. Look for frayed wires, loose connectors, corrosion, oil leaks, or fuel contamination. Document any issues with photos for reference during repairs.
Tip: Pay attention to the transfer switch area; many outages are transfer-related rather than engine issues. - 3
Check the battery and charging system
Test battery voltage, inspect terminals for corrosion, and confirm the charger is delivering proper current. A weak battery is a common cause of no-start conditions and intermittent operation.
Tip: Clean terminals with a mild cleaner and re-tighten to manufacturer torque specs. - 4
Inspect fuel system and filters
Examine visible fuel lines for cracks or leaks, check fuel quality, and replace clogged or saturated filters. Poor fuel supply is a frequent root cause of hard starts or stalling.
Tip: Keep a backup supply of fresh, labeled fuel; avoid old gasoline that degrades over time. - 5
Test electrical circuits and relays
Using the multimeter, verify continuity through relays and inspect for voltage drop at critical points. Faulty relays or compromised wiring often manifest as delayed or failed starts.
Tip: If you suspect a relay, swap with a known-good unit only if you have a spare and model compatibility. - 6
Verify control panel and firmware
Check for fault codes on the controller and ensure firmware is up to date per the manual. Software glitches can mimic hardware faults and mislead diagnostics.
Tip: Record the fault codes before clearing them to track recurrence. - 7
Replace worn components
Swap out filters, worn belts, fuses, or relays as indicated by the diagnostic results. Replacing one worn item can restore performance without a full overhaul.
Tip: Use OEM or manufacturer-approved parts to maintain warranty and reliability. - 8
Reassemble and perform a test run
Secure all panels, reconnect the battery, and perform a controlled test run. Confirm proper starting, stable idle, and correct battery charging. Observe the transfer switch during simulated load to ensure seamless power transfer.
Tip: Never skip the test run after a repair; it confirms the repair’s success. - 9
Document results and cleanup
Record all measurements, parts replaced, and test outcomes. Clean the work area, dispose of waste properly, and store spare parts for future use.
Tip: Maintain a maintenance log for your Generac unit for warranty compliance. - 10
When to escalate to a professional
If you encounter high-voltage wiring, control board failures, gas leaks, or persistent faults after steps above, contact a licensed technician. These issues can be hazardous and may require specialized equipment.
Tip: A professional evaluation can prevent costly mistakes and safeguard your household.
People Also Ask
What is generac generator repair?
Generac generator repair involves diagnosing issues, replacing worn components, and restoring proper operation of Generac standby or portable generators. It may include electrical checks, fuel system service, and control board updates. Always start with safety checks and manufacturer guidelines.
Generac generator repair means diagnosing and fixing issues so the generator runs reliably again, following safety and manufacturer guidelines.
Can I perform DIY repairs on a standby generator?
DIY repairs are suitable for simple maintenance and non-electrical tasks. For anything involving high voltage, gas lines, or the transfer switch, consider a licensed technician. Always consult the manual and follow local code requirements.
DIY is okay for basic things, but for electrical or gas-related repairs, hire a pro and follow the manual.
Is it safe to repair live electrical connections?
No. Do not work on live circuits. Always disconnect power sources and verify de-energization before touching wires or components. Wear appropriate PPE and work in a dry, well-ventilated area.
Never work on live electrical connections. Disconnect power and wear safety gear.
Do fault codes help identify issues?
Yes. Fault codes point to specific subsystems, such as ignition, fuel, or the controller. Cross-reference codes with the model manual and document codes before clearing them to avoid losing diagnostic context.
Fault codes guide you to the likely faulty subsystem; use the manual to interpret them.
How often should I service a Generac generator?
Follow the manufacturer’s recommended maintenance schedule, typically including annual inspections and periodic battery, filter, and fluid checks. Regular service reduces unexpected failures and extends service life.
Follow the manual’s maintenance schedule; regular service prevents surprises.
When should I call a professional?
Call a professional for high-voltage work, electrical code compliance issues, gas leaks, transfer-switch failures, or persistent fault codes after basic diagnostics. A licensed technician ensures safety and proper warranty handling.
If the fault involves high voltage or gas, or remains after DIY checks, call a professional.
Watch Video
Key Takeaways
- Diagnose before replacing parts to avoid unnecessary cost.
- Safety is non-negotiable; always isolate power and vent areas properly.
- Use OEM parts to protect warranty and reliability.
- Document findings to build a history for future maintenance.
- Know when to call a licensed pro to handle complex repairs.