Why a Generator Makes Noise: A Troubleshooting Guide
Learn why your generator makes noise and how to diagnose common causes—from oil level to exhaust issues. Practical, steps-based guidance for homeowners and managers by Genset Cost.

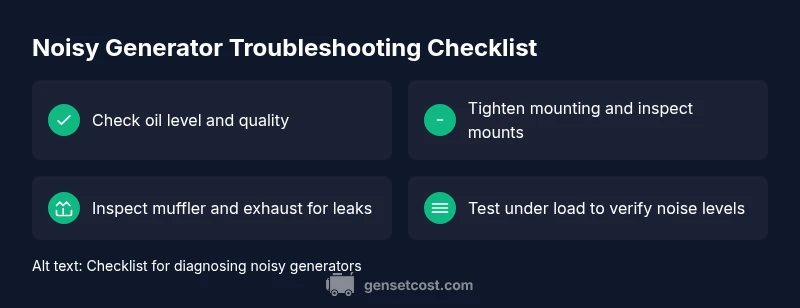
Unusual generator noise usually comes from installation, wear, or exhaust issues. The most common sources are low oil, loose mounting, or a faulty muffler. Start by checking oil level and quality, securing the unit to a solid base, and inspecting the exhaust system. If the noise persists, recheck fuel load and seek professional help if needed.
Why Noise Happens in Generators
If you’ve ever asked why generator make noise, the simple truth is that most noise comes from installation, wear, or exhaust design. According to Genset Cost, the loudest culprits in residential setups fall into three broad categories: mechanical wear, mounting and vibration, and the exhaust path or gasket leaks. That means the first fix isn’t always a new part—it can be as simple as tightening bolts or replacing a worn muffler. Recognizing these sources helps you act quickly and avoid unnecessary downtime. When a tone changes—rattling, buzzing, or a sharp clang—it’s a signal to inspect the relevant subsystem. The goal is to address the root cause, not just muffle the sound, so you preserve performance and extend service life. In practice, a focused, urgent approach yields faster, safer fixes for homeowners and property managers alike.
Quick Diagnostic Steps You Can Take Today
Before calling a technician, run through a concise, safe checklist. First, power down and let the generator cool. Then check oil level and oil quality; top up or replace as needed with the manufacturer-recommended grade. Next, verify that the unit is securely mounted on a solid base and that anti-vibration mounts are intact. Inspect the exhaust system for cracks, loose clamps, or a degraded muffler. If you notice fuel leaks or a dirty air filter, address those immediately. By isolating whether the noise stems from mechanical components or from the exhaust, you can decide on the right next steps and avoid unnecessary service visits.
Engine Noise vs Exhaust Noise: How to Tell Them Apart
Engine noises tend to come from the heart of the machine—bearings, pistons, timing gears—while exhaust noises are tied to the muffler, pipes, or gaskets. You can tell them apart by timing and location: engine-related sounds often persist under varying loads, whereas exhaust rattles surge with acceleration or deceleration. If the noise seems to originate near the muffler, carefully inspect clamps and joints for leaks. This distinction informs your repair path: engine work typically requires a technician, while exhaust updates can be DIY-friendly if you have the right parts and tools.
Reducing Vibration: Mounting and Isolation
Vibration magnifies many noises. Start by ensuring the generator sits on a level, solid surface and that all mounting bolts are tight. Inspect anti-vibration mounts or rubber feet for cracks; replace any worn components. In some cases, an additional vibration isolation pad or a proper mounting kit dramatically reduces noise without altering airflow. After securing mounts, run the unit at a light load to gauge changes in tone and vibration. Proper isolation is often the most cost-effective fix for persistent low-frequency hums.
Fuel, Air and Combustion: Knocks and Fouls
Fuel quality and air intake have a direct impact on both performance and noise. Old or contaminated fuel can cause knocking sounds; replace with fresh fuel and avoid ethanol blends if your system isn’t designed for them. A clogged air filter also raises engine noise by restricting airflow. If your unit uses a carburetor, ensure jets are clean and free of varnish. If you hear popping or backfiring, inspect intake and exhaust gaskets for leaks and seal them with appropriate gaskets.
Belts, Pulleys and Accessories: Small Components, Big Noise
Squeaks and whines often come from worn belts or loose pulleys. Inspect belts for cracks or glazing and confirm correct tension. Spin pulleys by hand to detect roughness or wobble, and replace worn items. Don’t overlook accessories driven by the belt—cooling fans and the generator’s output alternator can generate noise if they’ve developed play or misalignment. Replacing a worn belt is typically easy and can restore quiet operation quickly.
Maintenance Schedule to Prevent Noise Build-Up
Proactive maintenance is the best defense against noise. Create a simple schedule for oil changes, air filter cleaning, belt inspections, and exhaust checks, aligning with operating hours rather than calendar intervals when possible. Use manufacturer-approved lubricants and replacement parts, and store fuel properly to prevent varnish and gum formation. Keeping a log of service dates helps you spot trends and catch issues before they become loud problems.
When to Call a Pro: What to Expect
If basic checks don’t locate the source, or if the noise is accompanied by smoke, heat, or warning indicators, stop the unit and contact a qualified technician. A professional can perform compression tests, inspect bearings, and check the exhaust system with specialized equipment. For homeowners and managers, budgeting for routine preventive maintenance every 12–24 months ensures consistent performance and minimizes unexpected downtime.
Quick Prevention Checklist for Noisy Generators
Prevent noise before it starts with a simple checklist: keep the area clear of debris for proper airflow, confirm adequate clearance around the exhaust, and schedule regular inspections especially after storms or heavy load changes. Use weather protection that does not trap heat and compromise cooling. By following these steps, you reduce the chances of disruptive noise and costly repairs, and you extend the life of your generator.
Steps
Estimated time: 60-90 minutes
- 1
Power down safely
Shut off the generator, disconnect loads, and allow the unit to cool before inspecting. This step prevents burns and electrical hazards. Always verify there are no fuel leaks before touching any hot surfaces.
Tip: Never work on a hot engine; give it time to cool, and unplug electrical connections first. - 2
Check oil level and condition
Remove the dipstick, wipe clean, reinsert, and check the level. Top up if needed with manufacturer-approved oil. If the oil appears milky or very dark, perform an oil change and inspect seals for leaks.
Tip: Use clean, labeled containers when handling used oil to avoid contamination. - 3
Inspect mounting and anti-vibration mounts
Look for loose bolts and worn rubber mounts. Tighten or replace as needed. Ensure the unit rests on a solid, level surface and that vibration pads are intact.
Tip: After replacement, re-tighten all fasteners at operating temperature to avoid loosening. - 4
Inspect exhaust system
Check the muffler, clamps, and exhaust pipe for cracks or leaks. Tighten clamps and replace damaged gaskets or the muffler if needed. A leaking exhaust greatly increases perceived noise and can be hazardous.
Tip: Wear eye protection when inspecting near hot exhaust components. - 5
Evaluate fuel and air system
Replace old fuel with fresh fuel, and clean or replace a dirty air filter. If applicable, ensure carb jets are clean and free of varnish. Check for air leaks in intake gaskets and seals.
Tip: Add a fuel stabilizer if you store gasoline for extended periods. - 6
Test under load and document results
Run the generator at light and full load to compare noise and vibration. Note any changes in tone or new sounds. This helps determine if the issue is load-related or related to a component.
Tip: Keep a log of sound changes with load conditions for technician reference.
Diagnosis: Generator is making unusual loud noises during operation
Possible Causes
- highOil level low or oil degraded
- highLoose mounting or failed anti-vibration mounts
- mediumExhaust leak or faulty muffler
- mediumWorn bearings or internal engine wear
- lowIncorrect fuel or heavy load causing knocking
Fixes
- easyCheck oil level and replace with correct oil grade
- easyTighten mounting bolts and replace damaged anti-vibration mounts
- easyInspect muffler and exhaust gasket for leaks; replace as needed
- mediumSchedule professional inspection for engine wear or bearing issues
- easyBalance load, avoid overloading, and verify fuel quality with fresh fuel
People Also Ask
What is the most common cause of generator noise?
The most common cause is a combination of poor installation, low or degraded oil, and worn or loose mounting. Start with the oil and mounting checks before deeper diagnostics. If the noise continues, a professional inspection is recommended to avoid further damage.
The most common cause is poor installation, oil issues, or loose mounting. Start with oil and mounting checks, then consult a pro if the noise persists.
Can noise indicate imminent failure?
Yes. Unusual noises can signal imminent wear or component failure. Do not ignore persistent sounds, especially with smoke, heat, or warning indicators. Address symptoms promptly to avoid costly breakdowns.
Yes. Unusual noises can mean wear or failure. Don’t ignore them, and get a professional check if needed.
Is an oil change necessary to fix noise?
An oil change can resolve noise caused by degraded lubricant, but it won’t fix worn bearings or exhaust leaks. Always assess oil quality first, then inspect other components if noise persists.
Oil changes can help if the oil is degraded, but other issues may need attention as well.
Should I run the generator during service?
No. Always power down and disconnect loads before inspecting or replacing parts. Working on a live generator increases the risk of shock, burns, and fuel ignition.
No—power down first and unplug the generator before inspecting.
When should I replace a muffler or bearings?
Replace mufflers or bearings when inspection shows cracks, leaks, or excessive wear. A professional can confirm if replacement is necessary or if a less costly fix suffices.
If leaks or wear are visible, consider replacement; a pro can advise.
How can I reduce noise in a small space?
Use a properly vented enclosure designed for generators and ensure adequate clearance for cooling. Install anti-vibration mounts and check that exhaust gases are vented away from living areas.
Enclosures with good ventilation and anti-vibration mounts can reduce noise a lot.
Watch Video
Key Takeaways
- Check oil and mounting first for quick fixes
- Differentiate engine vs exhaust noise to target fixes
- Vibration isolation often reduces most noise
- When in doubt, schedule professional service