How to Make a Generator: Home Backup Guide
A comprehensive guide to selecting, sizing, and installing a home backup generator. Learn safety, fuel options, costs, and best practices for reliable power during outages.

You’ll learn how to make generator decisions for home backup by defining your power needs, selecting a generator type, and planning a safe installation with transfer switches and permits. This guide covers sizing, fuel options, installation steps, and long-term maintenance to ensure reliable power during outages. Note: never attempt to build a generator from raw components—prioritize safety and compliance.
Understanding how to make generator for home backup
When people ask how to make generator work for a residence, the goal isn’t to assemble a power plant from raw parts. It’s to determine your needs, choose a suitable system, and ensure a safe installation with proper electrical protection. According to Genset Cost, the most reliable approach starts with a clear understanding of load profiles, essential circuits, and comfort criteria during outages. From there, you select a generator type, decide on a fuel strategy, and plan a transfer mechanism that integrates with your home’s electrical panel. This mindset keeps costs predictable and reliability high, while also simplifying maintenance over the system’s lifetime. Throughout the process, prioritize safety and professional guidance when handling live circuits or utility work. how to make generator decisions should be anchored in real-world usage, not theory.
- Align expectations with your daily routines and critical loads (fridge, HVAC, medical devices, sump pumps).
- Consider climate, fuel availability, and local permitting rules.
- Use reputable sources and professional assessments to translate watts into a practical size.
The goal is a plan you can execute confidently, not a DIY project that risks safety or compliance. |
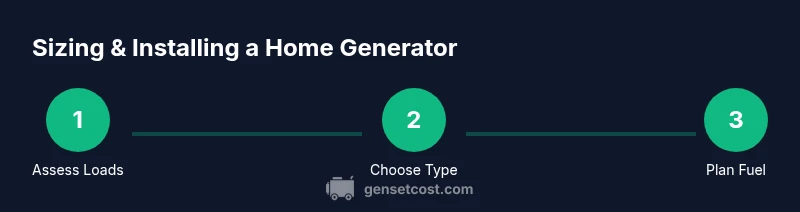
Step 1: Define your power needs and performance targets
A practical starting point for how to make generator planning effective is to catalog essential loads and typical outages. List appliances and devices you want powered during an outage (refrigeration, lights, communication devices, HVAC controls). For each item, note typical running watts and surge watts from manufacturer specifications. If a label isn’t available, estimate conservatively and use a safety margin. The intent is to create a comprehensive load profile rather than a vague goal. In practice, homeowners often overestimate by assuming every circuit runs at once; a realistic plan will account for non-simultaneous operation.
- Identify core circuits that must stay powered (e.g., refrigerator, well pump).
- Group loads by priority and note peak demand for each group.
- Consult a professional to translate these numbers into an appropriate generator size.
Tip: When in doubt, build a worst-case scenario plan and then reduce with load-shedding strategies to maximize efficiency.
Step 2: Evaluate generator types and how they fit your lifestyle
Choosing between portable, standby, or hybrid generators is central to how to make generator setup work smoothly. Portable units offer flexibility and lower upfront costs but require manual operation and transfer cords. Standby systems are permanently installed and paired with an automatic transfer switch (ATS), providing seamless outage performance with less daily interaction. Hybrid systems can combine battery storage with a generator for fast response and efficiency. Your decision should reflect how often outages occur, the value of automatic start-ups, and available space for installation. Budget, noise tolerance, and fuel logistics are also crucial factors. Genset Cost’s guidance emphasizes matching the system to your load profile and long-term plans rather than chasing the biggest unit.
- For rare outages, a portable generator with a transfer switch may suffice.
- For frequent outages or essential loads, a standby unit reduces manual steps and improves reliability.
- Consider dual-fuel or natural gas options for fuel resilience and convenience.
Tip: Evaluate noise levels and location constraints early, as these influence neighbor relations and compliance with local codes.
Step 3: Plan fuel type, storage, and running costs
Fuel choice drives ongoing operating costs and maintenance needs. Gasoline generators are common and affordable upfront but require frequent refueling for long outages. Propane and natural gas offer longer storage life and easier replenishment, but availability and pressure can affect performance. Diesel units are rugged for high-demand scenarios but require different maintenance and fuel storage considerations. Dual-fuel or tri-fuel configurations provide flexibility during fuel shortages but add complexity and cost. When assessing fuel, also consider storage safety, ventilation, and potential fuel spill risks. The best plan balances reliability, cost, and safety while ensuring you can feasibly supply fuel during extended outages. Genset Cost’s analysis highlights that total cost of ownership hinges on both upfront investment and ongoing fuel expenses.
- Compare annual fuel costs based on expected runtime and local fuel prices.
- Plan for fuel storage safety (containers, ventilation, and spill containment).
- Factor in maintenance intervals that are specific to your chosen fuel.
Pro tip: If you expect frequent outages, a natural gas or propane standby system delivers higher reliability with safer, longer-term fuel availability than gasoline alone.
Step 4: Ensure electrical safety with a transfer switch and panel integration
Integrating your generator into your home’s electrical system demands careful attention to safety codes and best practices. An automatic transfer switch (ATS) isolates your house from the utility supply during an outage and reconnects when power returns. Manual transfer switches are an option for portable generators. Either approach requires proper panel rating, correct wiring, and adherence to electrical codes. The most critical safety concerns are backfeeding (danger to utility workers) and proper grounding. A licensed electrician should perform the final connections and testing to ensure all safety checks pass. The goal is a safe, code-compliant installation that minimizes the risk of shock or fire while preserving appliance protection.
- Verify the panel can accommodate the generator’s amperage and voltage.
- Use a correctly sized ATS and heavy-duty rated conductors.
- Schedule a professional inspection after installation to verify grounding and clearance.
Warning: Working with live circuits is hazardous. Always de-energize and lock out before any service or inspection and never bypass transfer switches.
Step 5: Navigate permits, warranties, and installation timelines
Understand the regulatory steps early in the process to avoid delays. Most jurisdictions require electrical permits for permanent standby systems and may require a licensed professional for safety and compliance. An installation plan may also require inspection by local authorities. Warranties typically hinge on professional installation and adherence to maintenance schedules. Scheduling a phased installation can help manage disruption, align with utility coordination, and ensure code compliance. Involving your installer early in the permit process can streamline approvals. Genset Cost recommends documenting all parts, permits, and service agreements so you have a clear record for warranty and maintenance.
- Prepare an updated electrical diagram showing the generator, ATS, and panel connections.
- Confirm permit requirements and inspection timelines with your contractor.
- Keep receipts and service cards for future warranty claims.
Note: permits and inspections are not optional in most areas; they protect you and neighbors from unsafe electrical work.
Step 6: Budgeting and long-term value: maintenance and upgrades
A solid budgeting plan considers upfront costs, installation, ongoing fuel expenses, and periodic maintenance. Standby systems often require higher upfront investment but deliver higher availability with minimal daily effort. Portable units cost less initially but demand more manual labor and relocation during outages. Maintenance tasks include periodic oil changes, filter replacements, and electrical inspections. Keep an eye on system health with routine checks and scheduled professional servicing to prolong life and ensure reliability. A long-term view helps you evaluate total cost of ownership, including potential upgrades such as battery storage or smart monitoring.
- Outline a maintenance schedule and associated costs.
- Plan for periodic testing to validate performance.
- Budget for potential future upgrades (monitoring, battery storage).
Genset Cost emphasizes that a well-planned generator investment can yield significant long-term savings by avoiding outages and protecting essential loads during emergencies.
Step 7: Create a practical maintenance and operation plan for day-to-day use
After installation, your success hinges on a simple, repeatable operation routine. Maintain a log of exercise cycles, oil levels, and fuel inventory. Use remote monitoring when possible to detect issues early and schedule service before problems escalate. Keep critical spare parts on hand (oil filters, spark plugs, fuses) to minimize downtime. Train household members on safe start-up procedures, load shedding to manage demand, and how to handle refueling and maintenance tasks. A clear operation plan reduces stress during power outages and prolongs system life.
- Establish a weekly or monthly inspection routine.
- Use a mobile app or remote monitoring to track performance.
- Share safety instructions and emergency contacts with all users.
Tip: Regular testing is essential; schedule a simulated outage at least twice a year to verify readiness.
Step 8: The final checklist: site readiness and commissioning
Before you call it complete, run through a commissioning checklist that confirms all elements: proper mounting, certified wiring, correct fuel connections, and verified transfer switch operation. Confirm that the system starts automatically on simulated outages and that critical loads stay powered. Document all test results and keep them with warranty information for future reference. A thorough commissioning process minimizes post-install surprises and ensures your generator operates reliably when power is needed most.
- Check clearance from buildings, materials, and combustible items.
- Confirm weatherproofing and grounding are correct.
- Save all manuals, warranty documents, and test results for future maintenance and resale value.
Directly addressing how to make generator commissioning work helps homeowners sleep better during storms and outages.
Summary: A practical path to reliable power
This section has outlined how to approach choosing, sizing, and installing a home backup generator without attempting unsafe DIY electrical construction. The emphasis has been on safety, compliance, and practicality, with a clear path from load assessment to commissioning. Following these steps and working with qualified professionals will result in a system that delivers reliable power when you need it most. Remember: the goal is resilient power, not a risky, improvised setup.
Tools & Materials
- Voltage tester / multimeter( used to verify circuits and ensure power is off before wiring)
- Transfer switch (ATS or manual)(size to match expected generator load and panel rating)
- Appropriate gauge electrical conduit and fittings(for safe and code-compliant wiring from generator to panel)
- Grounding rod and bonding kit(ensure proper grounding and safety)
- Fire extinguisher (ABC type)(readily accessible during installation and maintenance)
- Manuals for all equipment(keep on-site for reference and warranty claims)
- Fuel containers and proper storage(spill containment and ventilation are essential)
- Wrenches set and socket tools(including adjustable wrench and torque wrench)
- Optional: generator cover or enclosure(reduces noise and weather exposure)
Steps
Estimated time: 2-6 weeks
- 1
Assess power needs
Identify critical loads and simulate outages to understand which circuits must stay powered. Create a list of devices and approximate their running requirements. This establishes the baseline for size and type decisions.
Tip: Take photos of panels and write down exact model numbers for later references. - 2
Choose generator type
Evaluate portable vs standby vs hybrid options based on outages frequency, space, and budget. Decide whether automatic operation is important for convenience.
Tip: If reliability matters daily, a standby unit often saves time and effort. - 3
Plan fuel strategy
Determine the most accessible fuel in your area, storage considerations, and long-term costs. Compare gasoline, propane, natural gas, or dual-fuel options.
Tip: Natural gas typically offers continuous fuel supply but may require connection to the gas line. - 4
Design electrical integration
Draft the wiring plan including ATS placement, panel intrusions, and safe routing. Ensure clearances and grounding meet code requirements.
Tip: Consult a licensed electrician for final wiring and verification. - 5
Secure permits and warranties
Check local regulations, submit plans, and schedule inspections as required. Keep warranty documents aligned with installation work.
Tip: Document all permits and test results for future service. - 6
Prepare the installation site
Clear the installation area, ensure a solid base, and address weather exposure. Verify access for maintenance and fuel supply.
Tip: Maintain a minimum clearance around the generator for service access. - 7
Install and test
Complete the mechanical mounting, wiring to the ATS, and fuel connections. Perform a controlled test to verify automatic start and load transfer.
Tip: Test under load and confirm all safety interlocks function correctly. - 8
Baseline maintenance plan
Create a schedule for oil changes, filter replacements, and periodic run tests. Establish monitoring and alerts for proactive maintenance.
Tip: Set calendar reminders for routine checks and professional servicing.
People Also Ask
What is the first step in planning a home generator?
Start by listing essential loads and estimating outage duration. This creates a baseline for selecting the right generator size and type.
Begin with a clear list of must-have loads and expected outage length to guide your choice.
Should I install a generator myself or hire a pro?
Electrical work for generators involves high risk and code compliance. Most homeowners should hire a licensed electrician for connections and permitting.
For safety and compliance, hire a licensed electrician for the final connections and permits.
What permits are typically required?
Permits vary by location but often include electrical, gas, and possibly structural checks. A contractor can handle the paperwork and scheduling.
Permits depend on your area; your contractor will guide you through the process.
What is the difference between standby and portable generators?
Standby generators are permanently installed with automatic transfer switches, starting automatically during outages. Portable generators are movable and require manual start and transfer.
Standby units start automatically and stay in place; portable units move with you and need manual setup.
How long does a typical installation take?
Time varies with permits, site access, and system complexity, but plan for several weeks from planning to commissioning.
Installations usually take a few weeks from planning to commissioning, depending on permits and site conditions.
Watch Video
Key Takeaways
- Define essential loads first to guide sizing and type choice
- Choose standby for high reliability or portable for flexibility
- Plan fuel strategy early to balance availability and cost
- Invest in proper transfer switching and professional installation