Electric Generator Maintenance: A Homeowner’s Step-by-Step Guide
A comprehensive guide to electric generator maintenance for homeowners and property managers, covering oil, filters, transfer switches, load testing, and storage to ensure reliable backup power.

This quick answer shows how to perform essential electric generator maintenance to keep your backup power reliable. You will inspect for leaks, check oil level, replace or clean air and fuel filters, test the transfer switch, and run the unit under load monthly. Always follow safety precautions: disconnect power, ventilate properly, and wear eye protection.
What is electric generator maintenance and why it matters
Regular electric generator maintenance is the process of inspecting, servicing, and testing a standby or portable generator to ensure it starts reliably and provides power when needed. For homeowners and property managers, a well-maintained generator reduces the risk of outages during storms, maintenance windows, or grid failures. It also extends the unit's life and lowers operating costs by preventing major failures. According to Genset Cost the maintenance habit should be consistent and documented so you can predict service needs and budget accordingly. In practice, maintenance covers fluids, filters, electrical components, cooling and ventilation, and storage considerations. By documenting every service, you build a predictable schedule that minimizes surprises.
Key takeaway: maintenance is an ongoing investment in reliability and cost control for your backup power system.
Core maintenance tasks every generator owner should perform
Maintenance tasks are the backbone of a reliable backup generator. Regular checks and replacements keep the unit ready when outages strike. Core tasks include inspecting for leaks and corrosion, verifying oil level and quality, examining air and fuel filters, testing the battery and charging system, and ensuring belts and hoses are intact. Additionally, verify that the unit’s coolant (if water-cooled) is at proper levels and that the exhaust pathway is clear of obstructions. Creating a simple log helps you track what was serviced and when next service is due. As you perform each task, note any unusual sounds, vibrations, or smells and address them promptly.
Tip: Keep a dedicated maintenance log that records dates, run hours, filter replacements, and oil changes. This will help you plan future service and justify costs to stakeholders.
Monthly and seasonal maintenance routines
A practical approach is to separate tasks by cadence: monthly checks and seasonal or annual service. Monthly duties include running the generator under a light load for 10–15 minutes, checking for oil leaks, measuring battery voltage, and verifying no corrosion on terminals. Seasonal or annual tasks involve oil and filter changes (as recommended by the manufacturer), fuel system inspection, air filter replacement, and a professional inspection if your unit powers critical loads. If you rely on natural gas or propane, inspect fuel lines for leaks and ensure shut-off valves are accessible. A defined cadence reduces the odds of skipped maintenance and unexpected outages.
Note: If your generator sits unused for long periods, run it monthly to prevent old fuel from gumming up the system.
Oil, filters, and fuel management
Oil quality and filter condition are central to engine longevity. Use the oil grade and viscosity recommended in your manual and replace the oil filter when you change the oil. Check oil level before each planned run and after the unit has cooled. Fuel management is equally important: keep fuel stabilized for longer storage, drain old fuel if stored over several months, and replace fuel with fresh supplies before heavy use seasons. Remember to wipe spills and dispose of used oil in accordance with local regulations. Maintaining clean fuel and fresh oil reduces wear and minimizes starting resistance.
Practical tip: If you notice frequent oil consumption, consult the service guide or contact a technician to check for leaks or worn seals. Avoid mixing fuels or using adulterated fluids.
Electrical components and transfer switches
Electrical components warrant careful handling. Inspect terminal bolts for tightness and corrosion, and test the battery and charging system. The transfer switch, which moves the load from utility to generator, should be exercised regularly to confirm it moves power smoothly without arcing or delay. If you hear buzzing or see flickering during transfer, shut down and schedule a professional inspection. Keep a spare set of fuses or breakers compatible with your generator’s rating, and verify grounding connections are intact to prevent stray currents.
Safety note: Never touch live terminals with bare hands or metal tools. Always disconnect the main power before touching electrical connections.
Air intake, exhaust, and cooling considerations
A generator’s cooling and ventilation are essential for safe operation. Keep air intakes free of debris and ensure exhaust pipes are unobstructed. Clean any cooling fins and radiator surfaces if your model uses liquid cooling. Blocked airflow causes overheating and early wear. For enclosed spaces, install proper ventilation with carbon monoxide detectors. Seasonal outdoor placement should consider wind direction and nearby obstructions to prevent exhaust fumes from entering living spaces.
Pro tip: Create a simple intake-to-exhaust checklist to ensure nothing blocks airflow during operation or storage.
Storage, battery care, and long-term shutdowns
Storing your generator properly extends its life. Drain or stabilize fuel per manual guidance if stored long term, or run the unit dry before storage to minimize gum buildup. Disconnect and remove battery connectors before long-term storage to avoid drainage. Use a moisture-absorbing cover in humid conditions and keep the unit on a dry, level surface. Label service intervals on the unit so technicians see a ready-made maintenance history. When returning to service after storage, perform a full startup and load test before relying on it in a real outage.
Troubleshooting common issues without professional help
Common maintenance issues can often be diagnosed with simple checks. If the unit is hard to start, inspect the spark plugs (for gasoline engines) or glow plugs (for diesel), verify fuel quality, and check for oil or coolant leaks. If power transfer is slow or incomplete, recheck the transfer switch settings, electrical connections, and load rating. Listen for unusual noises, which may indicate worn bearings or loose belts. Always confirm that the unit has adequate ventilation and that exhaust is clear before starting.
If problems persist, consult the manual and consider scheduling a professional inspection.
When to call a professional and how to choose a service
Not all maintenance should be handled alone. Complex electrical diagnostics, transfer switch failures, or suspected internal leaks require a licensed technician. When selecting a service, verify credentials, coverage area, and a transparent estimate. Ask about emergency service availability and whether they offer a preventative maintenance plan. A reputable provider will review fuel quality, oil changes, filter replacements, and performance testing with you, and provide a post-service report.
Maintenance plan template and checklist
A practical maintenance plan provides structure and accountability. Start with a quarterly checklist focusing on fluids, filters, and battery health. Add a semi-annual load test and a yearly professional inspection. Include sections for service dates, run hours, parts replaced, and any notes on performance. Save the checklist in a shared drive or notebook so homeowners and property managers can track compliance and budget for future services.
Tools & Materials
- Owner's manual(Model-specific instructions and maintenance intervals)
- Basic tool kit (wrenches, screwdrivers)(Metric and SAE sizes as per manual)
- Oil funnel(For smooth oil changes without spills)
- New oil (manufacturer recommended grade)(Viscosity as specified in your manual)
- Air filter(Replace if dirty or as per schedule)
- Fuel stabilizer(Stabilizes fuel for storage)
- Battery tester(Check voltage and health of the battery)
- Multimeter(Test electrical continuity and charging circuit)
- Fire extinguisher(Keep within reach during maintenance)
Steps
Estimated time: 90-120 minutes
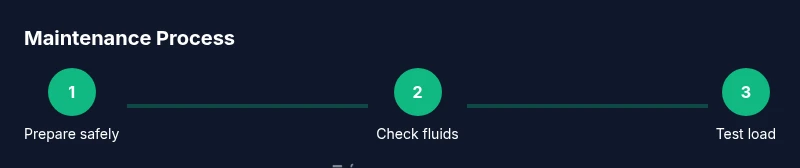
- 1
Prepare safely
Before touching any components, disconnect the main power, allow the engine to cool, and ventilate the area. Confirm you have a clear workspace and a fire extinguisher nearby. This initial safety step reduces the risk of shocks or burns while you work.
Tip: Use a partner to supervise while you work on the generator for added safety. - 2
Check fluids and fuel quality
Inspect oil level and quality, and top up or change oil as needed. Examine fuel for signs of contamination or stale appearance and replace with fresh fuel or stabilized fuel as required. Run the engine briefly after oil changes to circulate the new oil.
Tip: Wipe up any spills immediately and dispose of used oil per local regulations. - 3
Inspect air and fuel filters
Remove and inspect air filter; replace if dirty or clogged. If present, verify the fuel filter is clean and free of debris. A clean intake improves combustion efficiency and reduces wear.
Tip: Don’t run the unit with a dirty air filter; it reduces power and increases fuel consumption. - 4
Test the battery and charging system
Check the battery voltage and terminal connections for corrosion. Clean terminals if needed and ensure the charging system maintains proper voltage. A healthy battery ensures reliable starting.
Tip: Use a corrosion inhibitor on terminals to prevent future buildup. - 5
Inspect electrical connections and transfer switch
Inspect all visible electrical connections for looseness or corrosion. Exercise the transfer switch to ensure it engages and disengages smoothly. Look for arcing signs or heat around connections.
Tip: Shut off all power before manipulating any electrical components. - 6
Run under load
Start the generator and apply a light load for 10–15 minutes, then increase slightly to verify stable operation. Listen for unusual noises and observe temperature indicators. This simulates real outage conditions and identifies performance gaps.
Tip: Avoid overloading the unit during the test; follow the manufacturer’s load guidelines. - 7
Inspect cooling and exhaust systems
Check cooling lines and radiators (if liquid-cooled) for leaks and ensure fans operate correctly. Clear any obstructions from the exhaust path to prevent backpressure and carbon monoxide buildup.
Tip: Keep the area around the exhaust unobstructed during operation. - 8
Document results and plan next service
Record service actions, hours run, and observed issues in a maintenance log. Schedule the next service based on hours or calendar time, whichever comes first. This creates continuity and accountability.
Tip: Set calendar reminders for future maintenance tasks. - 9
Store properly after service
If storing, stabilize fuel or drain it per the manual and store in a dry, ventilated area. Disconnect the battery if storing long-term and keep the unit elevated to prevent moisture contact. Recheck the area prior to the next use.
Tip: Keep a protective cover on the generator to reduce dust and moisture.
People Also Ask
How often should I perform generator maintenance?
Perform basic monthly checks and schedule a professional service at least once a year, or more often if you rely on the unit heavily. Regular checks help catch problems early and preserve reliability.
Do monthly checks and at least yearly professional service to catch issues early and keep reliability high.
Can I perform maintenance myself, or should I hire a pro?
You can handle basic tasks like oil changes, air filter replacement, and battery checks. Electrical tests and transfer switch work are best left to a licensed technician, especially for larger or critical-load systems.
DIY basics are fine, but hire a pro for electrical tests and transfer switch work.
What should I use for oil and filters?
Use the oil grade and filter type specified in your generator’s manual. If climate or usage is extreme, follow the manual’s guidance or contact a technician for recommendations.
Use the manufacturer’s recommended oil and filter; consult the manual for climate-specific guidance.
How do I test the transfer switch safely?
Follow the manual steps to simulate a power outage and verify the generator starts and maintains load transfer. Always ensure the main power is disconnected during testing.
Follow the manual to simulate an outage and test transfer; always disconnect main power first.
What are signs maintenance is overdue?
Unusual noises, poor starting performance, reduced power output, or excessive fuel consumption are common indicators that maintenance is overdue.
Listen for unusual noises or poor performance, and watch for high fuel use as overdue maintenance signs.
Watch Video
Key Takeaways
- Schedule regular, documented maintenance
- Check fluids, filters, and battery before each use
- Test load and transfer switches to ensure reliability
- Maintain safe operating procedures and ventilation
- Track service history to plan future care