How to Fix Generator Under Voltage: Step-by-Step Guide
A practical, safety-first guide for diagnosing and correcting voltage issues in home backup generators. Learn common causes, step-by-step tests, load-balancing tips, and when to call a pro. Based on Genset Cost Analysis, 2026.

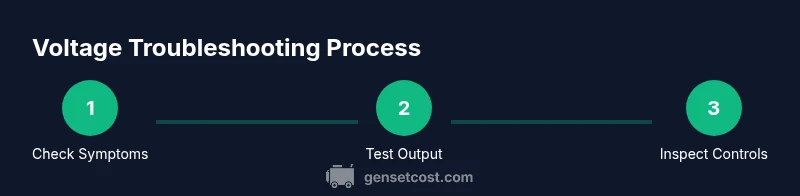
To fix generator under voltage, begin by confirming the problem with a voltage test at the generator output. Then check the governor, voltage regulator, and transfer switch for proper operation, and verify that loads aren’t exceeding the generator’s capacity. If readings stay low after these checks, consult a licensed electrician. This approach aligns with expert guidance from the Genset Cost team.
What is under voltage in generators and why it matters
Under voltage occurs when a generator delivers less voltage than its rated output. For home backup setups, this can mean lights dim, appliances underperform, and chargers fail to regulate properly. Most residential systems aim to stay within manufacturer tolerances, commonly around +/- 5% of nominal voltage. Being able to recognize and address under-voltage quickly protects electrical devices and extends generator life. As you explore how to fix generator under voltage, use a methodical approach: confirm the symptom, isolate potential causes, and apply safe, tested fixes. According to Genset Cost, many under-voltage issues originate from load mismanagement, aging regulators, or loose wiring rather than a failing core generator.
This section sets the stage for a practical, step-by-step path you can follow safely and confidently.
Common causes of low voltage in home backup generators
Low voltage isn’t always a sign of a bad generator core. In many cases, the problem traces to auxiliary components or operating conditions. Common culprits include: overload (more watts than the generator can safely handle at once), a worn or faulty voltage regulator or AVR (automatic voltage regulator), and governor issues that fail to keep engine RPM stable under load. Loose or corroded connections, burned or damaged wires, or a compromised transfer switch can also cause voltage drops across the system. Inadequate fuel supply that causes RPM droop will also show as reduced voltage. Finally, mismatched loads on split-phase systems can create unequal voltages between legs. By understanding these routes, you can narrow down the likely cause before taking action.
Pro-tip: document voltage readings at multiple points (generator terminals, outlets, and every major circuit) to reveal patterns that single-point testing might miss.
Safety essentials before you troubleshoot
Safety first. Always disconnect nonessential loads and power down the system when performing tests. If you smell fuel, hear unusual noises, or see sparks, stop immediately and seek professional help. Use appropriate PPE: insulated gloves, safety glasses, and non-conductive footwear. Read the generator’s manual for model-specific warnings and torque specs before tightening any connections. Never work on live wiring; use a non-contact voltage tester to verify de-energized status. If you’re unsure about any step, pause and contact a licensed electrician or certified technician. The goal is to avoid electrical shock, arc flash, or fire hazards while diagnosing under voltage.
Genset Cost emphasizes safety as the foundation of any troubleshooting effort.
Diagnostic approach: baseline tests and observations
Start with a baseline measurement: confirm labeled nominal voltage (often 120/240V in residential systems) at the generator output with the engine at the manufacturer-recommended RPM. Next, compare open-circuit voltage (no load) against loaded voltage (under typical household loads). Note any voltage drop when appliances turn on. If voltage remains low under light load but recovers with less load, the issue is likely load-related. If voltage stays low across all loads, inspect the regulator/AVR, governor response, and wiring for faults. Keep a log of RPM, voltage, and load readings for trend analysis and to share with a technician if you escalate.
A structured test plan reduces guesswork and speeds up resolution.
Load balancing, wiring, and transfer switches
Uneven loads across phases or an imbalanced 240V split can cause under-voltage on one leg. Check that the transfer switch is selecting the correct source and that all connections between the generator, panel, and feeders are clean, tight, and undamaged. Inspect for frayed insulation, corrosion, or burned terminals that impair conductivity. When diagnosing wiring, always verify that wire gauge matches the system’s amperage and that protective devices (fuses/breakers) are properly rated. If wiring or the transfer switch shows wear, plan for professional repair or replacement to restore voltage stability and safety.
Document any anomalies and test after each adjustment.
When to service or replace a regulator or governor
A failing AVR or worn governor is a common source of persistent under-voltage. If tests show voltage dropping as load increases or the RPM does not respond promptly to changes in load, the regulator or governor may be out of calibration or nearing end of life. In these cases, repair options vary by model and availability of replacement parts. Always consult the manufacturer’s guidance or a qualified technician. In some situations, replacing the AVR module or governor mechanism can restore proper voltage control and stabilize operation without replacing the entire generator.
Genset Cost recommends evaluating long-term costs and reliability when deciding between repair and replacement.
Preventive maintenance to reduce under-voltage risk
Regular maintenance helps prevent voltage issues. Schedule periodic testing of voltage and RPM under known loads, inspect electrical connections for looseness or corrosion, clean air intakes and fuel filters to prevent RPM droop, and replace worn components before they fail. Keep a spare AVR or regulator kit on hand if your model supports quick swaps, along with a basic set of tools. Document maintenance activities and readings to build a history that supports future troubleshooting. Consistent preventive care reduces surprising voltage dips and extends equipment life.
Quick fixes and precautions you can safely perform
Some minor adjustments can be done safely, such as redistributing loads to balance demand, tightening obvious loose connections with the engine off, and verifying air intake is clear for stable RPM. Do not attempt internal regulator repairs unless you are trained and have the proper service manual. If the problem persists after these checks, schedule a professional diagnostic to avoid risk of electrocution or equipment damage. This pragmatic approach keeps you safe while addressing the most common under-voltage causes.
Tools & Materials
- Digital multimeter (AC volts)(Use a true RMS meter; measure at generator terminals with RPM stable)
- Clamp meter(Check current on each leg and look for imbalance during loaded conditions)
- Non-contact voltage tester(Verify de-energized status before handling connections)
- Insulated tools (pliers, screwdrivers)(Use when touching live components is unavoidable; keep dry)
- Generator service manual(Model-specific procedures, torque specs, and wiring diagrams)
- Torque wrench(Useful for securing terminal connections to spec)
- Protective gloves and eye protection(Attain basic personal protection against shocks and debris)
- Fuel and air filter checks(Ensure clean fuel supply and unrestricted air flow for stable RPM)
Steps
Estimated time: 60-120 minutes
- 1
Verify symptoms and safety
Power down the system and confirm low voltage with a voltmeter at the output. Record RPM and temperature, and note any unusual sounds. Ensure nonessential loads are disconnected before testing.
Tip: Never touch live terminals; confirm energy is off before handling wires. - 2
Test generator output at the terminals
With the engine at the recommended RPM, measure voltage across the main output terminals. Compare open-circuit vs loaded voltage to identify droop. If the voltage remains low under light load, the issue may reside in the regulator or wiring.
Tip: Use a true RMS meter and stabilize RPM before recording readings. - 3
Inspect regulator and governor operation
Check for signs of wear or misalignment in the governor linkage and AVR connections. If readings drift with load, the regulator or governor may require servicing.
Tip: Consult the service manual for calibration tolerances before attempting adjustments. - 4
Check transfer switch and wiring
Examine the transfer switch for loose or corroded terminals, damaged cables, or improper connections. Verify all wiring matches the panel diagram and that the main feeder is intact.
Tip: Turn off power at the main disconnect before inspecting wiring behind panels. - 5
Evaluate load balance across circuits
Distribute loads evenly across legs, and test voltage as you add or remove major appliances. An imbalanced load can cause one leg to sag while the other remains stable.
Tip: Use a clamp meter to observe per-leg current and identify imbalances. - 6
Test under varied load conditions
Gradually increase and decrease load to observe voltage response. Document peak currents and corresponding voltages to determine if the issue is load-related or systemic.
Tip: Do not exceed model-rated capacity; stop if voltage becomes unstable or RPM drops sharply. - 7
Address fuel and cooling considerations
Ensure a steady fuel supply and adequate cooling. Fuel starvation or overheating can cause RPM fluctuations that manifest as voltage drop.
Tip: Check the fuel line for kinks and verify air filters are clean for consistent RPM.
People Also Ask
What causes generator under voltage?
Under voltage is commonly caused by overload, a failing voltage regulator or AVR, governor issues, loose connections, or insufficient fuel causing RPM droop. A systematic test plan helps identify the root cause.
Common causes include overload, regulator faults, governor issues, and loose wiring.
Can I fix this myself?
Some basic checks are safe for a homeowner, such as testing voltage and inspecting obvious wiring. More complex issues with regulators, governors, or transfer switches should be handled by a licensed technician.
Basic checks are possible, but complex regulator or wiring issues require a pro.
Is under voltage dangerous to appliances?
Prolonged undervoltage can stress motors and electronics. If voltage remains out of spec, stop using the generator and seek professional assessment to prevent damage.
Yes, persistent undervoltage can damage appliances; get it checked.
Should I replace the AVR or governor if the readings stay low?
If diagnostics indicate the regulator or governor is out of calibration or failed, replacement or professional recalibration is recommended rather than guesswork.
If tests show regulator or governor failure, professional replacement is advised.
How can I prevent under-voltage in the future?
Schedule preventive maintenance, keep connections tight, monitor load distribution, and ensure clean fuel supply. Regular testing helps catch issues before they cause voltage drops.
Regular maintenance and load monitoring prevent future under-voltage.
What readings indicate a healthy generator?
Healthy generators maintain voltage within manufacturer tolerance across typical loads and RPM. If voltages stay within spec during load tests and RPM stays steady, the system is healthy.
Voltage stays within spec and RPM is stable during tests.
Watch Video
Key Takeaways
- Verify voltage with RPM-stable tests before assuming a fault.
- Isolate causes by testing regulator, governor, and wiring first.
- Balance loads to prevent voltage sag across circuits.
- Document readings for future troubleshooting and maintenance.
- Know when to escalate to a professional for regulator or wiring faults.