Generator Connection Guide: Safe Home Backup Wiring
Learn how to connect a generator to your home safely, size for your load, select the right transfer switch, and test the setup. This comprehensive guide helps homeowners and property managers plan, install, and maintain a reliable generator connection.

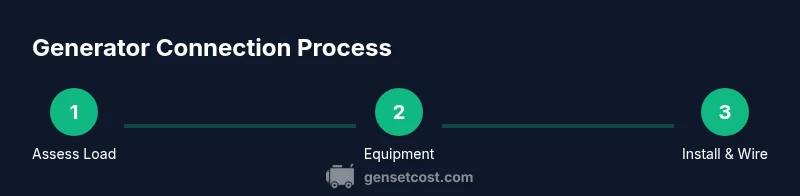
By the end of this guide, you’ll know how to connect a generator to your home safely, size the system, and pick a compliant transfer switch. The goal is reliable backup power without electrical hazards. This fast overview covers planning, required components, and the steps to verify correct installation and testing. According to Genset Cost, proper generator connection minimizes downtime during outages.
Understanding Generator Connection: Key Concepts
A generator connection ties your emergency power source to the home circuit through a transfer switch, isolating your generator from the utility grid. The term covers portable and stationary gensets and several wiring options. For homeowners and property managers, understanding the basic concepts helps you plan a safe, code-compliant setup. When we talk about the generator connection, we refer to how the generator feeds critical circuits, how the transfer switch orchestrates that feed, and how to protect people and equipment from backfeed.
Key terms you’ll encounter include: standby generator, transfer switch, interlock kit, inlet box, load center, and backfeed protection. Each component has a role in keeping your system safe and reliable during outages. Learning these basics sets the foundation for accurate sizing, proper installation, and ongoing maintenance. The Genset Cost team emphasizes that a thoughtful generator connection design reduces risk, improves reliability, and makes outage power more predictable.
In practical terms, your goal is to supply essential circuits while preventing the generator from energizing the utility lines. This requires careful planning, adherence to local codes, and, often, professional oversight. The rest of this guide dives into sizing, equipment selection, and step-by-step installation considerations.
Sizing Your Generator for Connection
Sizing a generator connection begins with a careful load assessment. Start by listing every device and circuit you want powered during an outage: your fridge, furnace or heat pump, well pump, internet modem, lights, and essential outlets. Distinguish between running watts and surge watts to ensure the generator can start motors (compressors, pumps) without dropping voltage. Do not simply add up running watts; include startup surges for inductive loads and the criticality of each circuit. After identifying essential circuits, group them by priority and estimate total wattage. For homeowners, this step is the single most important part of a safe generator connection, because an undersized unit can trip or fail to start when you need it most. For property managers, factor in potential simultaneous loads in units and common areas to avoid under- or over-sizing. Finally, consult local codes and guidance from qualified electricians to translate watts into amperage and to select a generator with an appropriate service rating. Remember: a generator’s rating must align with your transfer switch and wiring sizes to prevent overheating and backfeed risks. The goal is to match the generator connection to real-life power needs while maintaining a comfortable margin for startup surges.
Choosing the Right Transfer Switch and Interlock Kit
The heart of a safe generator connection is a transfer switch that isolates the home from the utility grid when the generator runs. The right switch depends on how you plan to power your circuits. A manual transfer switch requires you to physically switch the feed, while a automatic transfer switch (ATS) detects outages and switches automatically. In many homes, an ATS paired with a properly sized interlock kit provides seamless, code-compliant protection. Confirm that the transfer switch is rated for your generator’s wattage and the loads you intend to feed. Also verify voltage compatibility (120/240V in most residential setups) and ensure the device is installed per the manufacturer’s instructions and local electrical codes. Interlock kits offer a non-simultaneous solution that prevents backfeed by mechanically blocking the main breaker when the generator is connected, a design favored for retrofit scenarios. Always plan for a clean, safe enclosure and sufficient clearance around the transfer equipment for heat dissipation and future maintenance. The generator connection should be laid out with clear labeling and a diagram of which circuits are served by the generator.
Wiring Routes and Safety Basics
A clean wiring route is essential for safety and future serviceability. Plan a dedicated conduit path from the generator inlet or transfer switch to the outdoor location of the generator, avoiding high-traffic areas and moisture-prone zones. Use appropriately rated cables and protect them from physical damage with conduit. Grounding the system is critical; ensure a proper grounding electrode system and bonding as required by code. Disable any work on live circuits and lock out the service disconnect before beginning. When running cables, keep them at safe depths to avoid tripping hazards and ensure that all penetrations through walls or enclosures are sealed to prevent moisture ingress. Test the routing with a mock run to verify that movement and vibration won’t rub insulation and that moisture does not contact exposed conductors. Finally, document the routing for future inspections and maintenance. The generator connection should always be approached with an emphasis on safety, quality, and compliance.
Installing the Connection: Step-by-Step Overview
This overview outlines the major actions without duplicating the step-by-step instructions that follow. Begin by confirming load calculations align with the transfer switch rating. Mount the transfer switch in a proper enclosure and ensure there is clearance for servicing. Run the feeder from the transfer switch to the main panel, using appropriately sized conduit and cable. Install the generator inlet box at an accessible outdoor location and connect the inlet to the switch using a dedicated, weatherproof cord or hardwired path. Verify that all connections are tight and that terminal markings match the circuit diagram. Finally, test the system with no load, then with a controlled load, to observe switching behavior and voltage stability. The aim is a smooth, automatic or manual transition to generator power without backfeeding or nuisance tripping.
Testing, Commissioning, and Documentation
Testing a generator connection is essential before relying on it during an outage. Start with a no-load test to confirm that the transfer switch engages correctly and that the generator starts without fault codes. Next, perform a light-load test, monitoring voltage, frequency, and current to ensure each feed remains within specs. If any alarm or fault occurs, shut down, review connections, and correct the issue before the next test. Schedule a full-load test with a qualified professional to verify performance under peak conditions. Documentation should include a wiring diagram, load calculations, equipment ratings, serial numbers, and inspection dates. Keep manuals accessible in a central location and update them after any component replacement. Proper documentation facilitates future maintenance, resale, and code compliance.
Common Mistakes and How to Avoid Them
Common mistakes in generator connection projects include underestimating surge loads, selecting a transfer switch that cannot handle the intended loads, and neglecting code requirements or permits. Another frequent error is improper wiring or gaps in weatherproofing, leading to corrosion or shorts. A few simple practices can prevent these problems: re-check load calculations, verify ratings against your generator and panel, use a dedicated circuit for the generator, and conduct thorough testing before blackout scenarios. Regular maintenance, labeling, and a written plan reduce risk and improve reliability.
Maintenance, Costs, and Future-Proofing
Maintenance is an ongoing consideration for generator connections. Periodically inspect the transfer switch, inlet box, and wiring for signs of wear, corrosion, or loose connections. Replace any damaged components promptly and keep a scheduled inspection plan with a licensed electrician. Costs vary with equipment quality, installation complexity, and permitting requirements; expect a range of service levels and options from basic manual switches to full automatic systems with remote monitoring. For future-proofing, consider upgrading to higher-capacity equipment, adding an automatic transfer switch with remote monitoring, or integrating a smart load management system to prioritize critical circuits during outages. A robust generator connection should center safety, reliability, and long-term value for both homeowners and property managers.
Quick Reference Checklist for Generator Connection
- Define essential circuits and confirm loads
- Choose appropriate transfer switch and interlock kit
- Plan outdoor inlet box placement and routing
- Use conduit and weatherproof connections
- Verify grounding and bonding per code
- Test no-load, light-load, and full-load operation
- Document wiring diagrams and permits
Final Thoughts on Generator Connection Safety
A well-executed generator connection protects people and property while delivering dependable power during outages. With proper sizing, the right transfer switch, and careful wiring, you can minimize downtime and ensure a clean, code-compliant setup. Always prioritize safety, follow manufacturer instructions, and consult qualified professionals for inspections and complex configurations. The goal is a durable, legal, and safe generator connection that serves you reliably when the grid is down.
Tools & Materials
- Transfer switch (rated for your load)(Ensure compatibility with your generator's wattage and the home's service panel)
- Interlock kit (if retrofitting)(Used to prevent backfeed and ensure main breaker safety)
- Generator inlet box(Outdoor-rated, weatherproof; accommodates generator power cord)
- Dedicated feeder cables (appropriate gauge)(Accepts surge without overheating; match panel and switch ratings)
- Conduit and fittings(Protects conductors and separates power from moisture)
- Multimeter or clamp meter(For voltage, current, and resistance checks during setup)
- Torque wrench(Ensures proper torque on all electrical terminals)
- Personal protective equipment (PPE)(Safety glasses, gloves; always wear eye protection when wiring)
- Grounding electrode and bonding kit(Follow local code requirements for proper grounding)
- Permits/inspection (as required by locality)(Check with local building authority; may require inspection)
Steps
Estimated time: 3-6 hours
- 1
Define essential loads
List critical circuits and estimate running and surge watts. Prioritize what must stay powered during an outage and identify any nonessential loads you can shed to reduce overall demand.
Tip: Document each circuit’s wattage and confirm it doesn’t exceed the transfer switch rating. - 2
Verify permits and codes
Check local electrical codes and obtain any required permits before starting. Some jurisdictions require professional installation or inspection for generator connections.
Tip: If uncertain, contact your local building department for guidance upfront. - 3
Select transfer switch and interlock
Choose a transfer switch with adequate amperage and a compatible interlock or auto-switch, considering future load changes and panel layout.
Tip: Prefer a switch with clear labeling and tester access for maintenance. - 4
Mount transfer switch
Install the switch in a weather-protected location near the main panel, ensuring ventilation and accessible service space.
Tip: Leave enough clearance around the unit for heat dissipation and future service. - 5
Run feeder and conduit
Route a dedicated feeder from the switch to the outdoor generator inlet; protect with conduit and seal penetrations to prevent moisture ingress.
Tip: Avoid sharp bends and ensure protection from physical damage in high-traffic areas. - 6
Connect inlet box and cord
Install the outdoor inlet box and connect the generator to it using a properly rated, weatherproof power cord or hardwired path per code.
Tip: Keep the inlet box accessible and clearly labeled for emergencies. - 7
Wire into transfer switch
Follow the schematic provided by the transfer switch manufacturer to connect the feeder to the correct terminals; verify conductors match circuit design.
Tip: Double-check terminal torque and insulation; mis-wiring is a common failure cause. - 8
Test safety and operation
Perform no-load and loaded tests, monitoring voltage, current, and frequency for stability. Confirm the switch isolates utility power and generator power correctly.
Tip: Shut down immediately if you detect arcing, overheating, or abnormal readings. - 9
Document, inspect, and train
Create a wiring diagram, record component details, and schedule an inspector if required. Train household members on operation and safety.
Tip: Keep a copy of manuals and permits with the home records for future maintenance.
People Also Ask
What is generator connection and why is it important?
Generator connection is the method of linking a home backup generator to the electrical system through a transfer switch, isolating the generator from the utility grid. Proper connection prevents backfeed and ensures reliable power during outages. It is essential for safety and code compliance.
Generator connection links a backup generator to your home via a transfer switch to prevent backfeed and ensure safe power during outages.
Do I need a transfer switch for a generator connection?
Yes. A transfer switch isolates the house from the grid when the generator runs, preventing backfeed and protecting utility workers. It also ensures a clean, safe handoff of power between sources.
Yes. A transfer switch prevents backfeed and ensures safe power handoff between the grid and generator.
Can I install it myself or should I hire an electrician?
If you have electrical experience and local codes permit DIY work, you can install a simple, small system. For larger installations or where permitting is required, hire a licensed electrician to ensure safety and code compliance.
You can do it yourself if you have the right experience and permits; otherwise, hire a licensed electrician.
How long does a typical generator connection project take?
A typical project ranges from a few hours to a full day depending on setup complexity, permitting, and wiring routing. Plan for careful testing and inspections.
Most projects take several hours to a full day, depending on complexity and inspections.
What permits or inspections are usually required?
Permits and inspections vary by locality. Many areas require electrical permits and a final inspection to confirm code-compliant installation.
Permits and inspections vary by locale; check with your local authority.
What are common safety hazards in generator connections?
Common hazards include backfeed, loose connections, improper grounding, and moisture intrusion. Address these with proper equipment, secure wiring, and professional guidance when needed.
Backfeed, loose connections, and moisture are common hazards; use proper equipment and seek professional help as needed.
Watch Video
Key Takeaways
- Assess and prioritize essential loads before connecting a generator.
- Choose a transfer switch rated for your total generator load.
- Follow code requirements and obtain permits when required.
- Test the system thoroughly under no-load and load conditions.
- Document wiring, permits, and maintenance for future safety.