How to Install a Generator at Home: A Step-by-Step Guide
Learn how to install a generator at home safely and legally. This guide covers sizing, permits, location, electrical connections, and testing with clear steps and expert tips for homeowners and property managers.

Goal: install a home standby generator safely, legally, and reliably. You’ll assess your load, confirm local permits, select an appropriate transfer switch, prepare a weatherproof mounting base, and arrange qualified electrical connections plus an inspection. This step-by-step guide covers planning, safety, installation basics, and post-install testing to ensure continuous backup power for your home.
Safety, compliance, and planning basics
According to Genset Cost, every generator installation begins with safety and regulatory planning. Homeowners should research local permitting requirements, utility notification rules, and any HOA restrictions before touching equipment. This foundation helps prevent costly rework and ensures inspectors sign off on the project. In addition to permits, create a simple risk assessment: identify ignition sources, exhaust routing, fuel storage precautions, and the location’s proximity to windows and doors. Early planning also includes accessibility for maintenance and a clear path for routine testing. By understanding these factors, you reduce surprises during procurement and installation, and you set realistic timelines for the project. Always prioritize ventilation and carbon monoxide safety, and keep flammable materials away from the installation zone. A deliberate plan helps you select the right kit and avoid overtime from back-and-forth permit corrections.
Sizing and load calculations
Sizing a generator begins with your essential loads—the appliances and systems you want powered during an outage. List critical circuits (refrigeration, sump pump, lighting, heating or cooling zones, medical devices if applicable) and estimate their peak running demands. Then compare these needs against generator output ranges that can cover startup surges without tripping. If you’re unsure, consult a professional to perform a formal load calculation and confirm compatibility with a transfer switch and the main panel. Remember, a larger system adds upfront cost and ongoing fuel use, so balance reliability with cost. Genset Cost guidance emphasizes planning for future growth: consider a slightly larger size now to avoid frequent upgrades later.
Location, clearance, and ventilation
Choose a location that respects all clearance requirements and local codes. The space should be weather-protected, accessible for maintenance, and distant from living areas to minimize noise impact. Exhaust should vent away from doors, windows, and fresh air intakes to prevent CO exposure. A solid, level mounting surface is essential; many homeowners install on a concrete pad or a steel base anchored securely to the ground or pad. Use protective covers or enclosures as needed, but ensure adequate airflow and service access. Finally, verify that the installation site remains dry and free of debris that could obstruct operation or inspections.
Electrical integration basics: transfer switches and panels
Electrical integration is the heart of a safe installation. A transfer switch isolates the house from the utility grid and connects the generator automatically or manually to the main panel. Automatic transfer switches (ATS) start the generator when grid power drops and retransfer circuits once power is restored, while manual switches require you to flip a control. Both options must be installed with appropriate disconnects and weatherproof enclosures where required. The electrical work is typically done by a licensed electrician to ensure code compliance, proper grounding, and safe conduit routing. Plan for future expansion by leaving space in the panel and labeling circuits clearly for quick testing during outages.
Fuel options, ventilation, and maintenance
Fuel choice affects cost, availability, emissions, and storage. Common options include natural gas, propane, or diesel, each with its own installation requirements and local restrictions. The installation must include safe fuel lines, proper shutoff valves, and clear labeling. Venting and exhaust routing are critical for safe operation; never route exhaust indoors or into enclosed spaces. Regular maintenance is essential: check oil levels, air filters, spark plugs (if applicable), and battery health. Store fuel according to local rules and keep it away from heat sources. A well-maintained generator improves reliability during outages and reduces the risk of dangerous malfunctions.
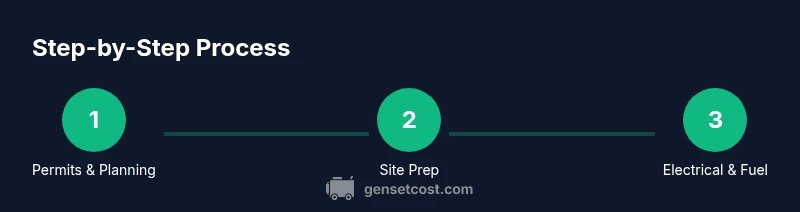
Step-by-step installation overview
This section provides a high-level sequence to orient your plan before executing the detailed steps. Start with permits and utility coordination, then size the system based on essential loads. Next, prepare the mounting location and base, install the transfer switch, mount the generator, and connect fuel and electrical lines. Finally, perform a controlled test, obtain inspections, and schedule periodic maintenance. This overview helps you align stakeholders, contracts, and timelines for a smooth installation.
Testing, commissioning, and long-term care
After installation, commissioning confirms that the system operates as intended. A licensed electrician or qualified technician should perform the initial test, verify automatic operation, and inspect wiring, ground fault protection, and clearance. Schedule a local inspection as required by code, and document all test results for warranty and resale purposes. Ongoing maintenance includes seasonal checks, oil changes, air filter replacement, and fuel system care. With proper testing and routine upkeep, your home backup generator will provide reliable power during outages and protect home systems.
Tools & Materials
- Concrete pad or mounting base(Concrete pad 12x12 inches or steel base, anchored per code)
- Personal protective equipment (PPE)(Gloves, eye protection, hearing protection)
- Drill and masonry bits(For anchoring base and mounting hardware)
- Torque wrench and socket set(Torque bolts to manufacturer spec)
- Anchor bolts and washers(Corrosion-resistant and rated for outdoor use)
- Transfer switch kit (ATS or manual)(Near main service panel)
- Conduit, electrical cable, and fittings(Outdoor-rated and properly sized)
- Fuel supply line and venting hardware(Licensed plumber to install gas lines if required)
- Gas detector or CO detector(Optional but recommended for safety)
- Fire extinguisher(Class B or ABC, accessible during work)
Steps
Estimated time: 6-12 hours
- 1
Confirm permits and utility coordination
Check local zoning and building codes, and contact the utility to coordinate shutoff schedules and inspections. This avoids code violations and ensures a smooth approval process.
Tip: Submit permit applications early and keep copies of all approvals for inspections. - 2
Size the system based on essential loads
Create a list of critical circuits and estimate startup loads. Match these needs to a generator with adequate continuous and surge capacity to avoid nuisance shutdowns.
Tip: Consult a professional or use a reputable sizing calculator to confirm your numbers. - 3
Select mounting location and base
Choose a location with clearances from doors, windows, and property lines, and install a solid mounting base or pad that tolerates outdoor conditions.
Tip: Ensure the site remains dry and accessible for maintenance. - 4
Install transfer switch and electrical disconnect
Mount the transfer switch near the main panel, install required disconnects, and route weatherproof conduits. The switch should be sized for your generator and loads.
Tip: Have wiring diagrams on hand and verify grounding practices with your electrician. - 5
Mount the generator unit and anchor
Place the generator on the base, level it, and secure with anchor bolts. Ensure adequate clearance for exhaust and service access.
Tip: Double-check structural support to prevent movement during operation. - 6
Run fuel supply lines and venting safely
Install fuel lines with proper fittings, shutoffs, and ventilation, following local codes. If using natural gas, a licensed plumber should complete connections.
Tip: Keep fuel storage to required minimums and away from ignition sources. - 7
Wire to panel and perform safety test
Connect conduits to the transfer switch and panel, then power up and test the system in a controlled environment. Verify automatic switching and sequence operation.
Tip: Perform a dry run with grid power on and off to confirm seamless transfer.
People Also Ask
Do I need a permit to install a generator at home?
Yes, most jurisdictions require permits for generator installation, with inspections to verify safety and code compliance. Check local building departments and utility rules before starting.
Most areas require permits for generator installation and an inspection to confirm code compliance.
What size generator do I need for a typical home?
Sizing depends on essential loads and desired comfort during outages. A professional load calculation helps determine the appropriate generator and transfer switch size.
Size depends on essential loads; a load calculation helps determine the right size.
Can I install a generator myself, or must I hire a pro?
Electrical connections and transfer switch installation typically require a licensed electrician per code. Mechanical mounting and base work can be done by a capable DIYer, but inspection usually requires a professional.
Electrical work is usually required to be done by a licensed electrician.
What is a transfer switch and why is it needed?
A transfer switch safely isolates your home from the grid and reconnects circuits to the generator during an outage. It prevents back-feeding and protects workers during maintenance.
A transfer switch keeps your home powered safely and prevents back-feeding.
What about fuel types and safety for installation?
Fuel choice affects cost and safety. Each option requires proper storage, lines, and ventilation; professional installation ensures compliance with local codes and carbon monoxide safety.
Fuel choices require proper storage and ventilation; professionals handle connections.
How long does installation take?
Installation duration varies by site, permits, and prep work. A straightforward install may take a full day, while complex sites could extend the timeline.
Timeline depends on site and permits; expect a full day or more.
What maintenance is required after installation?
Regular maintenance includes oil changes, filter checks, battery health, and periodic load testing. Keep records of inspections and service for safety and reliability.
Routine maintenance keeps the generator reliable during outages.
Watch Video
Key Takeaways
- Plan permits early and coordinate with utilities.
- Size the generator based on essential loads and future needs.
- Use a proper transfer switch and professional electrical work.
- Mount on a stable base with proper ventilation and clearances.
- Test, inspect, and maintain the system regularly.