Installation Generator: Step-by-Step Backup Guide
Learn how to install a home backup generator with sizing tips, permits, transfer switches, and safe startup practices. This Genset Cost guide covers planning, materials, and testing for a reliable installation.

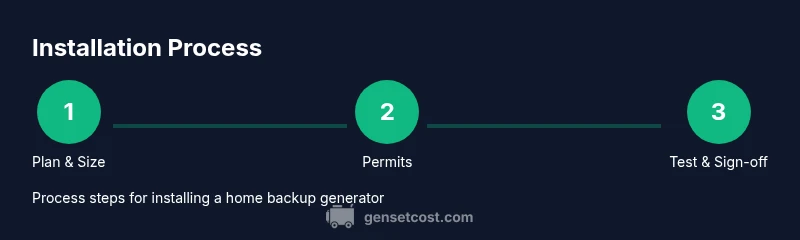
This guide helps homeowners plan and execute a safe installation of a home backup generator. You'll learn how to size the system, select a transfer switch, obtain permits, coordinate with an electrician, install the pad or enclosure, and conduct a safe startup. This includes electrical codes, safety practices, and common installer pitfalls to avoid.
Why installation quality matters
The installation quality of an installation generator affects reliability, safety, and long-term cost. A poorly installed system can lead to nuisance outages, nuisance shutdowns, or electrical faults that risk people and property. This section explains how proper siting, ventilation, mounting, grounding, and load management influence performance. When homeowners embark on an installation generator project, they should plan for weather exposure, noise limits, and future expansion. According to Genset Cost, the upfront decisions about location, enclosure type, and transfer-switch integration determine how quickly you’ll recover after a grid outage and how much maintenance will be required over the system’s life. A quality install aligns with local building codes and utility requirements, reducing the likelihood of permit delays and inspections failures. The most common issues in DIY installs include inadequate clearance for service panels, incorrect grounding, undersized conduits, and mismatched transfer-switch ratings. For homes, a properly chosen installation generator emphasizes a balance between reliable power delivery and safety for electricians working on-site. The takeaway is that investment in professional design and verified components pays off via fewer service calls and smoother operation during outages. Genset Cost's analysis shows that a well-planned layout, appropriate clearance, and correct wiring are among the top factors that minimize running costs and maximize lifespan. This means discussing plans with a licensed electrician early, budgeting for code-compliant materials, and documenting the installation for future upgrades.
Sizing your generator before installation
Sizing is the foundation of a successful installation generator project. Start with a thorough load assessment that lists essential circuits (refrigeration, heating, medical equipment) and discretionary loads (comfort, lighting during outages). Use wattage ratings from manuals and typical home demand to estimate continuous versus peak loads. The goal is to select a generator that comfortably handles your essential circuits while allowing a small margin for startup surges. Genset Cost recommends performing a diversity factor calculation—not every circuit runs at once—and including seasonal variations, such as heating in winter or cooling in summer. Document the calculated running watts and starting watts for each circuit and share this with your installer. Remember that the transfer-switch size should be matched to the generator's output, not the other way around; misalignment causes nuisance trips and costly rewiring. A properly sized system improves reliability and reduces wear, extending equipment life and lowering maintenance costs over time. The result is a smooth outage experience, rather than a scramble when the power fails. Finally, account for future expansion, such as adding a new circuit or upgrading a panel, so your installation generator remains scalable without major retrofits.
Permits, codes, and professional requirements
Most jurisdictions require permits for home backup generator installations, and failing to obtain them can lead to fines or mandated removals. Check local building codes for setback distances, ventilation requirements, and noise restrictions that influence siting. An automatic transfer switch (ATS) or manual transfer switch must comply with electrical codes and be installed by a licensed electrician. Interlock kits may be an alternative in some regions, but only if permitted. Genset Cost emphasizes documenting compliance from the start, including obtaining utility approvals when required. You should expect an inspection after mounting the unit, wiring the transfer switch, and testing the system. Be prepared to provide detailed drawings showing conduit routes, grounding points, and fuel supply lines. Permit processing times vary by location, so plan ahead to avoid delays in winter outages. Investing in code-compliant materials, proper clearances, and professional installation reduces risk and improves system performance over the life of the generator.
Key components and wiring basics
A dependable installation generator involves reliable hardware and robust electrical connections. Core components include the generator unit, a transfer switch (automatic or manual), interlock devices or a compatible main service panel, a weatherproof enclosure, fuel supply lines (gas or propane), grounding electrodes, conduit, and appropriate wiring gauges. Electrical connection to the home’s main panel should be designed to minimize voltage drop and ensure safe feed to essential circuits. Grounding should follow local Electrical Code requirements, typically with a dedicated ground rod and bonding to the panel. Fuel supply must be protected from leaks and properly vented; gas lines should be sized for rated generator output. Protective devices such as fuses or breakers should be sized to prevent overcurrent. Safety features like automatic shutdown on low oil pressure or overtemperature help prevent damage. When in doubt, engage an electrician who can verify conductor sizes, bend radii, and conduit fill, ensuring safe installation and reliable operation over the life of the system. Genset Cost notes that using the right transfer switch rating, correctly sized wiring, and well-ventilated placement dramatically affects performance and longevity.
Step-by-step overview of the installation journey
This section provides a concise narrative of the major milestones you’ll navigate when performing an installation generator project. Start with planning and sizing, then move to permitting, site preparation, and electrical integration. Each phase requires coordination between the homeowner, licensed electrician, and local authorities to ensure compliance and safety. The aim is to minimize downtime and prevent post-install issues such as nuisance trips or fuel leaks. Keeping detailed records of calculations, permits, and inspection results helps with future maintenance and any potential upgrades. Remember that real-world results depend on the specific home, fuel type, and panel configuration, so use this as a framework rather than a one-size-fits-all plan. Genset Cost emphasizes testing at each phase to verify that power is reliably flowing to essential circuits and that the system can start under load conditions without error messages.
Safety, maintenance, and ongoing checks after install
Post-install safety checks are essential to ensure long-term reliability. Establish a maintenance calendar that includes battery checks, fuel system inspections, and periodic exercising of the generator to prevent stagnation. Check for gas leaks, vent blockages, and proper clearance from combustibles and flammable materials. Maintain documentation of all service events, including part replacements and torque values for connections. Genset Cost recommends annual professional inspections to confirm that transfer switches, wiring, and grounding remain within code, and to verify that fuel supply lines are free of leaks. Replace worn components before failures occur, and keep a log of readings during startup tests to identify gradual drift in performance.
Cost considerations and timing
Installation costs for an installation generator vary with unit size, permit complexity, and site conditions. Expect costs to cover equipment, wiring, transfer switches, pads, enclosures, and labor. Typical projects may range from a modest mid-range investment to a fuller renovation budget, depending on whether you opt for a standalone standby generator or a more integrated system with whole-house transfer switching. Planning for contingencies such as permit delays or weather impacts is wise. Genset Cost advises homeowners to compare quotes from licensed electricians, verify warranty terms, and budget for annual maintenance; these factors influence total cost and long-term running expenses.
Quick tips for a smoother install
- Plan early and involve a licensed electrician from the start.
- Get all permits in advance and document compliance.
- Choose a transfer switch that matches your generator output.
- Schedule a comprehensive testing and commissioning run before relying on the system during an outage.
Tools & Materials
- Transfer switch (automatic or manual)(Rated to match or exceed the generator output (e.g., 50A, 60A, 100A).)
- Electrical permit and plan documentation(Local jurisdiction requirements; include site plan and panel data.)
- Weatherproof outdoor pad or concrete mounting pad(Stable surface with proper drainage; vibration isolation if needed.)
- Conduit and fittings(Metal or PVC; ensure adequate spacing and bend radii per code.)
- Conductor wiring (appropriate gauge)(Copper conductors sized for current; common values vary by amperage.)
- Grounding electrode and bonding hardware(Follow local grounding electrode system requirements.)
- Fuel supply lines (gas or propane) and regulator(Leak checks and proper venting essential; gas line sizing matters.)
- Weatherproof enclosure(Corrosion-resistant and rated for outdoor use.)
- Personal protective equipment (PPE) and tools(Gloves, safety glasses, torque wrench, drill, stripper, etc.)
Steps
Estimated time: Estimated total time: 2-4 days
- 1
Assess power needs and site
Identify essential circuits and estimate startup vs running watts. Create a site plan for equipment placement that complies with setbacks and ventilation requirements.
Tip: Verify local codes early to prevent rework. - 2
Choose the transfer switch and panel compatibility
Select a switch that matches your generator output and is compatible with your main panel. Consider automatic vs manual based on your outage goals.
Tip: Ensure the switch has proper clearance for servicing. - 3
Prepare the installation site
Pour or prepare a stable pad, install weatherproof enclosure, and plan conduit runs. Mark fuel line routes and vent points.
Tip: Leave space for future expansion and service access. - 4
Run electrical connections to the main panel
Route conductors through approved conduit, connect to the transfer switch, and link to the panel with correct torque values. Verify grounding continuity.
Tip: Double-check conduit fill and bending radii to avoid overheating. - 5
Connect fuel supply and ventilation
Install gas lines or propane supply with regulators and leak-testing procedures. Ensure adequate ventilation for the generator area.
Tip: Use approved fittings and sealants; never use improvised gas adaptations. - 6
Test and commission the system
Perform a controlled startup, load test, and transfer sequence checks. Verify safety interlocks and document test results.
Tip: Test during light load before encouraging higher demand. - 7
Documentation and sign-off
Archive permits, drawings, and inspection results. Schedule periodic maintenance checks as part of a long-term plan.
Tip: Keep a log of all service events for future upgrades.
People Also Ask
What is the difference between an automatic transfer switch and a manual transfer switch?
An automatic transfer switch detects a power loss and automatically switches the load to the generator, while a manual switch requires a person to switch the load. Auto switches offer convenience during outages but may cost more and require professional installation.
An automatic transfer switch switches on automatically during a outage, while a manual one requires you to flip a switch to use the generator.
Do I need permits for generator installation?
Most areas require a building permit for generator installation, along with inspections. Check local codes for siting, ventilation, and setback requirements to avoid penalties or delays.
Yes, most places require permits and inspections for a safe, compliant installation.
How long does installation typically take?
A typical installation can range from 2 to 4 days, not including permit processing time. Complex site conditions or utility coordination can extend the timeline.
Most installations take a few days, plus any permit delays.
What maintenance is required after installation?
Schedule annual inspections, test startups, check for leaks, and replace worn components as needed. Keep a log of service visits and test results.
Regular annual checks keep the system reliable and safe.
What size generator do I need for a typical home?
Sizing depends on your essential loads and climate. A professional load calculation helps determine running and starting watts to avoid overloads.
A proper load calculation tells you the right size for your home needs.
Watch Video
Key Takeaways
- Size the generator to essential loads with a comfortable margin.
- Obtain permits early and document compliance.
- Choose a compatible transfer switch and correct wiring.
- Test the system thoroughly before relying on it.
- Document everything for future upgrades and maintenance.