Where Do You Hook Up a Generator? A Homeowner's Guide
Learn where to hook up a home backup generator safely, including transfer switches, exterior inlet boxes, and code considerations. Practical steps, tools, and safety tips for homeowners and property managers.

Understanding where you hook up a generator
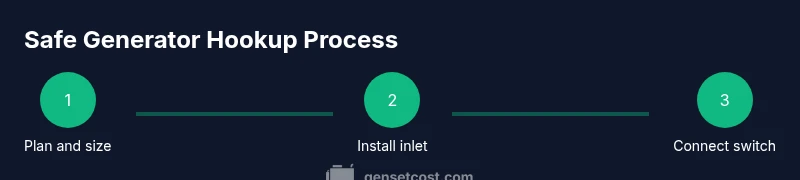
If you're asking where do you hook up a generator, you're tackling a central question of home backup power: where should generator power enter your electrical system? The safe, code-compliant answer is through a transfer switch that isolates the home from the utility feed, combined with an exterior power inlet that brings power from the generator to the switch. This arrangement keeps the generator outdoors, away from living spaces, and reduces the chance of backfeeding into the grid. According to Genset Cost, the most reliable hookups position the transfer switch near the main service panel and place the weatherproof inlet on an exterior wall within easy reach of the generator. The setup minimizes wiring length, simplifies maintenance, and makes it straightforward to test during outages. Whether you’re installing a small portable unit or a larger standby system, the basic principle remains the same: backfeed prevention, safe grounding, and adherence to local electrical codes.
Key components you need to know
A safe generator hookup relies on a few core elements working together. The main service panel, a transfer switch (manual or automatic), and a weatherproof exterior inlet box are the anchors of the system. You’ll also need outdoor-rated conduit, appropriate wiring routes, and a clear, dry space for the generator to operate. Grounding and bonding are critical, and the installation must comply with local electrical codes and any permit requirements. Finally, plan for regular testing to ensure the system functions correctly under load. The goal is to create a seamless, code-compliant path for generator power that protects household circuits and keeps utility power isolated.
Transfer switch: automatic vs manual
The transfer switch is the heart of the hookup. An automatic transfer switch (ATS) detects a utility loss and switches to generator power without human intervention, restoring circuits in a controlled sequence. A manual transfer switch requires a physical switch by the homeowner, which gives direct control but adds a step during outages. Both options must be properly sized for the generator’s output and installed in proximity to the main panel for short, safe conductor runs. The choice affects installation cost, speed of restoration, and the complexity of the wiring. If you prioritize convenience and rapid restoration, an ATS is typically preferred; for budget-conscious projects, a high-quality manual switch can work when installed correctly.
Location and siting considerations
Where you place the inlet box and transfer switch matters as much as what you connect. Outdoor inlet boxes should be mounted on a dry, sheltered wall with a short run to the transfer switch. Keep the generator a safe distance from doors, windows, and intakes to prevent exhaust exposure and noise concerns. Avoid sites with standing water or high humidity, and ensure access for maintenance and testing. Local codes may specify minimum clearances around electrical equipment and distance from combustibles; always verify with the authority having jurisdiction. By planning siting early, you reduce rework, improve safety, and streamline the permit process.
Wiring basics and code considerations
Wiring a generator hookup involves run-lengths, protective conduits, and correctly rated components. Use outdoor-rated conduit, weatherproof connectors, and appropriately sized conductors to carry the intended amperage. The inlet box and transfer switch should be grounded, bonded, and installed with strain relief where cables enter enclosures. Most jurisdictions require a permit and inspection for generator hookups; failing to obtain approvals can lead to safety risks and penalties. Always follow the National Electrical Code (NEC) or your local equivalent, and consider hiring a licensed electrician to ensure compliance and safety.
Permits, inspections, and safety
Permitting is a crucial step in professional hookups. The process typically involves submitting wiring diagrams, equipment specifications, and site drawings for review. Inspections verify that transfer switches, inlets, and panel connections are correct and safe. Skipping these steps can result in improper backfeed prevention, unsafe wiring, and insurance complications. If you’re unsure about permit requirements, contact your local building department or a licensed electrician who understands local codes and can help you obtain the necessary approvals.
Planning tips and common mistakes
A thoughtful plan reduces errors. Start by mapping the loads you intend to power, then verify generator capacity and switch compatibility. Avoid using shared neutrals or backfeeding through non-rated paths. Do not bypass the transfer switch or connect directly to the main panel; this creates a dangerous condition. Ensure weatherproofing for exterior components and plan for a safe, accessible testing path. With proper planning, your hookup will be reliable and safe during outages.
Testing and verification after hookup
Testing confirms the system operates as intended. Begin with a visual inspection, then perform an open-circuit test to verify the transfer switch engages correctly. Run a simulated load to check voltage stability, transfer timings, and appliance performance. Document results and keep a maintenance log. Regular testing helps catch problems before outages occur and supports smoother inspections.
Common mistakes to avoid
Common mistakes include skipping permits, using undersized wiring, misplacing the inlet box, and failing to test under load. Another frequent error is wiring the generator directly to the main panel without a transfer switch, which is dangerous and illegal in many jurisdictions. Avoid ad-hoc improvisations and rely on code-compliant components and professional guidance to ensure a safe and dependable setup.