Recommended Generator Size for House: A Practical Sizing Guide
Learn how to determine the recommended generator size for house using practical load calculations, essential vs whole-house coverage, and expert guidance from Genset Cost. Plan confidently, avoid waste, and ensure reliable power during outages.

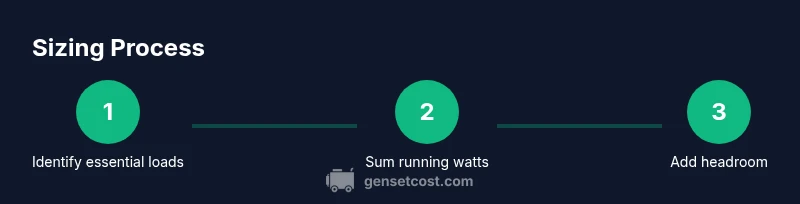
This guide helps you determine the recommended generator size for house by prioritizing essential loads, adding reliable headroom, and validating with a licensed electrician. It covers load calculation, transfer switches, and fuel decisions to balance reliability, cost, and future needs.
Why sizing matters
Sizing a home generator correctly is not just about buying the biggest unit. A properly sized system keeps your essential loads running, minimizes fuel waste, and reduces wear on equipment. According to Genset Cost, the sizing process should start with your core needs and then add headroom for startup surges and potential future growth. The goal is to use a generator that reliably powers key functions such as refrigeration, climate control, lighting, and communications without overdoing it. By focusing on the recommended generator size for house that matches your load profile, you protect your investment and improve long-term resilience. A balanced approach reduces nuisance outages and unnecessary whirring of oversized engines. This is especially important for homeowners who value comfort, safety, and peace of mind during outages.
Pro tip: keep a current list of essential devices and their importance to daily life. This makes it easier to communicate your needs to a generator dealer or electrician and speeds up the sizing process.
How the load concept guides sizing
Every powering scenario has a set of essential devices. The first step in sizing is to inventory these loads and verify their electrical requirements from labels, manuals, or panel documentation. You’ll primarily consider running watts (continuous use) for each item, then account for startup surges for motors like refrigerators, sump pumps, or HVAC compressors. A useful rule of thumb is to sum the running watts of all essential devices and compare that subtotal to the capacity of available generator sizes, while leaving headroom for surges. In practice, this means identifying the circuits that must remain energized during an outage and confirming that your chosen generator can handle that baseline, plus a safety margin. A precise estimate helps avoid under-sizing that leads to frequent cycling or over-sizing that wastes fuel and increases upfront cost.
When in doubt, consult a licensed electrician to validate your calculations and to ensure compatibility with your panel and transfer-switch options. This step safeguards against code violations and ensures safe operation under load.
Sizing categories: small, medium, and large homes
For many homeowners, size guidance comes in qualitative categories rather than exact wattages. Small homes—such as apartments or compact houses—typically need a modest-capacity unit that covers refrigeration, essentials lighting, and critical electronics. A mid-size home with multiple rooms and several HVAC zones often requires a mid-range unit that can support climate control, water heating, and lighting for comfort. Large homes with multiple zones, electric water heating, and higher daily energy use generally require a higher-capacity system. Climate, occupancy pattern, and potential future loads (like EV charging or a workshop) influence which category fits best. The overarching principle is to choose a size that provides reliable operation and some cushion for growth without paying for unused capacity.
Note: the category approach helps simplify shopping and engineering discussions with a professional. It’s better to start with a grounded category and then verify with a load calculation rather than guess a number.
Essential loads vs whole-house: balancing reliability and cost
A common decision is whether to backup only essential loads or to pursue a whole-house solution. Essential-load backup focuses on cooling, refrigeration, lighting, communications, and heating in critical spots. This approach tends to be more affordable and fuel-efficient while still preserving safety and basic comfort. Whole-house backup aims to power HVAC, water heating, multiple circuits, and more, offering maximum convenience but at higher cost, complex wiring, and larger fuel storage needs. Your climate, outage duration expectations, and budget are the guiding factors. Regardless of the approach, plan for headroom and ensure your system has a proper transfer switch and routine maintenance to maximize reliability during outages.
The step-by-step sizing checklist you can follow
This section provides a practical checklist to move from plan to purchase with confidence. Start by listing essential loads and confirming their running and starting watts from labels or manuals. Sum the running watts to determine your baseline load, then identify loads with startup surges and ensure the chosen unit can accommodate those surges. Add a comfortable margin for growth, verify transfer-switch compatibility, and confirm fuel type and runtime expectations. Finally, have a licensed electrician review your calculations and the proposed equipment before making a purchase. Document your results so dealers can quote accurately and so you can compare options later.
Tools & Materials
- Load calculator (digital or paper worksheet)(Use a dedicated worksheet to log each essential device and its running/starting watts.)
- Electrical panel diagram or photographs(Capture circuits feeding essential loads and clear labeling.)
- Manufacturer labels or manuals(Refer to running watts and surge information for each device.)
- Pen or pencil and notepad(Document decisions, room for growth, and future loads.)
- Safety gear (insulated gloves, non-conductive footwear)(Use during any inspection, label reading, or panel work.)
- Licensed electrician contact(Obtain professional validation of calculations and to handle installation.)
- Transfer-switch options information(Know if you’ll need a manual or automatic transfer switch and compatible models.)
Steps
Estimated time: 2-4 hours
- 1
Identify essential loads
Create a list of devices you want powered during an outage (refrigeration, heating/cooling, water heating, lighting, communications). Check labels for running watts and note any starting watts. Group items by priority and confirm which circuits must stay energized.
Tip: Prioritize equipment that protects perishables and safety—refrigeration, heating, and well pumps. - 2
Estimate running watts
Add up the running watts for all essential devices. Use manufacturer data where available; if not, use conservative estimates based on similar appliances.
Tip: Be generous with estimates for older or larger appliances to avoid under-sizing. - 3
Account for startup surges
Motorized devices have brief startup surges. Identify which items have high inrush and plan capacity to accommodate these surges without dropping other loads.
Tip: If you have multiple motors starting at once, you may need more headroom. - 4
Add growth margin
Include a comfortable margin for future loads such as new appliances or efficiency improvements. This helps avoid immediate upgrades after installation.
Tip: Think about potential renovations or additions in the next 5–10 years. - 5
Verify transfer-switch compatibility
Confirm whether you’ll use a manual or automatic transfer switch and ensure the panel and generator are compatible with that choice.
Tip: A properly sized transfer switch is essential for safe, code-compliant operation. - 6
Check fuel type and runtime
Decide between propane, natural gas, or liquid fuel. Consider fuel availability, storage, and expected runtime at your chosen load.
Tip: Fuel logistics can affect ongoing costs and convenience; plan accordingly. - 7
Plan installation with a pro
Engage a licensed electrician or generator dealer early to refine the size, select a model, and schedule the installation.
Tip: Professional review reduces risk and ensures code compliance. - 8
Obtain quotes and finalize size
Gather quotes that include equipment, transfer switch, wiring, permits, and warranty. Compare warranties, service plans, and turn-key support before finalizing.
Tip: Ask about maintenance intervals and exercise tests to ensure reliability.
People Also Ask
How do I determine the running watts versus starting watts for essential loads?
Running watts indicate continuous energy needs, while starting watts cover brief motor surges. Sum running watts for essential devices and verify the generator can handle startup surges, then choose a size with sufficient headroom.
Running watts are the steady energy needs; starting watts cover motor surges. Add them up and choose a unit with extra headroom.
Should I size for essential loads only or the whole house?
Sizing for essential loads is often more cost-effective and fuel-efficient. Whole-house backups offer convenience but require more equipment, wiring, and fuel capacity.
Essential-load sizing saves money and fuel; whole-house offers comfort but at higher cost.
Is a standby generator worth it for home use?
Standby generators stay wired and auto-start during outages, delivering seamless power. Portable units are cheaper but require manual setup and fuel handling.
Standby units provide automatic reliability; portable units require manual setup.
Should I plan for future expansion when sizing a generator?
Yes. Leave room for growth such as new appliances or EV charging, and verify with a professional to avoid immediate upgrades after installation.
Leave headroom for future loads and verify with a professional.
Do I need a transfer switch?
A transfer switch prevents backfeed and code compliance issues by safely isolating your home from the grid when the generator runs.
Yes, a transfer switch is essential for safety and code compliance.
How long does installation typically take?
Installation time varies by site, permits, and equipment, but planning for several days is common.
It usually takes a few days from start to finish.
Watch Video
Key Takeaways
- Start with essential loads and add headroom.
- Use labeled appliances to estimate loads accurately.
- Choose a size that balances reliability, cost, and future needs.
- Engage a licensed electrician for code compliance and safe installation.